Bear Push-Up (Chest Focus): Proper Form, Sets & Reps, Tips, Mistakes & FAQ
Master the Bear Push-Up (bear crawl push-up) to build chest, triceps, and core strength with full-body stability. Step-by-step form, sets by goal, common mistakes, FAQs, and recommended equipment.
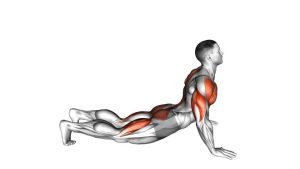
Bear Push-Up (Bear Crawl Push-Up)
This variation is perfect when you want a chest-focused press that also builds full-body tension. You’ll feel your chest and triceps working, but the “secret sauce” is the anti-sag core brace and the shoulder blade control needed to stay stable over your hands.
Quick Overview
| Body Part | Chest |
|---|---|
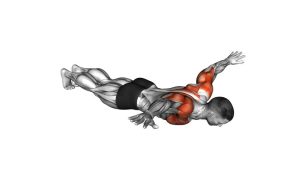
| Primary Muscle | Pectoralis major (chest) |
| Secondary Muscle | Triceps, anterior deltoids, serratus anterior, core stabilizers (abs/obliques) |
| Equipment | None (optional: exercise mat, push-up handles/parallettes) |
| Difficulty | Beginner → Intermediate (depends on knee hover height and tempo) |
Sets & Reps (By Goal)
- Strength (chest/triceps): 3–5 sets × 5–8 reps (2–3 min rest, slow controlled reps)
- Muscle/Hypertrophy: 3–4 sets × 8–15 reps (60–90 sec rest, 2–0–2 tempo)
- Endurance + conditioning: 2–4 sets × 12–20 reps (45–75 sec rest, steady pace)
- Warm-up / skill control: 2–3 sets × 6–10 reps (easy effort, perfect form)
Progression rule: Add reps first, then slow the tempo, then increase knee hover height (harder), or elevate feet slightly for more load. Only progress if your spine stays neutral and reps stay smooth.
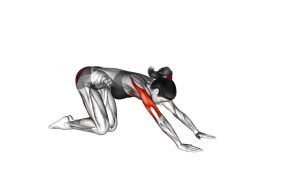
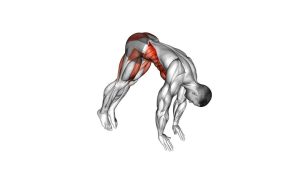
Setup / Starting Position
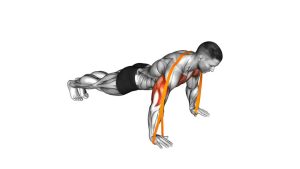
- Hands under shoulders: Place hands shoulder-width, fingers forward, “screw” palms lightly into the floor for stability.
- Bear stance: Bend knees ~90° and hover them 2–6 cm (1–2 in) above the floor. Stay on the balls of your feet.
- Brace the core: Ribs down, glutes lightly tight. Keep a neutral spine—don’t let the low back sag.
- Shoulders set: Keep shoulders away from ears. Think “strong upper back” without shrugging.
- Neck neutral: Look slightly down so the head stays in line with the spine.
Tip: If your knees touch the floor, keep them hovering but reduce the range of motion or slow down until control improves.
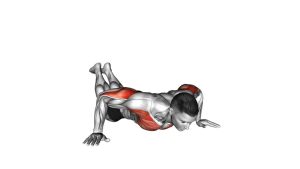
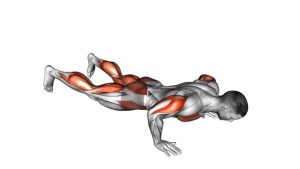
Execution (Step-by-Step)
- Inhale and brace: Tighten your midsection as if preparing for a light punch. Keep knees hovering.
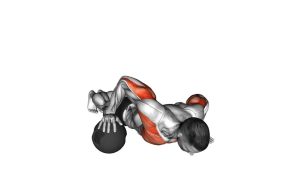
- Lower with control: Bend elbows and bring your chest toward the floor. Elbows track about 30–60° from your torso (not flared straight out).
- Keep hips steady: Don’t pike up or sag down—your torso lowers as one unit with the bear stance maintained.
- Pause briefly: Stop just above the floor (or as low as you can control) without collapsing the shoulders.
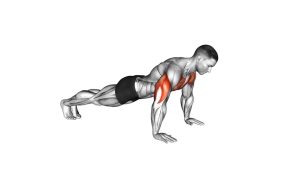
- Press up: Exhale and push the floor away until arms are nearly straight. Keep shoulders down and stable.
Pro Tips & Common Mistakes
- Hover means hover: Letting knees rest removes the stability challenge and changes the stimulus.
- Don’t flare elbows hard: Excessive flaring can irritate shoulders—keep a moderate angle.
- Avoid “snake” reps: Chest and hips should rise together—don’t lead with the hips or the head.
- Push the floor away: Think “spread the ground” for better shoulder stability and serratus activation.
- Wrist-friendly option: Use push-up handles/parallettes to keep wrists neutral.
- Tempo upgrade: Try a 3-second descent + 1-second pause to make lighter reps more effective.
FAQ
Where should I feel the Bear Push-Up most?
Primarily in the chest and triceps, with strong core and shoulder stabilizer involvement. If you feel mostly wrists or shoulders, use handles/parallettes and reduce depth.
Is this easier or harder than a standard push-up?
It depends on your control. Many people find it moderately challenging because the knee hover increases core demand. If you struggle, lower the range, slow the tempo, or hover knees closer to the floor.
How do I make it more chest-focused?
Use a controlled descent, keep elbows at a moderate angle, and aim to lower the chest (not the hips). You can also slightly shift your shoulders forward over your hands while keeping the spine neutral.
What if my wrists hurt?
Try push-up handles/parallettes, do reps on a softer surface (mat), and warm up wrists. Keep weight spread through the whole hand—don’t dump pressure into the heel of the palm.
Who should avoid or modify this exercise?
If you have acute wrist/shoulder pain, uncontrolled low-back pain, or can’t maintain a neutral spine, modify first: reduce depth, slow down, or use an incline (hands on a bench/box).
Recommended Equipment (Optional)
- Push-Up Handles — keeps wrists neutral and helps you press with better alignment
- Parallettes (Low Bars) — deeper range option with a stable neutral grip
- Non-Slip Exercise Mat — improves comfort for hands/toes and prevents slipping
- Resistance Bands Set — great for pairing with rows/pull-aparts to balance pressing work
- Wrist Wraps (Training Support) — optional support if wrists fatigue quickly during higher volume
Tip: Choose equipment that makes your reps feel more stable—not “harder.” Better stability usually means better chest/triceps output.