Weighted Plate Decline Chest Press: Form, Sets & Tips
Learn how to do the Weighted Plate Decline Chest Press with perfect form. Step-by-step cues, sets & reps by goal, common mistakes, FAQs, and recommended equipment for lower-chest focus.
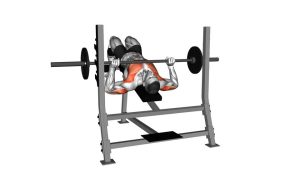
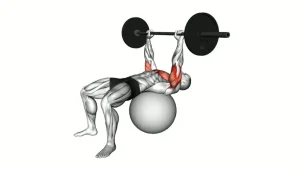
Weighted Plate Decline Chest Press
This variation is all about a steady press path and smooth tempo. You should feel your pecs doing most of the work, with the triceps assisting near the top. Keep your shoulders “packed” (down and back) so the press stays in the chest—not in the neck or shoulders.
Quick Overview
| Body Part | Chest |
|---|---|
| Primary Muscle | Pectoralis major (sternal head / lower chest emphasis) |
| Secondary Muscle | Triceps, anterior deltoids, serratus anterior (stability) |
| Equipment | Weight plate (optional: bench/step for a clearer decline angle, mat for comfort) |
| Difficulty | Beginner–Intermediate (depends on plate load and control) |
Sets & Reps (By Goal)
- Muscle growth (hypertrophy): 3–5 sets × 8–15 reps (60–90 sec rest)
- Strength focus: 4–6 sets × 4–8 reps (90–150 sec rest, heavier plate)
- Endurance / pump: 2–4 sets × 15–25 reps (30–60 sec rest)
- Warm-up / technique: 2–3 sets × 10–12 reps (easy load, perfect control)
Progression rule: Add reps first (top end of the range), then add a small amount of load. If your shoulders rise, elbows flare, or the plate wobbles, keep the same weight and improve control.
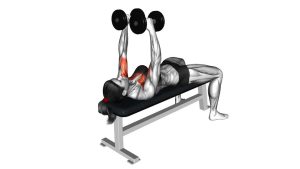
Setup / Starting Position
- Choose your surface: Use the floor for a shoulder-friendly range, or a bench/step for a clearer decline line.
- Body position: Lie back with knees bent and feet planted. Brace your core and keep your ribs down.
- Grip the plate: Hold one plate with both hands (symmetrical grip). Keep wrists straight—don’t let them bend back.
- Set your shoulders: Pull shoulder blades slightly down and back so your chest is lifted (no shrugging).
- Start position: Plate over the lower-to-mid chest line, elbows bent and angled about 30–45° from the torso.
Tip: If the plate feels slippery, use a plate with grip holes/handles—or lightly chalk your hands for better control.
Execution (Step-by-Step)
- Inhale and brace: Keep your shoulders packed and chest proud without over-arching your lower back.
- Press smoothly: Drive the plate upward in a controlled line from lower chest toward above the chest (slight diagonal press path).
- Finish strong: Reach near full elbow extension without aggressive lockout. Keep tension in the pecs.
- Lower under control: Descend slowly—elbows bend and track slightly inward (no flaring wide).
- Repeat clean reps: Maintain a steady plate position—no wobbling, bouncing, or rushing.
Pro Tips & Common Mistakes
Pro Tips
- Slow the eccentric: A 2–3 second lowering phase improves control and chest tension.
- Keep elbows moderately tucked: About 30–45° keeps the shoulders happier and the pecs loaded.
- Press “up and slightly back”: Think lower chest → above chest, not straight toward your face.
- Stay stable: Feet planted, core braced, shoulders down—no shaking or shifting.
- Use the floor for shoulder comfort: The floor limits deep stretch and can feel more joint-friendly.
Common Mistakes
- Elbows flaring wide: Often shifts stress to the shoulders and reduces chest control.
- Shrugging shoulders: If traps take over, reset shoulder blades down and back.
- Bouncing the plate: Control every rep—no rebound off the chest or floor.
- Wrist collapse: Keep wrists stacked over forearms for safe force transfer.
- Over-arching the back: Use core tension; don’t “bridge” to cheat the press.
FAQ
What part of the chest does this hit most?
This press tends to emphasize the sternal fibers of the pec major (often described as the lower chest) because of the decline-style press line. You’ll still train the entire chest, with triceps assisting near the top.
Is this exercise shoulder-friendly?
It can be, especially on the floor, which limits deep shoulder extension. Keep elbows moderately tucked and shoulders packed. If you feel pinching, reduce range and load.
What if I only have a light plate?
Increase difficulty by using slower tempo (3–4 seconds down), adding a pause at the bottom, increasing reps (15–25), or doing mechanical drop sets (full reps → partials).
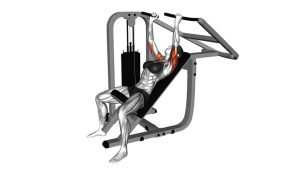
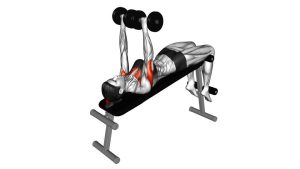
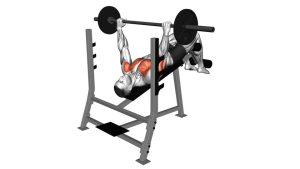
Can I do this on a decline bench?
Yes. A decline bench can increase the decline emphasis. Just keep the same principles: shoulder blades down/back, elbows not flared, and controlled lowering.
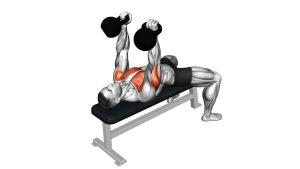
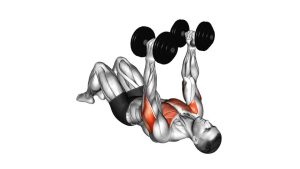
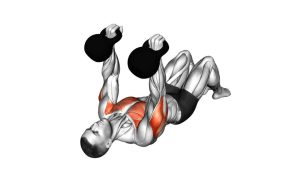
How does this compare to a dumbbell decline press?
Dumbbells allow a deeper stretch and independent arm paths, while a single plate keeps the movement more centered and stable. The plate version is great for home training and clean pressing mechanics.
Recommended Equipment (Optional)
- Grip Weight Plates (Olympic / Standard) — easier, safer handling for plate presses
- Adjustable Bench (Incline/Decline) — lets you create a true decline angle for more lower-chest emphasis
- Thick Exercise Mat — improves comfort and stability when pressing on the floor
- Resistance Bands Set — great for pairing with flys/pull-aparts to balance shoulder health
- Liquid Chalk / Grip Aid — helps prevent plate slipping when hands get sweaty
Tip: Choose loads you can control perfectly. A stable, smooth press beats a heavier plate with shaky form.