Forearms to Wide-Grip Wall Push-Up: Form, Sets & Tips
Learn how to do the Forearms to Wide-Grip Wall Push-Up for chest activation and shoulder-friendly pressing. Step-by-step form, sets by goal, common mistakes, FAQs, and recommended equipment.
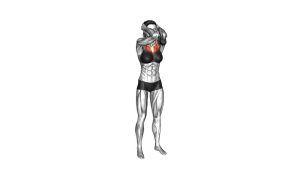
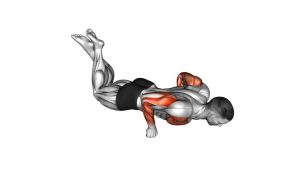
Forearms to Wide-Grip Wall Push-Up
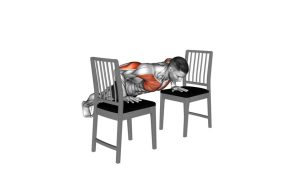
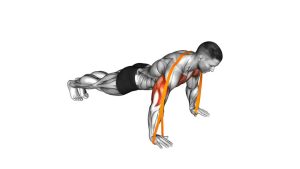
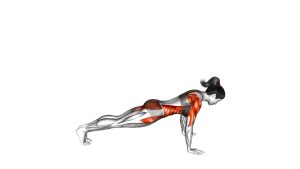
This variation is all about stable shoulders and a controlled transition. You should feel your chest working during the wide-grip press, plus a steady demand on the triceps, front delts, and serratus anterior to keep your shoulder blades controlled. If your neck or shoulders feel tense, step closer to the wall and reduce the range.
Quick Overview
| Body Part | Chest |
|---|---|
| Primary Muscle | Pectoralis major (chest) |
| Secondary Muscle | Triceps, anterior deltoids, serratus anterior, core stabilizers |
| Equipment | Wall (optional: yoga mat for comfort, timer) |
| Difficulty | Beginner (progression-friendly, low joint stress) |
Sets & Reps (By Goal)
- Warm-up / activation: 2–3 sets × 6–10 reps (easy tempo, 30–60 sec rest)
- Muscle endurance: 3–4 sets × 10–20 reps (steady rhythm, 45–75 sec rest)
- Technique + control: 3–5 sets × 5–8 reps (slow transition + 2 sec pause near the wall, 60–90 sec rest)
- Shoulder-friendly chest work: 2–4 sets × 8–12 reps (smooth, stop 1–2 reps before form breaks)
- Quick “desk break” reset: 1–2 sets × 5–8 reps (very light effort, perfect control)
Progression rule: First add reps or slow the tempo. Next, step your feet farther from the wall to increase the load. Keep transitions controlled—no collapsing onto the wall.
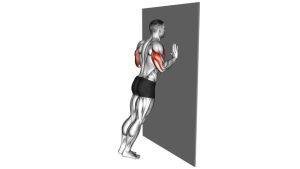
Setup / Starting Position
- Face the wall: Stand about 1–2 feet (30–60 cm) away to start. The farther you stand, the harder it becomes.
- Forearms on the wall: Place forearms flat with elbows bent about 90° and slightly wider than shoulder-width.
- Body line: Brace your core and keep a straight line from head to heels—no hip sag or rib flare.
- Shoulders down: Keep shoulders away from ears. Think “long neck, strong upper back.”
- Hand height: Keep forearms roughly at mid-chest height so the press feels natural and shoulder-friendly.
Tip: If wrists are sensitive when you transition to hands, place palms slightly higher and focus on pushing “through the whole hand,” not just the heel.
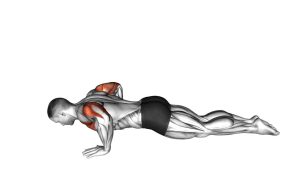
Execution (Step-by-Step)
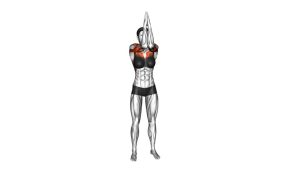
- Start on forearms: Forearms on the wall, core braced, shoulders stable.
- Transition to one hand: Place one palm on the wall and press up from forearm to hand without twisting your torso.
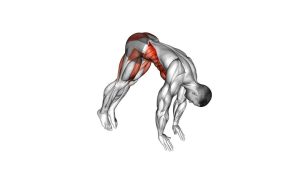
- Transition to both hands: Bring the second palm to the wall into a wide grip (wider than shoulder-width).
- Lower (wide-grip wall push-up): Bend elbows and bring chest toward the wall with control. Keep the body in one line.
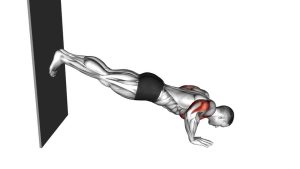
- Press back: Push the wall away to return to the top. Keep shoulders down and ribs stacked.
- Return to forearms: Lower one forearm back to the wall, then the other—slowly and smoothly.
Pro Tips & Common Mistakes
- Keep the torso square: Avoid rotating when you move from forearm to hand—brace your abs.
- Don’t shrug: Shoulders stay down and back; shrugging shifts stress into the neck/traps.
- Wide grip, controlled elbows: Wide is fine, but don’t flare to extremes—keep elbows slightly forward of the shoulders.
- Don’t collapse into the wall: Lower under control, then press smoothly.
- Use the right distance: Too far = form breaks; too close = too easy. Adjust so reps stay clean.
- Slow transition = better stimulus: A 2–3 second transition each way builds shoulder stability fast.
FAQ
Where should I feel this exercise?
Mostly in the chest during the press, with support from triceps and front delts. You should also feel your core working to prevent twisting during the transition.
Is this better than regular wall push-ups?
It’s different. Regular wall push-ups are great for basic pressing. This variation adds a forearm-to-hand transition that increases shoulder stability and control.
What if my wrists hurt when I switch to hands?
Step closer to reduce load, place palms slightly higher, and spread fingers to distribute pressure. You can also do the press portion on push-up handles or parallettes to keep wrists neutral.
How do I make it harder?
Step your feet farther back, slow the tempo, add a 2–3 second pause near the wall, or increase total reps. Keep form strict before progressing.
Who should be cautious with this movement?
Anyone with acute shoulder pain, unstable joints, or nerve-like symptoms (tingling/numbness). Keep it pain-free and controlled, and get professional guidance if symptoms persist.
Recommended Equipment (Optional)
- Push-Up Handles — reduces wrist extension and helps keep pressing comfortable
- Parallettes — neutral-grip option for push-up progressions and wrist-friendly training
- Non-Slip Yoga Mat — improves footing and comfort if training on slick floors
- Loop Resistance Bands — useful for pairing with upper-back work (band pull-aparts, rows) for posture balance
- Interval Timer — helps control tempo and rest for clean, consistent reps
Tip: If any tool or setup increases discomfort, simplify the movement (step closer, reduce range, slow down) and keep reps pain-free.