Band Low Alternate Chest Press: Form, Sets & Reps, Tips, Mistakes, FAQ
Master the Band Low Alternate Chest Press to target the lower-to-mid chest with a joint-friendly press. Step-by-step form cues, sets by goal, common mistakes, FAQs, and recommended bands/anchors.
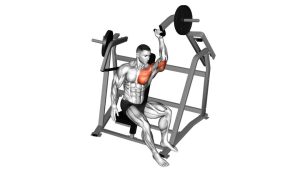
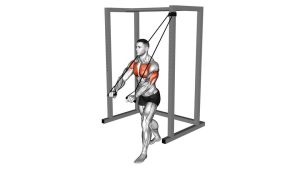
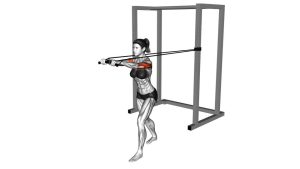
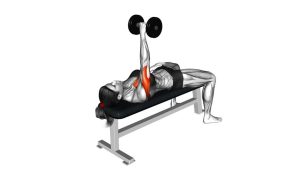
Band Low Alternate Chest Press
This variation is ideal for home workouts, warm-ups, and joint-friendly chest training. Because the band is anchored behind you, tension increases as you press—so focus on controlled reps and stable posture. The non-pressing side works to keep your torso square, making this a great combo of chest drive + core control.
Quick Overview
| Body Part | Chest |
|---|---|
| Primary Muscle | Pectoralis major (lower-to-mid emphasis) |
| Secondary Muscle | Anterior deltoid, triceps, serratus anterior (stabilization) |
| Equipment | Resistance band + low anchor point (door anchor, rack, sturdy post) |
| Difficulty | Beginner–Intermediate (easy to scale with band tension and stance) |
Sets & Reps (By Goal)
- Strength focus: 3–5 sets × 6–10 reps/side (60–120 sec rest, heavier band, controlled reps)
- Hypertrophy (muscle growth): 3–4 sets × 10–15 reps/side (45–75 sec rest, steady tempo)
- Endurance / conditioning: 2–4 sets × 15–25 reps/side (30–60 sec rest, smooth rhythm)
- Warm-up / activation: 2–3 sets × 8–12 reps/side (light band, focus on clean scap control)
Progression note: Add reps first, then slow the eccentric (return) or add a 1-second pause at full extension. Increase band tension only if you can keep your ribs down and torso square without twisting.
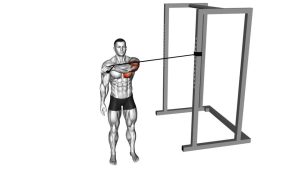
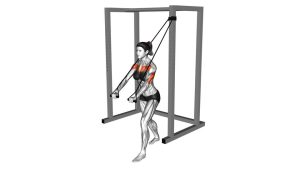
Setup / Starting Position
- Anchor low: Attach the band behind you at about knee-to-hip height (lower anchor = more upward press angle).
- Step out to tension: Walk forward until the band has tension with elbows bent—no slack at the start.
- Split stance: One foot forward, one back; knees soft. Keep hips and shoulders facing forward.
- Brace and stack: Ribs down, glutes lightly engaged, spine neutral—avoid arching your lower back.
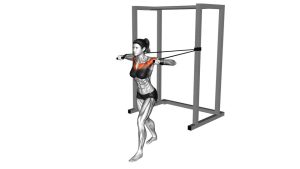
- Hand/Elbow position: Hands at chest level; elbows about 30–45° from the torso (not flared straight out).
Tip: If balance is tough, widen your stance slightly. If your shoulder feels “pinchy,” lower band tension and tuck elbows closer.
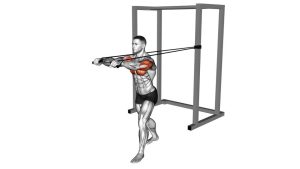
Execution (Step-by-Step)
- Set posture: Chest tall, shoulders down/back, core braced. Keep your torso square to the front.
- Press one arm: Drive one handle forward and slightly upward along a natural chest-press path.
- Lock in control: Finish with the wrist stacked and elbow nearly straight (don’t hyperextend). Shoulder stays “packed.”
- Resist rotation: Don’t let your ribs twist toward the pressing arm—stay centered.
- Slow return: Bring the handle back under control to the start position.
- Alternate sides: Press the other arm with the same path and tempo, keeping tension steady.
Pro Tips & Common Mistakes
- Think “reach” at the finish: A small reach helps serratus engagement—just don’t round your shoulder forward aggressively.
- Keep wrists neutral: Don’t let wrists bend back under tension; align knuckles with forearm.
- Control the eccentric: The return builds a lot of chest stimulus—avoid letting the band snap you back.
- Mistake: torso twisting: If you rotate, widen stance, lighten the band, and slow down.
- Mistake: elbows flaring hard: Flared elbows can irritate shoulders; aim for ~30–45° from your torso.
- Mistake: rib flare / low-back arch: Exhale as you press, keep ribs stacked, and brace like you’re about to be tapped in the stomach.
FAQ
Where should I feel this exercise?
You should feel it primarily in the chest (often lower-to-mid fibers due to the low anchor), with some work in the triceps and front shoulder. You’ll also feel your core working to prevent rotation.
How low should the anchor point be?
A good starting point is knee-to-hip height. Lower anchors create a more upward press path and may bias the lower chest more. If it feels awkward on your shoulders, raise the anchor slightly and reduce tension.
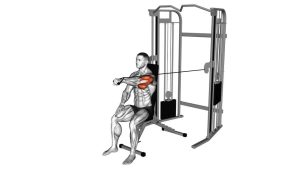
Why alternate arms instead of pressing both together?
Alternating presses add an anti-rotation challenge and can improve shoulder stability and core control. It also lets you focus on one side at a time to reduce compensations.
What if I feel it mostly in my shoulders?
Try a lighter band, tuck elbows slightly closer (30–45°), keep ribs down, and avoid shrugging. You can also take a half-step closer to the anchor to reduce peak tension at lockout.
How do I make it harder without heavier bands?
Slow the return to 3–4 seconds, add a 1-second pause at full extension, increase reps, or add a second set of lighter bands for smoother overload. You can also step farther from the anchor carefully (while maintaining posture).
Recommended Equipment (Optional)
- Loop Resistance Bands Set — easy to scale tension and great for home chest training
- Tube Resistance Bands with Handles — comfortable grip for pressing variations and higher reps
- Door Anchor for Resistance Bands — turns any sturdy door into a low or mid anchor point
- Anchor Strap (Post/Rack/Tree Band Anchor) — secure low anchor on racks, posts, or outdoor setups
- Non-Slip Exercise Mat — improves footing and comfort during split-stance pressing
Tip: Choose band tension that lets you keep your torso square and shoulders relaxed. If form breaks, reduce resistance and slow down.