Band Front Lateral Raise: Proper Form, Sets, Tips & FAQ
Learn how to do the Band Front Lateral Raise with proper form. Discover muscles worked, setup, step-by-step execution, sets and reps by goal, mistakes to avoid, FAQs, and recommended equipment.
Band Front Lateral Raise
This exercise is ideal for lifters who want to build stronger, fuller-looking front delts without relying only on dumbbells or machines. The band provides continuous resistance, encourages better control during both the lifting and lowering phases, and can be a useful option for home workouts, warm-ups, or shoulder-focused accessory work. The best reps are clean, shoulder-driven, and controlled from start to finish.
Quick Overview
| Body Part | Front Shoulders |
|---|---|
| Primary Muscle | Anterior deltoid |
| Secondary Muscle | Lateral deltoid, upper chest, upper traps (stabilizing), core |
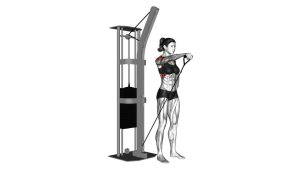
| Equipment | Resistance band with a low anchor point or under-foot setup |
| Difficulty | Beginner to Intermediate |
Sets & Reps (By Goal)
- Muscle growth: 3-4 sets × 10-15 reps with controlled tempo and 45-75 seconds rest
- Shoulder endurance: 2-4 sets × 15-20 reps with light-to-moderate tension and short rest
- Warm-up / activation: 2-3 sets × 12-15 reps with very light resistance and perfect form
- Technique practice: 2-3 sets × 8-12 reps focusing on strict movement and zero body swing
Progression tip: First improve rep quality, tempo, and control. Then increase band tension gradually. Do not jump to a heavier band if it forces you to lean back or swing the arms.
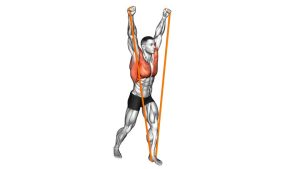
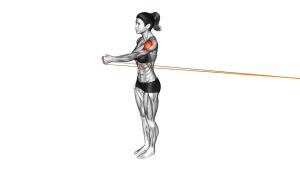
Setup / Starting Position
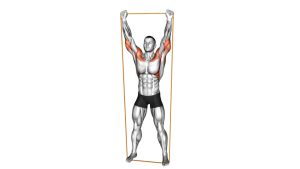
- Anchor the band low: Secure the resistance band at a low point behind you, or set it under your feet if using a standing variation.
- Grip the band firmly: Hold the handle or band with a neutral grip and let your arms start near the front of your thighs or slightly behind the body line depending on the anchor angle.
- Stand tall: Place your feet about hip-width to shoulder-width apart for balance.
- Brace your core: Keep the ribs down, chest proud, and spine neutral without arching the lower back.
- Set the shoulders: Keep them down and relaxed so the delts do the work instead of the traps taking over.
- Keep a slight elbow bend: Locking the elbows can make the movement feel stiff and stressful on the joints.
A stable starting posture makes a big difference. If the band tension pulls you backward, step forward slightly until you feel balanced and in control.
Execution (Step-by-Step)
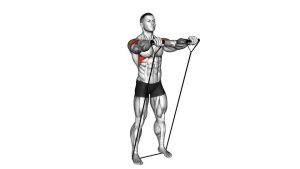
- Begin from the bottom: Start with the band under tension and your arms down in front of the thighs.
- Raise the arms forward: Lift the band in a smooth arc in front of your body until your hands reach about shoulder height.
- Keep the motion strict: Maintain a soft bend in the elbows and avoid turning the movement into a swing or upright row.
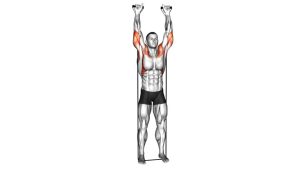
- Pause briefly at the top: Squeeze the front delts for a moment without shrugging the shoulders toward the ears.
- Lower with control: Return slowly to the starting position and resist the pull of the band on the way down.
- Repeat for smooth reps: Every repetition should look nearly identical, with the torso quiet and the shoulders controlling the full motion.
Pro Tips & Common Mistakes
- Raise only to shoulder height: Going much higher often shifts tension away from the delts and invites compensation.
- Do not lean back: Excessive torso lean turns the movement into a cheat rep and loads the lower back unnecessarily.
- Control the negative: The lowering phase builds stability and keeps tension on the target muscles.
- Avoid shrugging: If the upper traps dominate, lower the resistance and focus on keeping the neck relaxed.
- Use moderate band tension: Too much resistance ruins the line of motion and makes strict form harder to maintain.
- Keep wrists neutral: Do not let the wrists bend excessively as the arms rise.
- Train both sides evenly: If doing the move one arm at a time, match reps and tempo on each side.
FAQ
What muscles does the Band Front Lateral Raise work?
It mainly targets the anterior deltoids, which are the front part of the shoulders. The upper chest, lateral delts, traps, and core also assist with stabilization.
Is this better than a dumbbell front raise?
It is not automatically better, but it offers a different resistance profile. Bands create increasing tension as you lift, which can make the top half of the rep feel especially challenging while also keeping tension at the bottom.
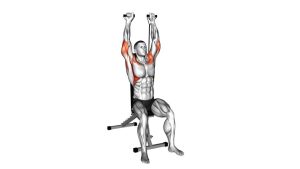
Should I do this with one arm or both arms?
Both options work well. Two-arm raises are efficient and symmetrical, while one-arm raises can help improve focus, control, and side-to-side balance.
Why do I feel this in my traps more than my shoulders?
That usually happens when the resistance is too heavy, the shoulders shrug upward, or the lifter uses momentum. Reduce band tension and keep the shoulders down during the raise.
Can beginners use the Band Front Lateral Raise?
Yes. It is beginner-friendly when performed with a light band and strict technique. Start easy and focus on smooth, controlled reps before adding more tension.
Recommended Equipment (Optional)
- Resistance Bands with Handles — ideal for front raises, presses, and other shoulder isolation exercises
- Door Anchor for Resistance Bands — useful for creating a secure low anchor point at home
- Resistance Band Set — gives multiple tension levels so you can progress gradually
- Workout Gloves — can improve comfort and grip if the band handles feel slippery
- Exercise Mat — helpful for a cleaner and more stable training area during band workouts
Choose tools that support clean mechanics first. For this exercise, the best upgrade is usually a quality band set with several resistance options.