Band Rear Delt Row: Proper Form, Muscles Worked, Sets, Tips & FAQ
Learn how to do the Band Rear Delt Row with proper form to build rear shoulders and upper-back strength. Includes setup, step-by-step execution, sets by goal, common mistakes, FAQ, and recommended equipment.
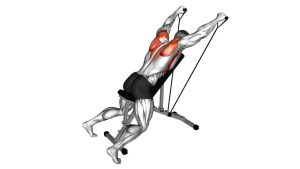
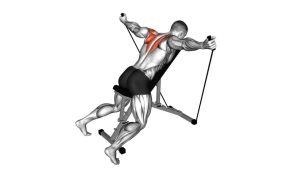
Band Rear Delt Row
This exercise is excellent for lifters who want stronger, rounder rear delts without needing cables or machines. It also fits well into shoulder, pull, upper-body, or posture-focused workouts. The best reps are controlled and deliberate: keep the torso stable, avoid swinging, and squeeze the upper back at the top without shrugging the shoulders toward the ears.
Quick Overview
| Body Part | Rear Shoulders |
|---|---|
| Primary Muscle | Rear deltoids |
| Secondary Muscle | Rhomboids, middle trapezius, biceps, posterior upper back stabilizers |
| Equipment | Resistance band, optional flat shoes or training shoes for stable footing |
| Difficulty | Beginner to Intermediate |
Sets & Reps (By Goal)
- Muscle growth: 3–4 sets × 10–15 reps with controlled tempo and 45–75 seconds rest
- Shoulder endurance / posture work: 2–4 sets × 12–20 reps using light-to-moderate resistance
- Warm-up or activation: 2–3 sets × 12–15 reps with light tension and perfect form
- General strength foundation: 3–4 sets × 8–12 reps using a thicker band or slower tempo
Progression rule: First improve control, pause quality, and rep consistency. Then increase band tension, add reps, or slow the lowering phase to make the exercise harder.
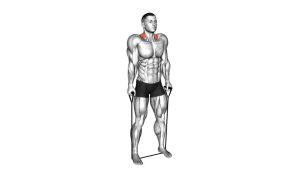
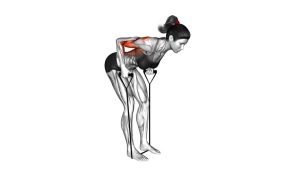
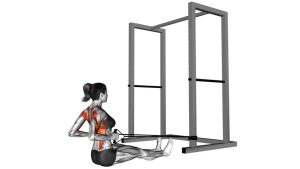
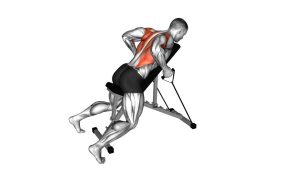
Setup / Starting Position
- Stand on the band: Place both feet on the middle of the resistance band about hip- to shoulder-width apart.
- Grip the handles or ends: Hold the band securely with your palms facing in or slightly backward.
- Hinge at the hips: Push your hips back and lean your torso forward until you are in a stable bent-over position.
- Set your spine: Keep your chest open, core braced, and lower back neutral rather than rounded.
- Let the arms hang naturally: Start with the elbows extended and the band under light tension.
- Lock in your head position: Keep your neck neutral and eyes looking slightly down and ahead.
Tip: If the band feels too loose at the bottom, narrow your stance slightly or choke up on the band to create better starting tension.
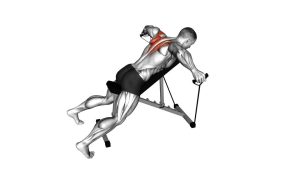
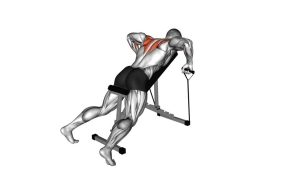
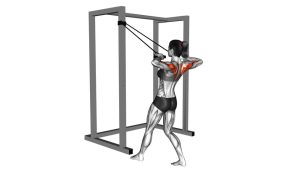
Execution (Step-by-Step)
- Brace before pulling: Tighten your core and keep the torso fixed so the shoulders do the work.
- Lead with the elbows: Pull the band upward by driving your elbows out and back, not tucked close to the ribs.
- Bring the hands toward the upper waist or lower chest line: The exact finish point can vary, but the elbows should flare enough to emphasize the rear delts.
- Squeeze at the top: Pause briefly when your shoulder blades come together and your rear delts are fully contracted.
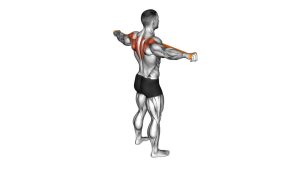
- Lower under control: Slowly extend the arms back to the start without losing posture or letting the band snap you down.
- Repeat smoothly: Keep every rep controlled, with no bouncing through the torso or neck.
Pro Tips & Common Mistakes
- Use a true hip hinge: Bending forward correctly helps keep tension on the rear delts instead of turning the exercise into an upright band row.
- Keep the elbows wide: A flared path is one of the main reasons this exercise hits the rear delts so well.
- Do not shrug: Keep the shoulders down and away from the ears to avoid overusing the upper traps.
- Do not swing the torso: Momentum reduces shoulder tension and makes the exercise less effective.
- Control the lowering phase: The eccentric portion helps build strength and shoulder control.
- Avoid rounding the back: Stay long through the spine and brace your midsection throughout the set.
- Adjust band tension wisely: Too much resistance usually leads to body English and poor elbow positioning.
- Think rear delts, not arms: Let the biceps assist, but do not let them dominate the movement.
FAQ
What muscles does the Band Rear Delt Row work?
The main target is the rear deltoid. It also trains the rhomboids, middle traps, and other upper-back muscles, with the biceps assisting during the pull.
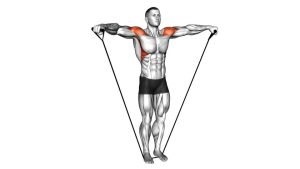
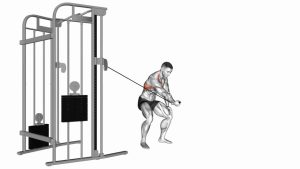
Is this different from a normal band row?
Yes. A normal row usually keeps the elbows closer to the body and often shifts more emphasis to the lats. The Band Rear Delt Row uses a wider elbow path to put more stress on the rear shoulders.
How heavy should the band be?
Use a band that lets you keep a flat back, stable torso, and clean elbow path. If you need to swing or shrug to finish reps, the resistance is too high.
Can beginners do this exercise?
Yes. Beginners can start with a lighter band and fewer reps to learn posture, control, and the correct rear-delt-focused pulling path.
Where should I feel the exercise most?
You should mainly feel it in the back of the shoulders and across the upper back. A little biceps involvement is normal, but your rear delts should do most of the work.
Recommended Equipment
- Resistance Bands with Handles — ideal for comfortable grip, smooth pulling, and adjustable band tension
- Loop Resistance Bands Set — useful if you want multiple resistance levels for warm-ups and higher-rep shoulder work
- Exercise Mat — helpful for traction, comfort, and creating a more stable home workout space
- Flat Resistance Band Set — a simple option for lifters who want portable bands without handles
- Fitness Gloves or Workout Grips — useful if your hands fatigue before your rear delts do
Tip: Choose gear that helps you maintain clean technique. Better control and consistent tension matter more than using the strongest band possible.