Resistance Band Standing Single-Arm Shoulder Flexion: Form, Sets, Tips & FAQ
Learn the Resistance Band Standing Single-Arm Shoulder Flexion for stronger front delts and better shoulder control. Includes setup, step-by-step form, sets by goal, mistakes, FAQs, and recommended equipment.
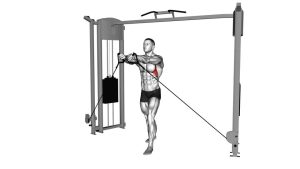
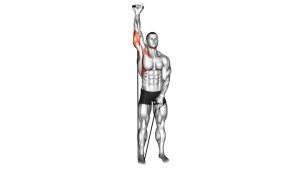
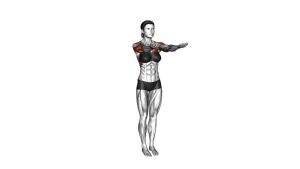
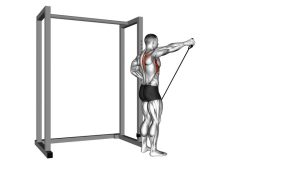
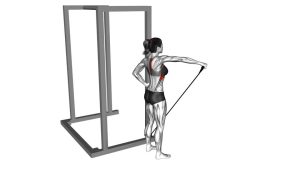
Resistance Band Standing Single-Arm Shoulder Flexion
This movement works best when performed with a strict range of motion and a controlled tempo. The goal is to lift the arm forward using the shoulder, not to swing the body or arch the lower back to help the band upward. You should feel the front of the shoulder doing most of the work, while the core and upper body stay braced and quiet.
Quick Overview
| Body Part | Shoulders |
|---|---|
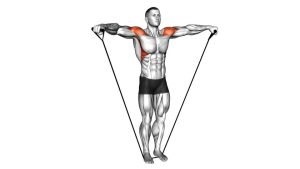
| Primary Muscle | Anterior deltoid (front deltoid) |
| Secondary Muscle | Upper chest, serratus anterior, rotator cuff stabilizers, core |
| Equipment | Resistance band with secure anchor point |
| Difficulty | Beginner to Intermediate |
Sets & Reps (By Goal)
- Muscle growth: 3–4 sets × 10–15 reps per arm
- Shoulder control and stability: 2–4 sets × 8–12 reps per arm with slower tempo
- Warm-up / activation: 2–3 sets × 12–20 light reps per arm
- Endurance: 2–3 sets × 15–20 reps per arm with strict form
Progression rule: Increase band tension only when you can raise and lower every rep without leaning back, shrugging, or losing control at the bottom.
Setup / Starting Position
- Anchor the band behind you: Secure the resistance band at a low point behind the body.
- Stand tall: Keep feet about hip- to shoulder-width apart and maintain a stable stance.
- Hold one handle or end: Use one arm at a time with a neutral grip or slightly forward-facing palm.
- Start with the hand near the hip: The working arm should begin low and slightly behind or beside the body.
- Brace the torso: Keep ribs down, core tight, shoulders level, and neck relaxed.
Tip: Step farther from the anchor to increase band tension, or closer to make the exercise easier.
Execution (Step-by-Step)
- Set posture first: Stand tall with the chest neutral and avoid leaning backward.
- Raise the arm forward: Lift the working arm in front of the body in a smooth arc.
- Keep a soft elbow bend: The elbow should stay slightly bent but fixed throughout the rep.
- Stop around shoulder height: Lift until the hand reaches about shoulder level unless your mobility allows more without compensation.
- Pause briefly: Squeeze the front delt for a moment at the top.
- Lower under control: Return slowly to the starting position without letting the band snap the arm backward.
- Repeat on the same side: Finish all reps, then switch arms.
Pro Tips & Common Mistakes
- Lead with the shoulder, not momentum: Avoid swinging the arm or using the hips to start the rep.
- Keep the ribs down: Don’t arch the lower back to create fake range of motion.
- Stay in the scapular plane if needed: A slightly angled forward raise may feel more natural than a perfectly straight front raise.
- Don’t shrug: Keep the upper traps from taking over by keeping the shoulder blade controlled.
- Control the lowering phase: The eccentric portion is where the band can pull you out of position.
- Use moderate range if needed: Shoulder height is usually enough for quality front-delt work.
- Train each side evenly: Single-arm work can reveal and correct left-right strength imbalances.
FAQ
What muscle does this exercise target the most?
The main target is the anterior deltoid, which is the front portion of the shoulder. The upper chest, serratus anterior, and stabilizing muscles also assist.
Is this the same as a front raise?
It is very similar. The main difference is that the band changes the resistance curve, often creating more tension earlier in the lift and throughout the range of motion.
Should I lift above shoulder height?
In most cases, raising to about shoulder height is enough. Going higher may be fine for some people, but only if it stays pain-free and your torso position remains strict.
Why does my lower back feel it?
That usually means you are leaning back or letting the ribs flare. Reduce the tension, brace your core harder, and keep the motion smaller and cleaner.
Can beginners use this exercise?
Yes. It is beginner-friendly when you use a light band and focus on controlled reps. It is also useful for warm-ups, muscle-building sessions, and shoulder-control work.
Recommended Equipment
- Resistance Bands Set with Handles — ideal for progressive tension and single-arm shoulder training
- Door Anchor for Resistance Bands — helpful for creating a secure anchor point behind the body
- Loop Resistance Bands — useful for lighter shoulder activation and travel-friendly workouts
- Exercise Mat — provides a more stable training surface for home workouts
- Adjustable Workout Bench — useful for pairing this exercise with seated or supported shoulder work
Tip: For best results, use bands with multiple resistance levels so you can progress gradually while keeping your form strict.