Standing Shoulder Full Flexion: Form, Benefits, Sets, Tips & FAQ
Learn how to perform the Standing Shoulder Full Flexion with proper form to improve shoulder mobility, overhead control, and front delt activation. Includes setup, step-by-step execution, sets and reps by goal, common mistakes, FAQs, and recommended equipment.
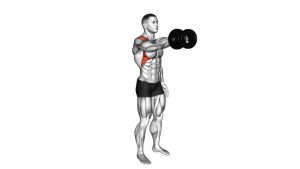
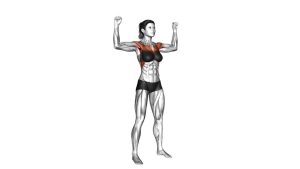
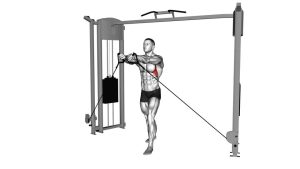
Standing Shoulder Full Flexion
This exercise works best as a shoulder warm-up, mobility drill, or movement prep exercise before pressing, reaching, throwing, or upper-body training. It helps reinforce smooth shoulder flexion mechanics while teaching the shoulder blades to rotate upward naturally as the arms move overhead.
Quick Overview
| Body Part | Shoulders |
|---|---|
| Primary Muscle | Anterior deltoids |
| Secondary Muscle | Serratus anterior, upper trapezius, rotator cuff stabilizers, upper chest |
| Equipment | None |
| Difficulty | Beginner (great for warm-ups, mobility practice, and overhead control) |
Sets & Reps (By Goal)
- Warm-up before upper-body training: 2–3 sets × 8–12 reps (slow and controlled)
- Mobility practice: 2–4 sets × 10–15 reps (pause briefly overhead)
- Posture / movement quality: 2–3 sets × 6–10 reps (focus on perfect mechanics)
- Recovery / easy daily movement: 1–2 sets × 8–12 reps at very light effort
Progression rule: First improve control, smoothness, and overhead range. Then add a short pause overhead or light resistance such as a mini band or very light dumbbells.
Setup / Starting Position
- Stand tall: Place your feet about hip-width apart with your weight balanced evenly.
- Brace lightly: Keep the ribs stacked over the pelvis and engage the core gently to avoid leaning back.
- Set the shoulders: Relax the upper traps and keep the neck long.
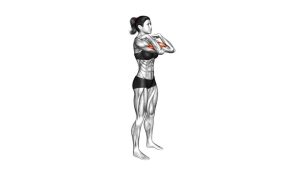
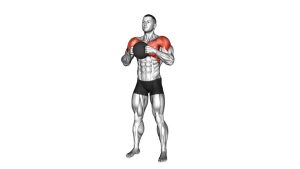
- Start with arms in front: Position your arms crossed or close together in front of the chest, depending on the variation used.
- Eyes forward: Keep the head neutral rather than pushing the chin forward as the arms rise.
Tip: If overhead motion feels limited, reduce range slightly and focus on keeping the torso still.
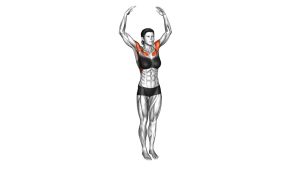
Execution (Step-by-Step)
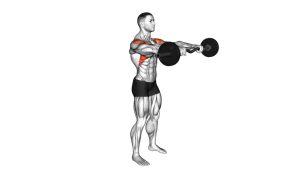
- Begin the raise: Lift the arms forward in a smooth arc, keeping the movement controlled.
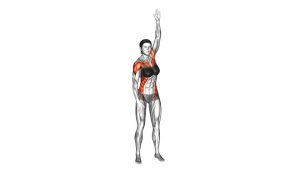
- Reach overhead: Continue until the arms are overhead or as high as your pain-free range allows.
- Let the shoulder blades move naturally: Allow upward rotation, but avoid aggressive shrugging.
- Pause briefly: Hold the top position for 1–2 seconds while keeping the ribs down and the torso stable.
- Lower with control: Bring the arms back down along the same path without dropping or swinging.
Pro Tips & Common Mistakes
- Keep the ribs down: Don’t turn the movement into a backbend to fake more overhead range.
- Move slowly: Controlled reps improve shoulder mechanics better than fast, sloppy ones.
- Don’t shrug too early: Let the shoulder blades rotate upward naturally instead of jamming the shoulders toward the ears.
- Use a pain-free range: Full flexion should be earned through control, not forced through discomfort.
- Keep the neck relaxed: Avoid forward-head posture or tension in the jaw during the raise.
- Pair it smartly: This drill works well with wall slides, band pull-aparts, and thoracic mobility work.
FAQ
What is the main benefit of Standing Shoulder Full Flexion?
Its main benefit is improving overhead shoulder movement quality while reinforcing anterior delt activity and better scapular coordination.
Should this exercise burn the shoulders?
You may feel light fatigue in the front of the shoulders, but this is usually more of a mobility and control drill than a heavy strength movement.
Can beginners do this exercise?
Yes. It is beginner-friendly because it uses bodyweight only and can be shortened to a pain-free range of motion.
What if I cannot raise my arms fully overhead?
Work only through the range you can control well. Over time, pairing this with thoracic mobility, serratus activation, and light shoulder mobility drills may help improve overhead motion.
When should I use this exercise in a workout?
It fits best in the warm-up, mobility, or recovery portion of a session before presses, overhead work, throwing, or posture-focused upper-body training.
Recommended Equipment (Optional)
- Shoulder Resistance Bands — useful for adding light resistance or pairing this drill with shoulder rehab and activation work
- Foam Roller for Upper Back Mobility — helps improve thoracic extension, which can support cleaner overhead shoulder motion
- Exercise / Yoga Mat — useful for floor-based shoulder mobility drills, recovery work, and warm-up routines
- Therapy Bands for Shoulder Mobility — good for low-load shoulder control, rehab-style work, and gradual progression
- Stretching Strap — helpful for assisted shoulder mobility and controlled range-of-motion practice
Tip: For this exercise, equipment is optional. Start with bodyweight mastery first, then add tools only if they improve comfort, control, or progression.