Roll Ball Biceps Brachii Wall Release: Form, Benefits, Tips & FAQ
Learn how to perform the Roll Ball Biceps Brachii Wall Release to massage the front upper arm, reduce tightness, and improve arm mobility. Includes setup, step-by-step execution, tips, FAQs, and recommended equipment.
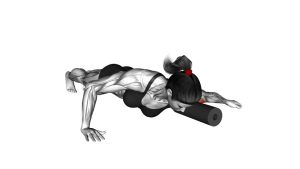
Roll Ball Biceps Brachii Wall Release
This movement works best when you stay relaxed and use moderate pressure. You should feel a tolerable massage-like pressure along the biceps area, not sharp pain, numbness, or tingling. Keep the chest open, the shoulder down, and the arm close enough to the wall that the ball can target the muscle without slipping.
Quick Overview
| Body Part | Biceps |
|---|---|
| Primary Muscle | Biceps brachii |
| Secondary Muscle | Brachialis, brachioradialis, forearm stabilizers, front deltoid (light stabilization) |
| Equipment | Massage ball or lacrosse ball, wall |
| Difficulty | Beginner (easy to learn, but requires controlled pressure and positioning) |
Sets & Reps (By Goal)
- Warm-up / tissue prep: 1–2 rounds of 20–40 seconds per arm with light pressure
- Mobility / recovery: 2–3 rounds of 30–60 seconds per arm with slow rolling and steady breathing
- Post-workout tightness relief: 1–3 rounds of 20–45 seconds per arm, focusing on the most restricted area
- General maintenance: 2–4 times per week as needed, keeping intensity moderate
Progression rule: Increase time under pressure or improve control before increasing intensity. More pressure is not always better—smooth rolling and good placement matter more.
Setup / Starting Position
- Stand beside a wall: Position yourself so the working arm is closest to the wall.
- Place the ball on the biceps: Set the ball between the wall and the front of your upper arm, roughly midway between the shoulder and elbow.
- Lean in gently: Shift your body toward the wall until you feel mild-to-moderate pressure on the muscle.
- Relax the shoulder: Keep the shoulder down and away from the ear. Do not hunch or twist your torso aggressively.
- Keep posture tall: Brace lightly through the core and maintain a neutral head and rib position while you work.
Tip: Start with a softer ball or lighter pressure if the biceps are very tender.
Execution (Step-by-Step)
- Find the contact point: Place the ball on the thickest part of the biceps and lean into the wall until the pressure feels productive but manageable.
- Roll slowly: Move your body slightly up, down, or side to side so the ball glides across the biceps muscle belly.
- Pause on tight spots: When you find a tender area, hold pressure there for 5–15 seconds while breathing slowly.
- Adjust the arm angle: Rotate the arm slightly inward or outward to change which part of the biceps is being targeted.
- Continue with control: Keep the movement slow and deliberate. Avoid bouncing, shrugging, or grinding into the tissue.
- Switch sides if needed: Repeat the same process on the other arm for balanced tissue work.
Pro Tips & Common Mistakes
- Use enough pressure to feel the muscle, not the bone: If the ball feels too sharp, reposition it or reduce force.
- Move slowly: Fast rolling usually misses the tight spots and reduces control.
- Don’t shrug the shoulder: Keep the upper trap relaxed so the pressure stays on the biceps.
- Avoid the elbow crease: Stay on the muscle belly rather than pressing into sensitive tendons or nerves near the elbow.
- Don’t overdo it: One to three short rounds are usually enough. Excessive pressure can irritate the area.
- Pair it with arm training wisely: This drill can work well before curls for tissue prep or after training for recovery.
FAQ
What should I feel during the Roll Ball Biceps Brachii Wall Release?
You should feel steady pressure and a massage-like sensation in the front upper arm. Mild tenderness is normal, but sharp pain, tingling, or numbness is a sign to stop and reposition.
Is this a strength exercise or a recovery drill?
This is primarily a recovery, mobility, and tissue-quality drill. It is not meant to replace biceps training such as curls or pulling exercises.
When should I use this exercise?
It can be used before upper-body workouts as light tissue prep, after training to reduce tightness, or on recovery days when your arms feel stiff.
How hard should I press into the ball?
Use a moderate level of pressure that allows you to breathe and stay relaxed. If you tense up, hold your breath, or feel pain in the joint, the pressure is too high.
Can beginners do this safely?
Yes, most beginners can perform it safely as long as they start with light pressure, stay on the muscle belly, and avoid aggressive rolling over sensitive areas.
Recommended Equipment
- Lacrosse Massage Ball — simple, firm, and effective for targeting the biceps against a wall
- Wall-Mounted Massage Ball — convenient for guided wall-based trigger-point and rolling work
- Peanut Massage Ball — useful if you want a slightly different pressure feel than a standard single ball
- Muscle Roller Stick — a good alternative for manual rolling when you do not want to use the wall
- Arm Compression Sleeve — optional support for light recovery sessions after arm training
Choose tools that let you control pressure easily. For this drill, a basic massage ball is usually the best place to start.