Seated Neck Tap: Form, Benefits, Sets, Tips & FAQ
Learn how to do the Seated Neck Tap with proper form. Improve neck control, posture awareness, cervical stability, and upper-body coordination with this beginner-friendly drill.
Seated Neck Tap
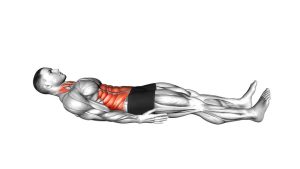
The Seated Neck Tap works best when it is performed with calm posture, slow timing, and light effort. It is not designed to be a heavy strengthening exercise. Instead, it teaches you how to control the head, neck, shoulders, and upper back together without excessive tension. Because the movement is small and precise, it can be useful in warm-ups, posture routines, desk-break mobility sessions, and beginner neck-control training.
During the exercise, the body should remain upright while the hands lightly guide or tap near the neck, head, or upper shoulder area depending on the variation being used. The neck should move only as much as you can control without strain. A clean repetition feels smooth, quiet, and stable. A poor repetition usually feels rushed, tense, or dominated by shoulder shrugging and jaw tightness.
Quick Overview
| Body Part | Neck |
|---|---|
| Primary Muscle | Deep neck flexors and cervical stabilizers |
| Secondary Muscle | Upper trapezius, scapular stabilizers, upper-back postural muscles, and light shoulder stabilizers |
| Equipment | Bodyweight only; optional chair, bench, yoga mat, posture support, or mirror for feedback |
| Difficulty | Beginner |
Sets & Reps (By Goal)
- Posture awareness: 2–3 sets of 8–12 slow reps with 30–45 seconds of rest.
- Neck control warm-up: 2 sets of 10–15 reps using a smooth, relaxed tempo.
- Desk-break reset: 1–2 sets of 6–10 easy reps performed without strain.
- Mobility and coordination: 2–4 sets of 8–12 reps, focusing on clean rhythm and steady posture.
- Rehab-style control: 2–3 sets of 6–8 reps with a slower pace and a brief pause at each tap.
Progression rule: Improve control before adding volume. Start with short sets, then increase reps only when the neck stays relaxed, the shoulders remain down, and the movement stays smooth from start to finish.
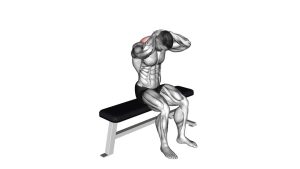
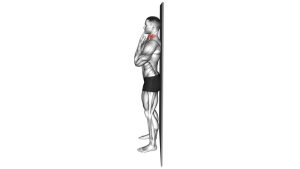
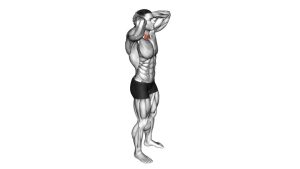
Setup / Starting Position
- Sit tall on a stable surface: Use a chair, bench, or box that allows your feet to stay flat on the floor. Keep your knees bent comfortably and your weight balanced evenly through both hips.
- Stack your posture: Place your ribcage over your pelvis, lengthen the spine, and avoid slouching forward. Your head should sit naturally over your shoulders.
- Relax your shoulders: Keep the shoulders away from your ears. The upper traps should not dominate the exercise.
- Position your hands: Bring your hands near the sides of the head, neck, or upper shoulder area depending on the version being performed. The hands should act as light contact points, not forceful levers.
- Keep your face neutral: Look forward with the chin level. Avoid looking sharply down, jutting the chin forward, or tilting the head aggressively.
- Brace lightly: Engage the core just enough to prevent your torso from rocking. The body should stay still while the neck and arms coordinate the tap.
A mirror can help you check whether your head is staying centered and whether your shoulders are rising during the movement.
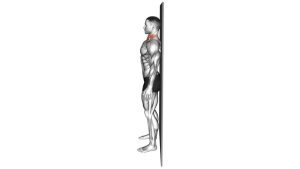
Execution (Step-by-Step)
- Begin in a tall seated position: Keep your spine long, chest relaxed, and shoulders gently pulled away from your ears.
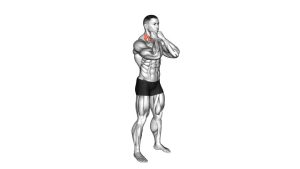
- Bring the hands into position: Place your hands near the sides of your head, neck, or upper shoulder area. Keep the elbows bent and controlled.
- Start the tap motion: Lightly tap or touch the target area without pushing the head or neck out of alignment.
- Control the neck: Allow only a small amount of neck movement. The head should remain stable, smooth, and coordinated with the hand contact.
- Pause briefly: Hold the contact for a short moment while breathing normally. Avoid clenching the jaw or tightening the throat.
- Return to neutral: Move the hands and neck back to the starting position with control. Do not snap the head back or rush the reset.
- Repeat with rhythm: Continue for the target number of reps while keeping every repetition small, precise, and relaxed.
Pro Tips & Common Mistakes
Pro Tips
- Keep the movement small: A short, controlled tap is more useful than a large movement that pulls the neck out of position.
- Use light contact: The hands should guide and cue the body, not push, crank, or force the neck.
- Breathe throughout the set: Smooth breathing helps reduce unnecessary neck, jaw, and shoulder tension.
- Stay tall through the spine: Imagine the crown of your head lifting upward while your shoulders stay soft and heavy.
- Use a mirror if needed: Visual feedback can help you spot head tilting, shoulder shrugging, or uneven arm movement.
- Pair it with upper-back work: For better posture results, combine this drill with rows, band pull-aparts, face pulls, or thoracic mobility work.
Common Mistakes
- Moving too fast: Rushing removes the control benefit and often creates tension in the neck.
- Shrugging the shoulders: Letting the shoulders rise turns the drill into a trap-dominant movement.
- Forcing the neck: The tap should not push the head into an uncomfortable position.
- Slouching while seated: A rounded upper back makes it harder to control the cervical spine.
- Clenching the jaw: Jaw tension usually means the effort is too high or the movement is too aggressive.
- Using the arms too much: The arms should assist the rhythm, but the focus remains on neck control and posture.
FAQ
What is the Seated Neck Tap good for?
The Seated Neck Tap is useful for improving neck control, posture awareness, and coordination between the head, neck, shoulders, and upper back. It is especially helpful as a light warm-up or desk-break drill.
Is the Seated Neck Tap a strength exercise?
It is more of a control and coordination exercise than a heavy strength exercise. The goal is not maximum resistance. Instead, the goal is clean posture, smooth movement, and relaxed neck stability.
Where should I feel this exercise?
You may feel gentle activity around the front and sides of the neck, along with light postural work in the upper back and shoulders. You should not feel sharp pain, strong pulling, dizziness, or nerve-like symptoms.
Can beginners do the Seated Neck Tap?
Yes. This is a beginner-friendly movement when performed slowly and gently. Beginners should keep the range small, avoid forcing the neck, and focus on relaxed control.
How often can I do this exercise?
Many people can perform it several times per week or even daily at low intensity. Start with a small amount of volume and increase only if your neck feels comfortable afterward.
Should I do this exercise if I have neck pain?
If you have mild stiffness, this exercise may feel helpful when performed gently. However, if you have sharp pain, dizziness, radiating symptoms, numbness, tingling, or a recent injury, consult a qualified healthcare professional before doing neck exercises.
Recommended Equipment
- Yoga Mat — useful for seated mobility work, warm-ups, stretching, and floor-based neck drills.
- Posture Corrector Brace — helpful as a light posture reminder, especially for users who sit for long periods.
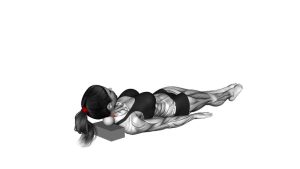
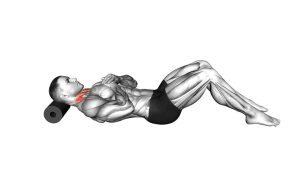
- Cervical Contour Pillow — supports neck alignment during recovery, relaxation, or supine posture practice.
- Resistance Bands Set — excellent for pairing this drill with upper-back strengthening such as rows and pull-aparts.
- Neck and Shoulder Relaxer — optional support tool for gentle neck relaxation after posture or mobility sessions.
Tip: Equipment is optional for this exercise. Prioritize clean technique, relaxed breathing, and small controlled reps before adding tools.