Seated Lower Trunk Lateral Flexor Stretch: Form, Benefits, Tips & FAQ
Learn the Seated Lower Trunk Lateral Flexor Stretch to improve side-body mobility, oblique flexibility, and lower trunk control with safe form.
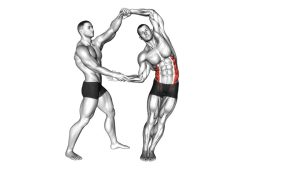
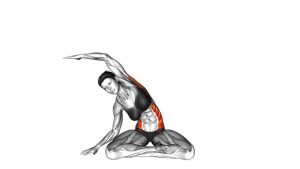
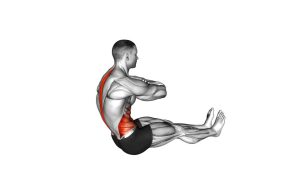
Seated Lower Trunk Lateral Flexor Stretch
This stretch is especially useful when the side waist, lower back, or rib area feels tight after long sitting, heavy training, or repeated one-sided movement. Additionally, it teaches the trunk to bend sideways without twisting, collapsing, or lifting the hips. For best results, move slowly, breathe into the stretched side, and keep the stretch comfortable rather than aggressive.
Quick Overview
| Body Part | Core |
|---|---|
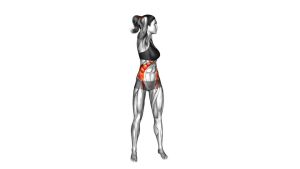
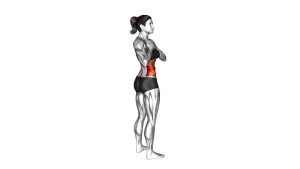
| Primary Muscle | Obliques and lower trunk lateral flexors |
| Secondary Muscle | Quadratus lumborum, intercostals, erector spinae, hip stabilizers |
| Equipment | Exercise mat only; optional yoga block or cushion for support |
| Difficulty | Beginner-friendly mobility stretch |
Sets & Reps (By Goal)
- General flexibility: 2–3 sets per side × 20–30 second holds.
- Warm-up mobility: 1–2 sets per side × 5–8 slow controlled reaches.
- Cool-down relaxation: 2 sets per side × 30–45 second holds with slow breathing.
- Desk-break posture reset: 1–2 sets per side × 15–25 second holds.
- Beginner mobility practice: 1–3 sets per side × short, easy holds without forcing range.
Progression rule: First improve breathing and control. Then, gradually increase hold time before increasing range. A deeper side bend is only useful when both hips stay grounded and the torso does not twist forward.
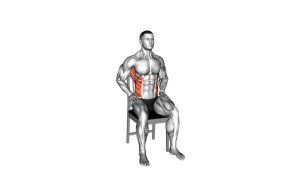
Setup / Starting Position
- Sit on a mat: Choose a comfortable seated position with your legs extended, crossed, or slightly bent.
- Anchor both hips: Keep your sit bones heavy so the pelvis does not lift when you bend sideways.
- Lengthen the spine: Sit tall through the crown of the head before moving into the stretch.
- Place one hand down: Keep one hand beside the hip for light support and balance.
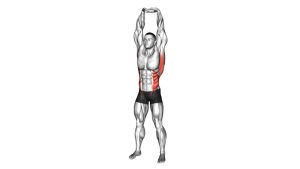
- Reach the opposite arm up: Lift the arm on the stretching side toward the ceiling before bending.
- Relax the shoulders: Keep the neck long and avoid shrugging the upper shoulder toward the ear.
If sitting upright feels difficult, place a folded towel or cushion under the hips. As a result, the pelvis tilts more comfortably and the side bend becomes easier to control.
Execution (Step-by-Step)
- Begin tall: Sit upright with both hips grounded and your chest relaxed.
- Lift one arm overhead: Reach the arm upward first to create length through the side of the waist.
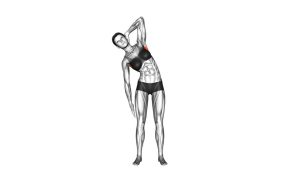
- Bend sideways slowly: Lean toward the grounded hand while keeping the torso open.
- Reach, not collapse: Let the top arm travel in a long arc instead of dropping the shoulder forward.
- Keep the hips heavy: Avoid lifting the opposite hip off the floor as the stretch deepens.
- Breathe into the ribs: Inhale gently into the stretched side and exhale without losing posture.
- Hold the stretch: Stay in a mild-to-moderate range for the recommended time.
- Return with control: Use your core to bring the torso back upright slowly.
- Reset before switching: Relax the shoulders, re-stack the spine, and repeat on the other side.
Pro Tips & Common Mistakes
Pro Tips
- Think “up, then over”: Reach tall before bending sideways to avoid compressing the spine.
- Use slow breathing: Each exhale can help the ribs soften and the side body relax.
- Keep the chest open: A slight open chest position helps target the lateral trunk instead of turning the movement into a forward fold.
- Stay symmetrical: Stretch both sides, even if one side feels tighter.
- Use support when needed: A yoga block under the bottom hand can make the stretch smoother and less compressed.
Common Mistakes
- Twisting forward: Rotating the chest down reduces the side-body stretch and changes the movement pattern.
- Lifting the hip: If the opposite hip rises, the stretch becomes less effective for the lower trunk.
- Forcing the arm: Pulling aggressively can irritate the shoulder or ribs.
- Collapsing into the bottom hand: The support hand should assist balance, not carry the whole torso.
- Holding the breath: Breath-holding increases tension and limits the relaxing effect of the stretch.
FAQ
What muscles does the Seated Lower Trunk Lateral Flexor Stretch target?
It mainly targets the obliques and lower trunk lateral flexors. Additionally, it can stretch the quadratus lumborum, intercostals, and tissues around the side ribs and lower back.
Should I feel this stretch in my lower back?
A gentle stretch near the side of the lower back is normal, especially around the quadratus lumborum. However, sharp pain, pinching, or radiating discomfort is not normal. In that case, reduce the range or stop the exercise.
Is this stretch good for tight obliques?
Yes. Because the movement combines overhead reach with lateral trunk bending, it can help lengthen the obliques and improve side-body mobility when performed slowly and consistently.
Can beginners do this exercise?
Yes. This is a beginner-friendly stretch when performed with a small range of motion. Beginners should focus on staying tall, breathing calmly, and keeping both hips grounded.
How long should I hold the stretch?
Most people can hold it for 20–45 seconds per side. For a warm-up, shorter dynamic reaches may work better. For a cool-down, longer relaxed holds are usually more effective.
Can this help with posture?
It can support posture by improving trunk mobility and reducing side-body stiffness. For stronger results, combine it with core stability, upper-back strengthening, hip mobility, and regular movement breaks.
Recommended Equipment
- Exercise Mat — provides floor comfort and support during seated stretching.
- Yoga Block — helps support the bottom hand if the floor feels too far away.
- Foldable Stretching Mat — useful for mobility sessions at home or in small spaces.
- Yoga Bolster — can support the hips or torso during relaxed mobility work.
- Stretching Strap — helpful for pairing this stretch with hamstring, hip, and full-body flexibility drills.
Tip: Equipment should make the stretch easier to control. If a tool causes discomfort, remove it and return to a simpler setup.