Cat Stretch: Proper Form, Benefits, Sets, Tips & FAQ
Learn how to do the Cat Stretch with proper form to improve spinal mobility, core control, waist flexibility, and back relaxation. Includes setup, execution, tips, FAQs, and equipment.
Cat Stretch
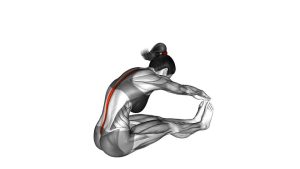
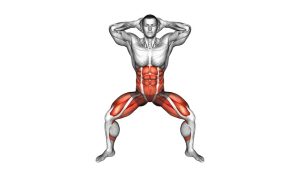
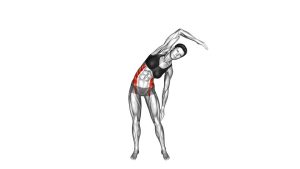
This exercise is especially useful as a warm-up, cool-down, posture reset, or low-intensity mobility drill. It teaches you how to move the spine segment by segment while keeping the shoulders, hips, and neck relaxed. In the demonstrated version, the movement has a slight waist-focused feel, which makes the obliques and lower-back area more involved.
Quick Overview
| Body Part | Obliques |
|---|---|
| Primary Muscle | Core stabilizers, obliques, spinal flexors |
| Secondary Muscle | Erector spinae, serratus anterior, quadratus lumborum, upper back stabilizers |
| Equipment | Bodyweight only; optional exercise mat |
| Difficulty | Beginner |
Sets & Reps (By Goal)
- General mobility: 2–3 sets × 8–12 slow reps
- Warm-up activation: 1–2 sets × 10–15 controlled reps
- Waist and lower-back stretch: 2–3 sets × 6–10 reps with a 2–4 second hold
- Cool-down relaxation: 1–2 sets × 30–60 seconds of slow continuous movement
Progression rule: Do not progress by forcing more range. Progress by improving control, breathing rhythm, and smooth spinal articulation.
Setup / Starting Position
- Start on all fours: Place your hands under or slightly in front of your shoulders and your knees under your hips.
- Set your base: Spread your fingers, press lightly through the palms, and keep your knees comfortable on the floor.
- Keep the spine neutral: Begin with your back flat, neck long, and gaze slightly down.
- Relax your shoulders: Avoid shrugging. Let the shoulder blades sit wide and stable.
- Brace lightly: Gently engage the abdomen without holding your breath.
Tip: If your knees feel uncomfortable, place a folded towel or exercise mat underneath them.
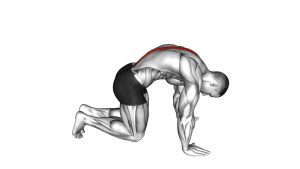
Execution (Step-by-Step)
- Begin in neutral: Keep your hands and knees planted while your spine stays long.
- Exhale and round the back: Slowly pull the belly upward and allow the spine to curve toward the ceiling.
- Spread the shoulder blades: Push gently through the floor so the upper back rounds without collapsing into the shoulders.
- Relax the neck: Let the head follow the spine naturally without yanking the chin toward the chest.
- Add a small waist emphasis: If desired, slightly bias the curve toward one side to feel a gentle stretch through the waist and obliques.
- Pause briefly: Hold the rounded position for 1–4 seconds while breathing calmly.
- Return with control: Slowly release the spine back to neutral without dropping suddenly into the lower back.
- Repeat smoothly: Continue for the planned reps, keeping every repetition slow and controlled.
Pro Tips & Common Mistakes
- Move one segment at a time: Think of rounding from the lower back through the mid-back and upper back.
- Do not rush: Fast reps reduce the mobility benefit and make the movement less controlled.
- Avoid locking the elbows: Keep the arms long but soft so the shoulders do not become tense.
- Do not force the neck: The head should follow the spine naturally, not be pulled down aggressively.
- Keep your hips steady: Avoid rocking too far backward unless you are intentionally turning it into a child’s pose variation.
- Breathe with the movement: Exhale as you round the back and inhale as you return to neutral.
- Use the floor actively: Lightly press through your palms to help spread the upper back.
- Keep the stretch gentle: A mild pulling sensation is fine; sharp pain is not.
FAQ
What is the Cat Stretch good for?
The Cat Stretch is good for improving spinal mobility, loosening the back, increasing core awareness, and gently stretching the waist, obliques, and lower-back area.
Is the Cat Stretch a core exercise?
Yes. Although it is commonly used as a mobility stretch, the core muscles help control the rounding of the spine. The abs and obliques work gently to support the movement.
Should I feel this in my lower back?
You may feel a mild stretch through the lower back, but it should not feel sharp, compressed, or painful. If it does, reduce the range of motion and focus on smoother breathing.
How often can I do the Cat Stretch?
Most people can perform it daily because it is low-impact and bodyweight-based. Keep the effort light, especially if using it as a posture reset or warm-up.
Is this the same as Cat-Cow?
It is similar, but the Cat Stretch focuses mainly on the rounded “cat” position. Cat-Cow includes both spinal flexion and spinal extension, while this version emphasizes rounding, waist control, and gentle back stretching.
Recommended Equipment (Optional)
- Exercise Mat — provides cushioning for the knees, hands, and floor-based mobility work
- Yoga Knee Pad — useful if kneeling positions bother your knees
- Yoga Blocks — helpful for modifying hand position and reducing wrist pressure
- Stretching Strap — useful for pairing this drill with full-body flexibility work
- Foam Roller — great for upper-back mobility and recovery before or after stretching
Tip: You do not need equipment to perform the Cat Stretch correctly. A mat or knee pad simply makes the exercise more comfortable.