Hanging Front Lever Raise: Form, Benefits, Sets, Tips & FAQ
Learn the Hanging Front Lever Raise for advanced core, lats, and straight-arm strength with step-by-step form, sets, mistakes, FAQs, and gear
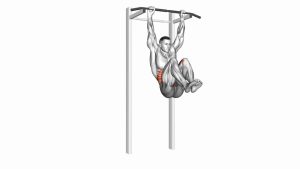
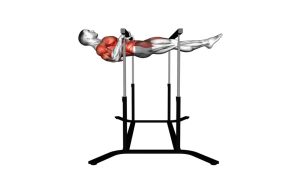
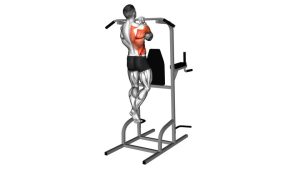
Hanging Front Lever Raise
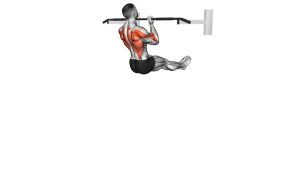
This exercise is best used by athletes who already have a strong hanging core base, solid pull-up strength, and good scapular control. It is not simply a leg raise. The movement requires the athlete to connect the shoulders, ribs, hips, and legs into one rigid line while the lats pull the body backward and the core prevents the spine from arching.
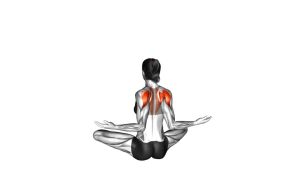
Quick Overview
| Body Part | Core |
|---|---|
| Primary Muscle | Rectus abdominis, transverse abdominis, and latissimus dorsi |
| Secondary Muscle | Rear delts, lower traps, teres major, hip flexors, forearms, and scapular stabilizers |
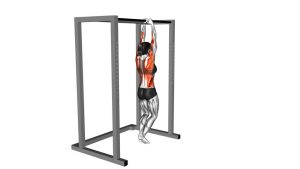
| Equipment | Pull-up bar or sturdy hanging station |
| Difficulty | Advanced |
Sets & Reps (By Goal)
- Skill practice: 3–5 sets × 2–5 controlled reps with long rest between sets.
- Strength development: 4–6 sets × 1–4 strict reps using a slow tempo.
- Eccentric control: 3–5 sets × 2–4 slow negatives, lowering for 3–6 seconds.
- Progression training: 3–4 sets × 4–8 reps using tuck, advanced tuck, or band assistance.
- Core accessory work: 2–3 sets × 3–6 reps after main pulling work.
Progression rule: Master clean tuck and advanced tuck front lever raises before attempting full-body straight-leg raises. Quality is more important than range.
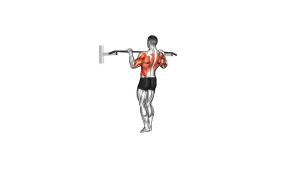
Setup / Starting Position
- Grip the bar: Use an overhand grip slightly wider than shoulder width.
- Start in a dead hang: Let the body hang tall while keeping the legs together and the toes pointed slightly forward.
- Brace the core: Pull the ribs down and lightly squeeze the glutes to prepare a strong hollow-body position.
- Set the shoulders: Depress the scapulae by pulling the shoulders away from the ears.
- Create tension before moving: Engage the lats first so the raise begins from the back and core, not from swinging the legs.
Tip: If you cannot stop your body from swinging before the first rep, the variation is too advanced. Use a tuck lever raise or band-assisted version.
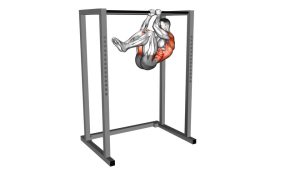
Execution (Step-by-Step)
- Begin from a controlled hang: Keep the arms straight and the shoulders active.
- Pull with the lats: Drive the bar downward with straight arms as if trying to bring the bar toward your hips.
- Raise the body as one unit: Lift the legs, hips, and torso together instead of kicking the legs first.
- Reach the lever line: Continue raising until the body approaches a horizontal front lever position.
- Hold briefly: Pause for a moment while keeping the ribs down, legs straight, and glutes tight.
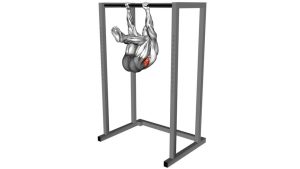
- Lower slowly: Return to the dead hang with control and avoid dropping or swinging.
- Reset before the next rep: Let any small movement settle before starting again.
Pro Tips & Common Mistakes
- Keep the arms straight: Bending the elbows turns the movement into a pull-up variation instead of a front lever raise.
- Use the lats first: Think about pushing the bar down, not just lifting the legs up.
- Stay hollow: Keep the ribs pulled down and avoid arching the lower back.
- Control the descent: The lowering phase builds serious front lever strength when performed slowly.
- Avoid momentum: Swinging reduces tension and increases stress on the shoulders.
- Do not rush progression: Tuck, advanced tuck, one-leg, straddle, and band-assisted versions are valuable steps.
- Grip firmly: A weak grip can cause early fatigue before the core and lats receive enough training stimulus.
FAQ
Is the Hanging Front Lever Raise the same as a hanging leg raise?
No. A hanging leg raise mainly lifts the legs toward the torso, while a Hanging Front Lever Raise lifts the entire body toward a horizontal lever position. It requires much more lat strength, scapular control, and full-body tension.
What muscles does the Hanging Front Lever Raise work?
It strongly trains the core and lats, while also challenging the rear delts, lower traps, teres major, hip flexors, forearms, and scapular stabilizers.
Is this exercise beginner-friendly?
No. This is an advanced calisthenics movement. Beginners should first build strength with dead hangs, hollow holds, hanging knee raises, scapular pulls, tuck front lever holds, and band-assisted lever progressions.
Why do my elbows bend during the raise?
Elbow bending usually means the lats and straight-arm pulling strength are not strong enough yet. Use an easier progression, reduce the range, or add band assistance until you can keep the arms locked.
How can I make the Hanging Front Lever Raise easier?
Use a tuck position, bend one leg, use resistance band assistance, or focus only on slow negatives from a partial lever position. These options reduce leverage while still building the correct movement pattern.
How often should I train this exercise?
Two to three times per week is enough for most athletes. Because this movement places high demand on the shoulders, elbows, grip, lats, and core, recovery is important.
Recommended Equipment
- Pull-Up Bar — essential for hanging front lever raises and other calisthenics pulling exercises.
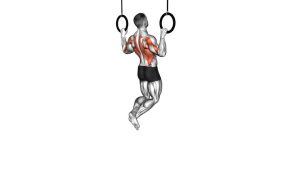
- Gymnastics Rings — useful for advanced straight-arm strength, lever progressions, rows, and bodyweight control drills.
- Resistance Bands — helpful for assisted front lever raises, easier progressions, and warm-up activation.
- Liquid Chalk — improves grip security during hanging strength work and reduces hand slipping.
- Calisthenics Grips — protects the hands during high-volume hanging, bar work, and advanced bodyweight training.
Tip: For front lever training, choose equipment that feels stable and secure. A strong bar, reliable grip, and proper assistance bands make progression safer and more consistent.