Ring Front Lever: Form, Sets, Progressions, Tips & FAQ
Learn the Ring Front Lever for powerful lats, core control, and straight-arm strength with setup, form cues, progressions, mistakes, FAQs, and gear.
Ring Front Lever
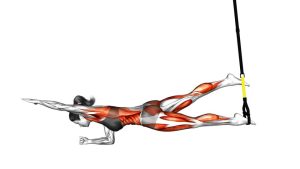
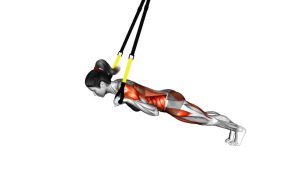
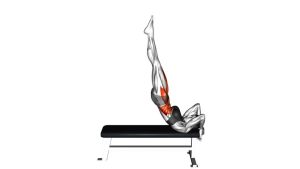
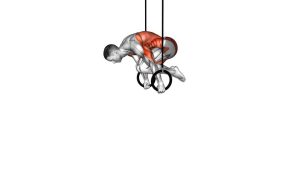
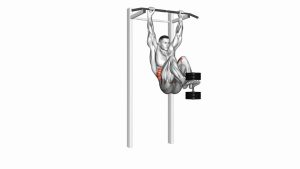
This movement is best trained with patience, clean progressions, and high body tension. In the video, the athlete moves from a hanging position into a tucked lever, extends the legs toward a near-full front lever, holds briefly, then exits under control. The key is not to pull with bent arms; instead, you should create a strong straight-arm pull by driving the rings down, locking the shoulders, and keeping the torso rigid.
Quick Overview
| Body Part | Back |
|---|---|
| Primary Muscle | Latissimus dorsi |
| Secondary Muscle | Core, rear delts, teres major, rhomboids, forearms, glutes, and scapular stabilizers |
| Equipment | Gymnastics rings, pull-up bar or ring anchor point, optional resistance band |
| Difficulty | Advanced |
Sets & Reps (By Goal)
- Skill practice: 4–6 sets × 6–12 second holds using the cleanest progression you can control
- Strength building: 3–5 sets × 3–6 controlled negative reps with 90–180 seconds rest
- Progression training: 4–5 sets × 8–15 second tuck or advanced tuck holds
- Core and lat control: 3–4 sets × 5–8 lever raises or tuck lever pulls
- Maintenance work: 2–3 sets × 8–10 second clean holds after your main pulling session
Progression rule: Increase hold quality before hold length. Only move to a harder variation when your hips stay lifted, arms stay straight, shoulders stay depressed, and the rings stay controlled.
Setup / Starting Position
- Set the rings: Hang the rings from a stable pull-up bar, ceiling mount, or gym rig. Make sure both straps are even.
- Grip the rings: Use a firm neutral grip with palms facing each other. Keep wrists strong and avoid a loose grip.
- Start in a dead hang: Let the body hang vertically with arms straight and feet slightly forward.
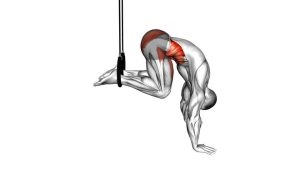
- Activate the shoulders: Pull the shoulders down away from the ears before lifting into the lever.
- Brace the core: Slightly tuck the pelvis, tighten the abs, and prepare to keep the ribs from flaring.
- Choose your level: Start with a tuck, advanced tuck, one-leg, straddle, or full front lever based on your strength.
Tip: If the rings swing before you begin, wait until they settle. A still start makes the front lever easier to control.
Execution (Step-by-Step)
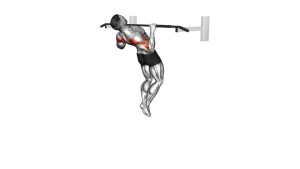
- Begin from an active hang: Keep the elbows straight and pull the shoulders down to create tension through the lats.
- Lean back under control: Shift the torso backward while keeping the rings close and stable.
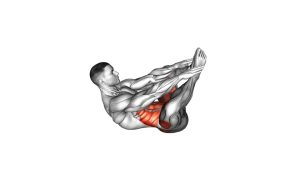
- Lift into a tuck lever: Bring the knees toward the chest and raise the hips until the back approaches a horizontal line.
- Lock the upper body: Keep the arms straight, shoulders depressed, chest controlled, and shoulder blades stable.
- Extend gradually: If strength allows, move from tuck to advanced tuck, then extend the legs farther without dropping the hips.
- Hold the position: Keep the body tight from shoulders to toes. Squeeze the abs, glutes, and quads.
- Control the exit: Return to the tuck or lower the legs slowly back to a vertical hang. Do not collapse out of the position.
Pro Tips & Common Mistakes
- Pull the rings down: Think about driving the rings toward your hips instead of pulling your body up with bent arms.
- Keep the elbows straight: Bent elbows turn the skill into more of a row and reduce the straight-arm strength benefit.
- Do not let the hips sag: Sagging hips usually mean the core or lats are not strong enough for that progression.
- Control the ribs: Avoid rib flare and lower-back arching. Keep the abs tight and pelvis slightly tucked.
- Use progressions honestly: A clean tuck front lever is better than a broken full front lever.
- Minimize ring swing: Start slowly and avoid kicking into the position with momentum.
- Train negatives carefully: Slow lowering builds strength, but only if your shoulders stay controlled.
- Rest enough: Front levers are high-tension skills. Short rest periods can quickly reduce form quality.
FAQ
What muscles does the Ring Front Lever work?
The Ring Front Lever mainly works the latissimus dorsi, but it also heavily trains the core, rear delts, teres major, rhomboids, forearms, glutes, and scapular stabilizers. It is one of the best bodyweight exercises for straight-arm pulling strength.
Is the Ring Front Lever harder than the bar front lever?
Yes, for most people it is harder because the rings are unstable. You must control both the lever position and the ring movement, which increases the demand on your shoulders, grip, and scapular stabilizers.
What progression should I use before the full Ring Front Lever?
Start with tuck front lever holds, then progress to advanced tuck, one-leg front lever, straddle front lever, and finally the full front lever. Move forward only when your current variation is stable and controlled.
Why do my hips drop during the front lever?
Hip drop usually happens because the lever is too difficult for your current strength level. Regress to a tuck or advanced tuck variation and focus on lat tension, abdominal bracing, and glute engagement.
Should my arms be straight during the Ring Front Lever?
Yes. The Ring Front Lever is a straight-arm strength skill. A small amount of natural elbow softness can happen, but actively bending the elbows changes the movement and reduces the intended training effect.
How often should I train the Ring Front Lever?
Most athletes do well with 2–4 focused sessions per week. Keep the volume moderate and prioritize clean holds, controlled negatives, and easier progressions instead of forcing maximal attempts every session.
Recommended Equipment
- Wooden Gymnastics Rings — essential for ring front lever practice, grip strength, and calisthenics skill training
- Doorway Pull-Up Bar — useful as a home anchor point for rings if installed and rated safely
- Heavy Resistance Bands — helpful for assisted front lever holds, negatives, and progression work
- Liquid Chalk — improves grip security during high-tension ring holds
- Thick Exercise Mat — provides safer floor coverage under the rings during skill practice
Tip: Always check ring straps, anchors, and mounting surfaces before training. Front lever work creates high force through the shoulders, straps, and anchor point.