Hanging Straight-Leg Hip Raise: Form, Sets, Benefits, Tips & FAQ
Learn how to do the Hanging Straight-Leg Hip Raise with proper form, core control, sets by goal, common mistakes, FAQs, and recommended equipment for stronger abs.
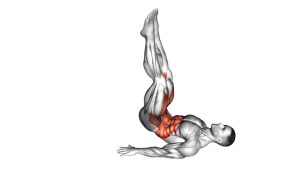
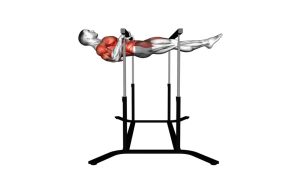
Hanging Straight-Leg Hip Raise
The Hanging Straight-Leg Hip Raise is best used when you already have strong hanging control and solid basic core strength. Because the legs stay straight, the lever becomes longer, and the abs must work harder to control the pelvis. Additionally, the grip, lats, and shoulder stabilizers must keep the upper body steady while the lower body moves. Therefore, this exercise is excellent for calisthenics athletes, advanced lifters, and anyone who wants a harder bodyweight ab exercise.
However, quality matters more than height. A clean repetition should begin from a stable dead hang, move through a smooth straight-leg raise, and finish with a controlled hip curl near the top. Then, the legs should lower slowly until the body returns to a full reset. If the body swings, the abs lose tension, and the exercise becomes less effective.
Quick Overview
| Body Part | Abs |
|---|---|
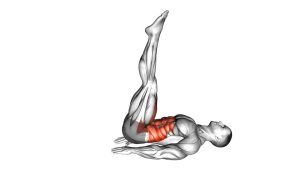
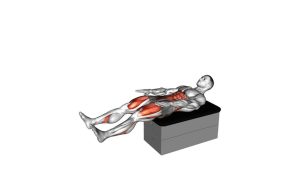
| Primary Muscle | Rectus abdominis, especially the lower abdominal region during the pelvic curl |
| Secondary Muscle | Hip flexors, obliques, forearms, lats, shoulder stabilizers, and deep core stabilizers |
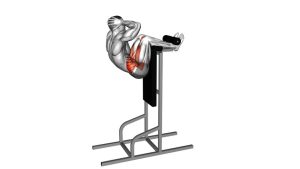
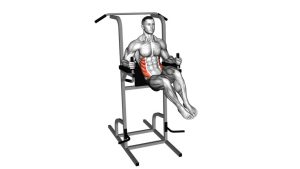
| Equipment | Pull-up bar, captain’s chair, dip station, or power tower |
| Difficulty | Advanced |
Sets & Reps (By Goal)
- Core strength: 3–5 sets × 4–8 controlled reps, resting 90–150 seconds between sets.
- Muscle building: 3–4 sets × 8–12 reps, using a slow eccentric and a strong top contraction.
- Calisthenics skill carryover: 4–6 sets × 3–6 strict reps, focusing on compression, grip, and zero swing.
- Core endurance: 2–4 sets × 10–15 reps, only if every rep remains smooth and controlled.
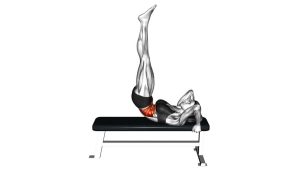
- Beginner progression: Start with hanging knee raises or bent-knee hip raises before moving to straight legs.
Progression rule: First, improve control and reduce swing. Next, increase reps. After that, add pauses at the top. Finally, progress to toes-to-bar only when you can raise and lower your legs without momentum.
Setup / Starting Position
- Grip the bar firmly: Use an overhand grip slightly wider than shoulder width. Then, wrap the thumbs around the bar for security.
- Start from a stable hang: Let the arms extend fully while keeping the shoulders active enough to avoid loose swinging.
- Set the ribs down: Brace the core gently before moving. This helps prevent the lower back from over-arching.
- Keep the legs together: Straighten the knees, point or flex the feet naturally, and squeeze the thighs lightly.
- Control the body line: Before the first rep, allow any small swing to stop. Then, begin from a quiet dead hang.
Setup tip: If your grip fails before your abs, use chalk or lifting straps carefully. However, do not rely on straps if your goal includes grip strength.
Execution (Step-by-Step)
- Begin in a controlled dead hang: Keep your arms long, your legs straight, and your body still. Before you lift, brace your abs as if preparing for a strong exhale.
- Raise the straight legs: Lift both legs forward without bending the knees. At this stage, move smoothly instead of kicking.
- Pass through parallel: As the legs approach hip height, keep the torso controlled. Meanwhile, avoid pulling with the lower back.
- Curl the hips upward: Once the legs rise above parallel, tilt the pelvis back and bring the hips toward the ribs. This is the part that turns the exercise into a true hip raise.
- Squeeze at the top: Pause briefly when your abs are fully contracted. If possible, keep the toes high without letting the body swing backward.
- Lower with control: Slowly reverse the motion. Keep tension in the abs as the legs pass through parallel again.
- Reset before the next rep: Return to the bottom position with straight legs and a quiet body. Then, repeat only after the swing is controlled.
Pro Tips & Common Mistakes
Pro Tips
- Use a slow start: Begin each rep gently so the body does not swing forward.
- Exhale near the top: A controlled exhale helps the ribs come down and makes the pelvic curl stronger.
- Keep the knees locked softly: Straight legs increase difficulty, but the knees should not feel painfully locked.
- Pause before lowering: A short top pause improves control and reduces momentum.
- Lower slower than you lift: The eccentric phase builds strength and teaches better body control.
- Use easier variations when needed: Hanging knee raises, bent-knee hip raises, and captain’s chair raises are smart progressions.
Common Mistakes
- Swinging the legs: Momentum makes the rep easier and reduces abdominal tension.
- Only lifting the legs: Without the hip curl, the movement becomes more hip-flexor dominant.
- Dropping the legs quickly: A fast descent can stress the lower back and shoulders.
- Bending the knees too much: This changes the exercise into a knee raise and lowers the difficulty.
- Over-arching at the bottom: Letting the ribs flare can irritate the lower back and reduce core engagement.
- Starting the next rep too soon: If the body is still swinging, reset first.
FAQ
What muscles does the Hanging Straight-Leg Hip Raise work?
The main target is the rectus abdominis, especially during the hip curl at the top. In addition, the hip flexors lift the legs, the obliques help stabilize the torso, and the forearms support the hang.
Is the Hanging Straight-Leg Hip Raise good for lower abs?
Yes. Although the abs work as one muscle group, this exercise strongly challenges the lower abdominal region because the pelvis must curl upward. Therefore, it is a great choice for advanced lower-ab-focused training.
Why do I feel this more in my hip flexors than my abs?
This usually happens when you only lift the legs and skip the pelvic curl. To fix it, slow down, exhale near the top, and think about pulling the hips toward the ribs. Also, reduce the range if you cannot control the top position.
Can beginners do this exercise?
Most beginners should start with easier variations. For example, hanging knee raises, lying leg raises, captain’s chair knee raises, and reverse crunches are better starting points. Once those feel controlled, the straight-leg hip raise becomes more realistic.
How can I stop swinging during hanging leg raises?
First, start each rep from a still dead hang. Next, lift slower and avoid kicking. Then, lower the legs with control. If swinging continues, reduce the range and pause at the bottom before every repetition.
Should my toes touch the bar?
Touching the bar is not required. A strict hip raise with clean pelvic rotation is more valuable than a high rep created with momentum. However, if you can reach the bar without swinging, it can be used as an advanced progression.
Recommended Equipment
- Pull-Up Bar — essential for hanging straight-leg hip raises at home or in a gym setup.
- Power Tower / Pull-Up Dip Station — useful for hanging core work, dips, knee raises, and bodyweight training.
- Gymnastics Grips — help protect the hands during high-volume hanging core sessions.
- Weightlifting Chalk — improves grip security when your hands get sweaty during hanging exercises.
- Ab Straps for Pull-Up Bar — optional support for hanging ab work if grip fatigue limits core training.
Equipment tip: A stable bar matters more than extra accessories. If the station shakes or the grip feels unsafe, choose a stronger setup before increasing difficulty.