Decline Kneeling Push-Up: Upper-Chest Focus, Form, Sets & Tips
Learn the Decline Kneeling Push-Up to target the upper chest with less load than a full decline push-up. Step-by-step form, sets by goal, common mistakes, FAQs, and recommended equipment.
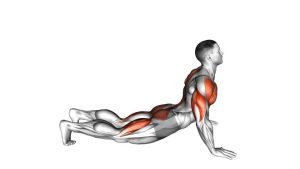
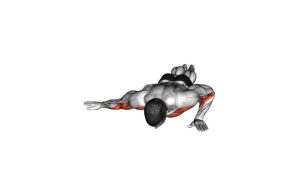
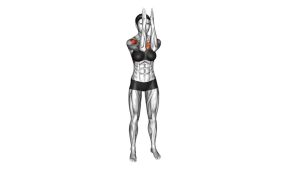
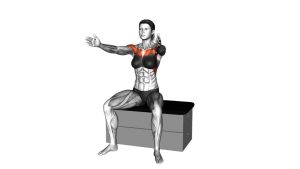
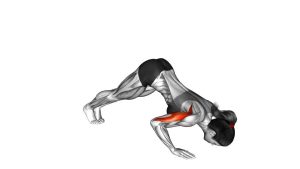
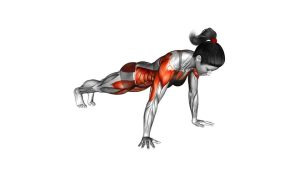
Decline Kneeling Push-Up
This variation is ideal if standard kneeling push-ups feel too easy but full push-ups (or full decline push-ups) feel too heavy. The decline angle typically increases demand on the upper chest, triceps, and front delts. Keep the movement smooth—your best reps should look identical from the first to the last.
Quick Overview
| Body Part | Chest |
|---|---|
| Primary Muscle | Pectoralis major (upper / clavicular emphasis) |
| Secondary Muscle | Triceps, anterior deltoids, serratus anterior (stability) |
| Equipment | Low box/bench/step/couch + optional mat or towel |
| Difficulty | Beginner → Intermediate (progression bridge) |
Sets & Reps (By Goal)
- Strength focus: 3–5 sets × 4–8 reps (90–150 sec rest, controlled tempo)
- Muscle / hypertrophy: 3–4 sets × 8–15 reps (60–90 sec rest, 1–2 reps in reserve)
- Endurance / conditioning: 2–4 sets × 12–20 reps (30–60 sec rest, steady pace)
- Skill / progression practice: 2–3 sets × 6–10 reps (slow eccentric + perfect form)
Progression rule: First increase reps with clean form. Next, slow the lowering (3 seconds), add a 1-second pause near the bottom, or raise the knee/shin elevation slightly.
Setup / Starting Position
- Choose elevation: Use a stable box/bench/step/couch. Place your knees or shins on top.
- Hand position: Hands slightly wider than shoulder-width. Fingers spread. Grip the floor.
- Stack joints: Wrists under (or slightly in front of) shoulders; elbows soft—not locked.
- Body line: Brace core and glutes so your body forms a straight line from head to knees.
- Neck & shoulders: Keep neck long; shoulder blades gently set (don’t shrug up).
Tip: If wrists are sensitive, use push-up handles/parallettes to keep a more neutral wrist angle.
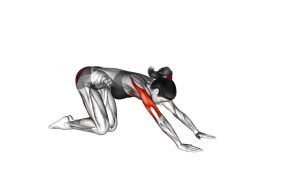
Execution (Step-by-Step)
- Brace first: Inhale, tighten your core, and keep ribs “down” (avoid arching your lower back).
- Lower under control: Bend elbows and lower your chest toward the floor in 2–3 seconds.
- Elbow path: Keep elbows at about 30–60° from your torso (avoid flaring straight out).
- Reach depth safely: Stop when your chest is close to the floor or when shoulder control starts to fade.
- Press up: Drive the floor away, extend elbows, and return to the top with your body rising as one unit.
- Finish strong: At the top, maintain a solid plank and gently protract (reach) without shrugging.
Pro Tips & Common Mistakes
- Use a slower negative: 2–4 seconds down improves control and chest tension.
- Keep the body “one piece”: Avoid hips sagging first or pressing up like a wave.
- Don’t flare elbows: Too wide often shifts stress to the shoulders and reduces power.
- Avoid head-first reps: Keep chin tucked slightly; chest leads the descent.
- Own your depth: Only go as low as you can while keeping shoulders stable and ribs controlled.
- Progress smart: Raise elevation gradually—small changes can increase difficulty a lot.
FAQ
What does the decline kneeling push-up target most?
It primarily trains the chest with a frequent emphasis toward the upper chest due to the decline angle, while also working the triceps and front delts.
How high should I elevate my knees/shins?
Start low (a step or low bench). Choose a height where you can do controlled reps without hip sagging, shoulder pinching, or elbow flare. Higher elevation = more load on the upper body.
How do I know if my form is correct?
Your body should move like a solid plank from head to knees, elbows should track comfortably (not flared wide), and you should feel the chest/triceps working more than the neck or front shoulder.
What if my wrists hurt during push-ups?
Try push-up handles/parallettes, elevate your hands on a stable surface, or reduce volume. A neutral wrist position often feels much better for many lifters.
How do I progress from this to a full push-up?
First, build reps here with perfect control. Then move to flat full push-ups (toes on the floor) using a slightly elevated hand position if needed. Once full push-ups are solid, you can progress to full decline push-ups.
Recommended Equipment (Optional)
- Thick Exercise Mat — protects knees and improves comfort on the floor
- Push-Up Handles — reduces wrist strain and allows a deeper chest range
- Parallettes Bars — stable grip option for push-up progressions and control
- Plyometric Box / Step Platform — easy way to adjust decline height safely and consistently
- Knee Pads (Workout) — helpful if knees are sensitive during kneeling variations
Tip: Keep your elevation surface stable and non-slip. Comfort helps consistency—especially for high-quality reps.