Kneeling Push-Up to Child Pose: Form, Benefits, Sets & Tips
Learn the Kneeling Push-Up to Child Pose for beginner upper-body strength, core control, shoulder mobility, and a smooth stretch reset.
Kneeling Push-Up to Child Pose
This movement works best when each phase is performed slowly and with control. During the push-up portion, the body stays aligned from shoulders to knees while the elbows bend and extend smoothly. After that, the hips move back toward the heels as the arms reach forward into child’s pose. Therefore, the exercise is useful as a beginner strength drill, a warm-up flow, or a low-impact home workout option.
Quick Overview
| Body Part | Chest |
|---|---|
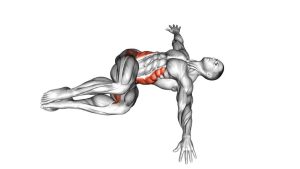
| Primary Muscle | Chest muscles, especially pectoralis major |
| Secondary Muscle | Shoulders, triceps, core, upper back, and hip-supporting muscles during the child’s pose transition |
| Equipment | No equipment required; optional exercise mat for knee and wrist comfort |
| Difficulty | Beginner-friendly bodyweight strength and mobility exercise |
Sets & Reps (By Goal)
- Beginner strength: 2–3 sets × 6–10 reps with slow, controlled movement.
- Warm-up flow: 1–2 sets × 6–8 reps at an easy pace before upper-body training.
- Mobility and control: 2–3 sets × 5–8 reps with a longer child’s pose pause.
- Home workout conditioning: 3–4 sets × 8–12 reps, resting 45–75 seconds between sets.
Progression rule: Add reps first. Then, increase push-up depth only when your shoulders, hips, and knees stay aligned through every repetition.
Setup / Starting Position
- Start on the floor: Place your knees down and position your hands about shoulder-width apart.
- Set your upper body: Keep your arms straight, shoulders stacked over the hands, and gaze slightly down.
- Align the body: Keep a straight line from shoulders to knees instead of letting the hips sag.
- Brace gently: Engage the core enough to keep the torso steady during the push-up.
- Prepare the transition: Leave enough space behind you so your hips can shift back into child’s pose.
Execution (Step-by-Step)
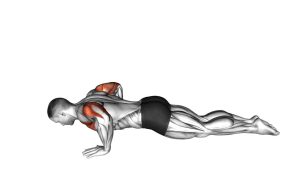
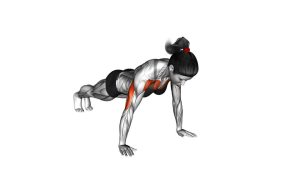
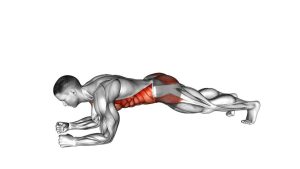
- Begin in a kneeling push-up position: Keep your knees grounded, hands planted, and body controlled.
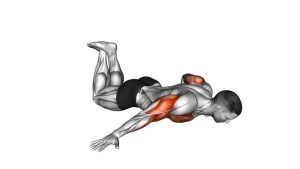
- Lower the chest: Bend your elbows and bring your chest toward the floor without dropping the hips.
- Pause briefly: Stop at a depth you can control while keeping the neck neutral.
- Press back up: Push through your hands and straighten your elbows to return to the top position.
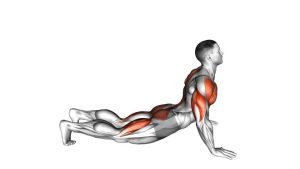
- Shift into child’s pose: Move your hips backward toward your heels while your arms stay extended forward.
- Lengthen the body: Lower the torso toward the thighs and let the back stretch gently.
- Return smoothly: Move forward again into the kneeling push-up setup and repeat the flow.
Pro Tips & Common Mistakes
- Keep the elbows controlled: Avoid letting them flare too wide during the lowering phase.
- Do not collapse the hips: Maintain a steady line from shoulders to knees during the push-up.
- Use the child’s pose as a reset: Reach the arms forward and let the torso lengthen after each press.
- Move slowly: A controlled tempo improves strength, stability, and body awareness.
- Protect the wrists: Press evenly through the hands and avoid dumping all pressure into the heel of the palm.
- Reduce depth if needed: A shorter, cleaner push-up is better than a deep rep with poor control.
- Keep breathing: Exhale as you press up, then breathe naturally as you shift back into child’s pose.
FAQ
What is the Kneeling Push-Up to Child Pose good for?
It is useful for building beginner upper-body strength while also adding a gentle stretch for the shoulders, back, and hips. Because it combines pressing and mobility, it works well in warm-ups, beginner workouts, and bodyweight training sessions.
Is this exercise easier than a regular push-up?
Yes. Since the knees stay on the floor during the push-up, the movement usually feels easier than a full push-up from the toes. Therefore, it is a good option for beginners or anyone practicing controlled push-up form.
Should I pause in child’s pose?
Yes, you can pause briefly if your goal is mobility or recovery between reps. A 1–3 second pause is enough for most people, although you can hold longer during a warm-up or cool-down.
Where should I feel this exercise?
During the push-up, you should feel the chest, shoulders, triceps, and core working. During the child’s pose phase, you may feel a gentle stretch through the upper back, shoulders, and hips.
Can I do this exercise every day?
You can perform it often if it stays comfortable and low in volume. However, if your wrists, shoulders, or elbows feel irritated, reduce frequency and focus on cleaner technique.
Recommended Equipment (Optional)
- Thick Exercise Mat — adds comfort for the knees, hands, and child’s pose position.
- Non-Slip Yoga Mat — helps keep the hands and knees stable during the flow.
- Push-Up Handles — may reduce wrist extension for users who prefer a neutral hand position.
- Exercise Knee Pad — provides extra support if kneeling pressure feels uncomfortable.
- Resistance Bands Set — useful for pairing this exercise with rows, pull-aparts, and shoulder warm-ups.
Tip: Equipment is optional. However, a soft mat can make the exercise more comfortable and easier to repeat with consistent form.