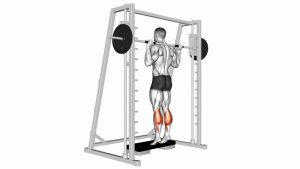
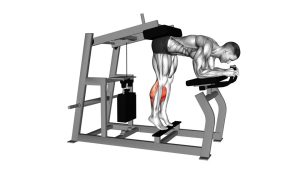
Donkey Calf Raise: Proper Form, Muscles Worked & Tips
Learn the Donkey Calf Raise with correct bench-supported form, muscles worked, sets and reps, calf-building tips, common mistakes, and safe progression.
Donkey Calf Raise
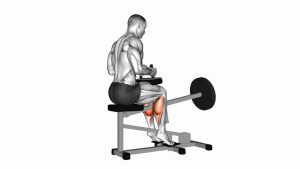
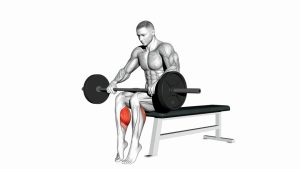
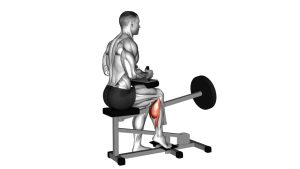
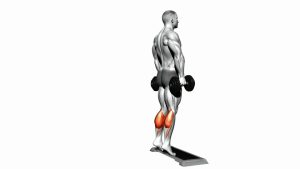
The bodyweight Donkey Calf Raise is an effective way to train the calf muscles without requiring a dedicated calf-raising machine. During the movement, both feet remain supported on an elevated platform, while the upper body stays bent forward and the hands provide balance through a stable bench.
As the heels rise, the calf muscles shorten to produce ankle plantar flexion. Conversely, lowering the heels slowly lengthens the calf muscles under controlled tension. Therefore, maintaining a consistent range of motion is more valuable than rushing through repetitions or bouncing at the bottom.
Although the movement appears simple, proper execution requires coordinated ankle control, stable foot positioning, and consistent knee alignment. Additionally, keeping the torso supported allows you to concentrate on the working calves rather than using unnecessary upper-body movement.
Quick Overview
| Body Part | Legs |
|---|---|
| Primary Muscle | Gastrocnemius (medial and lateral heads) |
| Secondary Muscle | Soleus; tibialis posterior and fibularis muscles assist with ankle and foot control. Hamstrings, glutes, and trunk stabilizers help maintain the bent-over position. |
| Equipment | Stable exercise bench and elevated calf-raising platform or step. Bodyweight resistance; optional weighted vest for progression. |
| Difficulty | Intermediate. The basic ankle movement is simple, but the elevated platform, bent-over position, and balance requirements demand controlled technique. |
Sets & Reps (By Goal)
The ideal training volume depends on your experience, available resistance, and ability to control the full movement. Because the calves regularly support bodyweight during everyday activities, they may tolerate relatively frequent training. However, recovery requirements still increase as intensity and total volume rise.
- Strength: Perform 3–4 sets of 6–10 controlled repetitions, resting 90–120 seconds between sets. Use a challenging but manageable resistance. Once bodyweight becomes easy, consider a carefully secured weighted vest while maintaining the same movement quality.
- Hypertrophy (muscle growth): Complete 3–5 sets of 8–15 repetitions, resting approximately 60–90 seconds. Use a controlled 2–3-second lowering phase and a brief contraction at the top. Additionally, select resistance that makes the final repetitions challenging without losing form.
- Muscular endurance: Perform 2–3 sets of 15–25 repetitions with approximately 30–60 seconds of rest. Maintain an even pace throughout each set. Although the repetitions are higher, avoid shortening the movement or bouncing to finish the set.
- Mobility and ankle control: Complete 2 sets of 10–12 slow repetitions using comfortable bodyweight resistance. Focus on smooth heel elevation and controlled lowering. Meanwhile, use only a pain-free range that allows the ankles to move without excessive inward or outward rolling.
- Rehab-style control: When appropriate and approved by a qualified professional, start with 1–3 sets of 6–10 easy repetitions. Use additional hand support, a smaller range of motion, and a slow tempo. Avoid loading a painful or recently injured Achilles tendon without individualized guidance.
Progression and Training Intensity
Beginners to this variation should first become comfortable with supported bodyweight repetitions. Once every repetition remains smooth, gradually add repetitions or increase the controlled lowering time. Subsequently, external resistance may be introduced when the platform, bench, and body position remain stable.
Progression rule: Prioritize full control before additional resistance. Increase repetitions, movement quality, or loading gradually, rather than changing everything at once. For most training goals, leave approximately 1–3 technically sound repetitions in reserve.
Setup / Starting Position
Correct setup is essential for keeping the movement focused on the calves. In the demonstrated variation, both feet stand on a raised platform while the torso bends forward and the hands grip a bench. Consequently, the supporting equipment must remain secure throughout the set.
- Choose a stable platform: Position a sturdy calf-raise block or elevated step on a level, non-slip surface. Ensure the platform is wide enough to support both forefeet without shifting during repetitions.
- Position the exercise bench: Place a stable flat bench in front of the platform, within comfortable arm’s reach. The bench should allow you to maintain a forward-bent position without overstretching the shoulders.
- Stand with both feet elevated: Place the balls of your feet securely on the platform with your heels extending beyond its edge. Keep your feet approximately hip-width apart, or slightly narrower if comfortable.
- Bend forward at the hips: Hinge your torso forward until your upper body approaches a horizontal position. Maintain a neutral spine rather than excessively rounding the lower back.
- Grip the bench: Extend both arms toward the bench and hold its edge firmly. Use your hands for balance and upper-body support, without aggressively pushing against the bench.
- Align your knees and ankles: Keep both knees nearly straight with a comfortable, consistent amount of extension. Additionally, position the knees in line with the feet without forcefully locking the joints.
- Stabilize your upper body: Engage your abdominal muscles lightly and keep your hips relatively still. Your neck should remain aligned with your spine, with your gaze directed naturally downward.
- Establish the bottom position: Allow your heels to descend slightly below the platform until you feel a comfortable calf stretch. Avoid forcing the ankles into an excessive range or transferring pressure onto the toes.
Foot Placement and Body Alignment
The forefoot should remain firmly supported throughout the repetition. However, the heels must have enough clearance to move freely below the platform. If the feet slide forward or the toes lose contact, stop and correct your placement.
Furthermore, keep your hips, knees, and ankles aligned as closely as your natural anatomy permits. A stable bent-over posture helps reduce unnecessary movement, allowing the calf muscles to perform the primary lifting action.
Setup tip: Test the platform and bench before starting. If either surface moves, replace or reposition the equipment rather than attempting the exercise on an unstable setup.
Execution (Step-by-Step)
The Donkey Calf Raise should be performed through a smooth, controlled ankle movement. Unlike squats or hip extensions, the primary lifting action comes from the calves. Therefore, the knees and hips should remain relatively stationary during each repetition.
- Set your starting posture: Begin with both forefeet supported on the elevated platform. Keep the torso bent forward, hands firmly gripping the bench, and knees nearly straight. Allow your heels to reach a comfortable lowered position.
- Prepare for the contraction: Maintain light abdominal tension and distribute pressure evenly across the forefeet. Keep your ankles aligned instead of rolling the feet excessively inward or outward.
- Push through the balls of your feet: Contract both calves simultaneously to lift your heels upward. As the heels rise, the ankle joints move into plantar flexion while the toes remain supported.
- Raise the heels smoothly: Continue elevating your heels through your comfortable available range. Avoid bending the knees, extending the hips, or lifting the upper body to create momentum.
- Reach the top position: Lift the heels as high as possible without sacrificing ankle alignment or balance. At this point, the gastrocnemius and soleus produce the ankle extension movement.
- Pause at peak contraction: Hold the raised position for approximately 1–2 seconds. Focus on a controlled calf contraction while keeping the hips and torso steady.
- Lower the heels gradually: Reverse the movement by allowing the ankles to dorsiflex slowly. Take approximately 2–3 seconds to lower your heels rather than dropping your bodyweight.
- Return to the stretched position: Lower the heels slightly below platform level if your ankle mobility permits. The stretch should remain comfortable, particularly around the calves and Achilles tendons.
- Repeat with consistent technique: Begin the next repetition without bouncing or changing your torso position. Continue until the prescribed repetitions are complete, maintaining controlled movement throughout the set.
Understanding the Lifting and Lowering Phases
During the upward phase, the calf muscles contract concentrically to raise the heels. Conversely, the downward phase requires eccentric muscle control as the heels descend. Both phases contribute to the training stimulus, so neither should be rushed.
Additionally, the straight-knee position places the gastrocnemius in a favorable position to contribute to plantar flexion. The soleus remains active because it also produces ankle plantar flexion, regardless of knee position.
Pro Tips & Common Mistakes
Proper technique helps keep tension on the calf muscles while limiting unnecessary stress on the ankles and Achilles tendons. Although the Donkey Calf Raise requires relatively little equipment, small positioning errors can reduce its effectiveness.
- Prioritize a controlled range of motion: Raise your heels as high as comfortably possible, then lower them gradually. Avoid using short, rushed repetitions simply to complete a larger number.
- Do not bounce at the bottom: Rapidly rebounding from the stretched position can increase tendon stress. Instead, reverse direction smoothly while maintaining control of the ankles.
- Keep the knees nearly straight: Excessive knee bending changes the exercise mechanics and reduces the intended straight-knee emphasis. Maintain a comfortable knee position without aggressively locking the joints.
- Maintain your bent-over torso: Avoid repeatedly lifting the chest or extending the hips during each repetition. The torso should remain supported while the calves produce the lifting movement.
- Control ankle alignment: Keep pressure distributed across the forefeet and avoid excessive inward or outward ankle rolling. Additionally, avoid deliberately twisting the feet to force a particular calf-muscle emphasis.
- Use the bench primarily for stability: Maintain a firm grip without pushing excessively through the arms. Excessive upper-body movement may change your balance and interrupt the calf contraction.
- Do not force the bottom stretch: Lower your heels only as far as your comfortable ankle range permits. If the Achilles tendons feel painful or irritated, reduce the depth immediately.
- Use an appropriate training tempo: A practical starting rhythm is 1–2 seconds upward, a brief top pause, and 2–3 seconds downward. Consequently, every repetition remains deliberate rather than momentum-driven.
- Progress resistance gradually: Begin with bodyweight and build consistent technique. Once the exercise becomes manageable, a securely fitted weighted vest can increase resistance without interfering with your bench support.
- Train both calves evenly: Press through both forefeet with similar effort. If one side consistently performs more work, reduce the difficulty and improve bilateral control.
Improving Calf Development Over Time
For balanced calf development, combine the Donkey Calf Raise with other calf exercises when appropriate. For example, bent-knee calf raises can provide additional soleus-focused training. Meanwhile, straight-knee variations continue to emphasize the gastrocnemius.
Furthermore, progress depends on training consistency, suitable resistance, and adequate recovery. A controlled set with meaningful muscular effort is generally more useful than performing many rushed repetitions. Therefore, track your repetitions, resistance, and range of motion as your calf strength improves.
FAQ
What muscles does the Donkey Calf Raise work?
The Donkey Calf Raise primarily works the gastrocnemius, which forms the prominent upper portion of the calf. Additionally, the soleus assists with ankle plantar flexion and provides substantial support during the movement.
Smaller muscles around the foot and ankle contribute to stability. Meanwhile, the hamstrings, glutes, and trunk stabilizers help maintain the bent-over position. Because the knees remain nearly straight, the gastrocnemius receives a greater relative emphasis than during bent-knee calf raises.
Is the Donkey Calf Raise good for building bigger calves?
Yes. Donkey Calf Raises can contribute to calf hypertrophy when performed with sufficient resistance, consistent technique, and progressive overload. The elevated platform also allows a useful range of ankle movement when mobility permits.
However, bodyweight alone may eventually become too easy for experienced lifters. Therefore, gradually increasing resistance, maintaining controlled repetitions, and combining different calf-training variations can help support continued muscle development.
What is the difference between Donkey Calf Raises and Standing Calf Raises?
Both exercises primarily train ankle plantar flexion and involve the gastrocnemius and soleus. However, a traditional Standing Calf Raise is performed with the torso upright, while the Donkey Calf Raise places the torso in a bent-over position.
In the demonstrated variation, the hands also hold a bench for stability. Although body positioning differs, both movements can develop calf strength and size. The best choice depends on equipment availability, comfort, loading options, and personal preference.
Technique and Progression Questions
Should I keep my knees straight during Donkey Calf Raises?
Yes. The knees should remain relatively straight throughout this variation, although they do not need to be forcefully locked. Maintaining knee extension helps preserve the intended gastrocnemius emphasis.
Nevertheless, avoid using excessive joint tension or changing knee position during repetitions. If your knees bend repeatedly as you rise, reduce resistance and slow the movement. Your ankles should perform most of the visible motion.
Can beginners perform Donkey Calf Raises without added weight?
Yes. Beginners can learn the movement with bodyweight, a stable platform, and reliable bench support. Start with a comfortable range and moderate repetitions. Additionally, maintain smooth ankle movement before attempting more challenging variations.
If the bent-over position is uncomfortable or difficult to stabilize, begin with a supported upright calf raise instead. Once your technique improves, you can gradually introduce the Donkey Calf Raise and eventually progress to additional resistance.
Recommended Equipment
The Donkey Calf Raise does not require specialized machinery. However, stable support equipment can make the exercise easier to perform correctly. The following five items support the demonstrated movement, safe positioning, and gradual training progression.
- Calf Raise Block / Elevated Foot Platform — provides a firm raised surface for supporting the forefeet while allowing the heels to move through a controlled range of motion.
- Flat Weight Bench — provides stable hand support during the bent-over position, helping maintain balance and consistent torso alignment.
- Non-Slip Rubber Exercise Floor Mat — offers a traction-friendly floor surface for suitable exercise equipment, provided the bench and platform remain completely stable and level.
- Adjustable Weighted Vest — allows gradual resistance progression while leaving both hands available to support the torso on the bench.
- Resistance Bands Set — useful for complementary calf strengthening, ankle-control exercises, and lower-body warm-up movements outside the primary calf-raising set.
Equipment tip: Prioritize a stable platform and secure bench before adding resistance. Choose equipment with appropriate weight capacity and non-slip contact surfaces. Additionally, ensure the elevated step cannot shift or tip during heel movement. Once your bodyweight repetitions become consistently controlled, increase resistance gradually rather than sacrificing range of motion or balance.