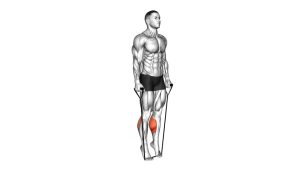
Lever Donkey Calf Raise: Proper Form, Muscles Worked & Tips
Learn the Lever Donkey Calf Raise with correct machine setup, controlled heel movement, sets by goal, calf muscles worked, common mistakes, and safety tips.
Lever Donkey Calf Raise
The Lever Donkey Calf Raise is particularly useful for developing calf strength, muscular endurance, and lower-leg hypertrophy. Because the knees remain nearly straight, the gastrocnemius works in a relatively lengthened position compared with bent-knee calf raises. Meanwhile, the soleus continues assisting throughout each repetition.
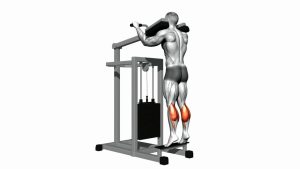
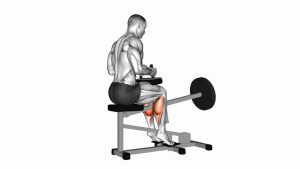
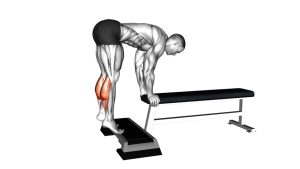
The movement shown in this exercise uses a dedicated lever machine with a padded hip support, a front forearm platform, and an elevated foot block. Therefore, the athlete can stabilize the upper body while moving both heels upward and downward against resistance. Although the machine guides the loading, proper alignment and deliberate ankle movement remain essential.
Quick Overview
| Body Part | Calves |
|---|---|
| Primary Muscle | Gastrocnemius (medial and lateral heads) |
| Secondary Muscle | Soleus, with assistance from smaller ankle and foot stabilizers |
| Equipment | Lever donkey calf raise machine with padded hip support, forearm rests, and elevated foot platform |
| Difficulty | Intermediate, depending on machine familiarity, resistance, and ankle control |
Sets & Reps (By Goal)
Recommended Training Volume
- Strength: Perform 3–4 sets × 6–8 controlled repetitions. Use challenging but manageable resistance, resting approximately 2–3 minutes between sets. Prioritize complete repetitions rather than lifting the heaviest possible weight.
- Hypertrophy: Complete 3–4 sets × 10–15 repetitions. Use a moderate-to-challenging load with a brief contraction at the top. Rest approximately 60–90 seconds while maintaining consistent ankle movement.
- Muscular endurance: Perform 2–3 sets × 18–25 repetitions. Select lighter resistance and maintain smooth, continuous control. Rest approximately 45–75 seconds between sets.
- Mobility and movement control: Complete 2 sets × 8–12 slow repetitions using very light resistance. Focus on comfortable ankle movement, gradual heel lowering, and balanced pressure across both forefeet.
- Rehab-style strengthening: When cleared by a healthcare professional, begin with 1–2 sets × 8–12 easy repetitions. Use minimal resistance and avoid painful or forced stretching. Individual rehabilitation requirements may differ considerably.
Progression and Recovery
Progression rule: First establish consistent heel height, smooth lowering, and stable ankle alignment. Once every repetition remains controlled, increase resistance gradually using the machine’s available increments. Additionally, allow sufficient recovery when performing demanding calf training alongside running, jumping, or heavy leg workouts.
Setup / Starting Position
Machine Positioning and Body Alignment
- Adjust the machine: Select a manageable starting resistance and check the lever’s height. Make sure the foot platform, hip pad, and upper-body support accommodate your body comfortably.
- Step onto the platform: Stand with both feet approximately hip-width apart. Position the balls of your feet securely on the raised foot block, allowing the heels to extend beyond its rear edge.
- Position the hip pad: Lean forward and place your hips beneath the padded lever. The pad should rest securely across the intended pelvic support area, rather than pressing uncomfortably into the lower spine.
- Support the upper body: Place your forearms on the machine’s front rests and hold the provided handles where available. Keep the torso bent forward without excessively rounding or arching the back.
- Set the knee position: Extend both legs naturally while retaining a slight, comfortable knee bend. Keep this position consistent throughout the exercise instead of repeatedly bending and straightening the knees.
- Align the feet and ankles: Point the toes generally forward and distribute pressure across the balls of both feet. Avoid allowing either ankle to roll excessively inward or outward.
- Prepare the starting position: Lower the heels gradually until you reach a comfortable calf stretch. Keep your breathing relaxed and confirm that the lever moves freely before beginning the working set.
Starting Position Checklist
Before the first repetition, confirm that both forefeet remain securely supported, the hip pad is correctly positioned, and the torso is stable. Furthermore, keep the neck aligned naturally with the spine. If the machine feels uncomfortable or unstable, readjust its settings before increasing resistance.
Execution (Step-by-Step)
Performing the Calf Raise
- Establish the starting stretch: Begin with both heels lowered to a comfortable position beneath the forefoot level. Keep your legs nearly straight while maintaining contact with the padded lever.
- Press through the forefeet: Push evenly through the balls of both feet. As the ankles extend, your heels begin rising and the gastrocnemius and soleus generate the lifting force.
- Lift the heels together: Continue raising both heels against the machine’s resistance. Meanwhile, keep the knees relatively stationary and avoid driving upward through hip extension or trunk movement.
- Reach the top position: Rise as high as your ankle mobility comfortably permits without rolling onto the outside edges of your feet. Briefly contract the calf muscles while maintaining balanced pressure.
- Pause under control: Hold the upper position for approximately one second if comfortable. Keep breathing naturally instead of holding your breath or forcefully bracing the upper body.
- Lower the heels slowly: Allow both ankles to dorsiflex as the heels descend. Control the resistance for roughly two to three seconds, rather than letting the lever drop suddenly.
- Return to the bottom position: Continue lowering until you reach a comfortable calf stretch. However, avoid forcing the heels downward beyond your available ankle range.
- Repeat the movement: Begin the next repetition smoothly, keeping both feet synchronized. Maintain your forward-leaning posture and continue until you complete the prescribed repetitions.
Contraction and Lowering Control
During the lifting phase, the calves shorten as the ankles plantar-flex. In contrast, the lowering phase challenges the muscles while they lengthen under resistance. Therefore, both phases deserve deliberate attention. A controlled descent also makes it easier to identify unwanted ankle movement or uneven pressure between the feet.
Pro Tips & Common Mistakes
Professional Technique Tips
- Prioritize ankle movement: The heels should rise because the ankles plantar-flex, not because the knees repeatedly straighten or the hips drive upward.
- Keep both forefeet supported: Maintain firm contact with the platform throughout each repetition. Consequently, you can apply force more consistently without balancing on the tips of your toes.
- Use a controlled tempo: Raise the heels smoothly, pause briefly near the top, and lower for approximately two to three seconds. This approach reduces reliance on momentum.
- Maintain stable knee alignment: Keep a slight natural knee bend without turning the movement into a squat. Because the knees remain relatively extended, the gastrocnemius can contribute strongly.
- Distribute pressure evenly: Press through both forefeet instead of rolling excessively toward the inner or outer edges. Additionally, keep the heels moving in a consistent path.
- Control the bottom stretch: Allow the heels to descend gradually. However, never force a deeper stretch through sharp discomfort or attempt to bounce out of the lowest position.
- Maintain contact with the lever: Keep the padded support positioned securely across the hips. Meanwhile, avoid unnecessary twisting, shrugging, or shifting of the upper body.
Common Mistakes to Avoid
- Using excessive resistance: Too much weight often shortens the range of motion and encourages bouncing. Instead, select a load that permits consistent heel travel.
- Rushing the lowering phase: Dropping the heels quickly reduces muscular control and may increase unwanted stress around the Achilles tendon.
- Bending the knees repeatedly: Turning each repetition into a knee-extension movement changes the intended technique. Therefore, keep the legs nearly stationary.
- Rolling the ankles: Excessive inward or outward movement can reduce stability. Reduce the load if you cannot maintain comfortable foot alignment.
- Moving the torso excessively: Raising the upper body away from its support shifts attention away from the calves. Instead, maintain a stable forward lean.
- Forcing maximum heel depth: A deeper stretch is not automatically better. Use only the ankle range that remains comfortable and controlled.
FAQ
What muscles does the Lever Donkey Calf Raise work?
The Lever Donkey Calf Raise primarily trains the gastrocnemius, including its medial and lateral heads. Additionally, the soleus contributes to ankle plantar flexion throughout the movement. Because the knees remain nearly extended, the gastrocnemius works in a relatively lengthened position. Smaller ankle and foot muscles also help maintain stability.
Is the Lever Donkey Calf Raise good for building bigger calves?
Yes. The exercise can support calf hypertrophy when performed with appropriate resistance, consistent training, and sufficient recovery. Furthermore, controlled repetitions allow the calf muscles to work through a comfortable range of motion. For balanced lower-leg development, combine straight-knee calf exercises with bent-knee variations that emphasize the soleus.
What is the difference between donkey calf raises and standing calf raises?
Both exercises train ankle plantar flexion and strongly involve the gastrocnemius when the knees remain relatively straight. However, the donkey variation uses a forward-leaning torso supported by the machine’s padded lever. In contrast, conventional standing calf raises use a more upright position. Neither variation is automatically superior; comfort, available equipment, and consistent technique are important considerations.
Should I keep my knees straight during the exercise?
Keep the knees nearly straight with a slight natural bend, rather than forcefully locking them. This position allows the gastrocnemius to remain involved while maintaining comfortable joint alignment. Moreover, the knee angle should stay consistent throughout each repetition. If your knees repeatedly bend and straighten, reduce the resistance and concentrate on ankle movement.
How much weight should I use for the Lever Donkey Calf Raise?
Begin with a load that allows controlled heel lifting and lowering without bouncing or shifting your body position. For example, a moderate resistance may suit sets of 10–15 repetitions. Once you can complete every repetition with consistent technique, increase the load gradually. However, machine resistance varies between models, so there is no universal starting weight.
Recommended Equipment
- Donkey Calf Raise Machine — dedicated machine for supported, resistance-based donkey calf raises; check pad placement, load capacity, and machine dimensions before purchasing
- Non-Slip Calf Raise Block — provides an elevated forefoot surface for controlled bodyweight calf raises and alternative calf-strengthening exercises
- Adjustable Calf Stretch Slant Board — supports gradual calf stretching and ankle mobility practice outside heavy resistance sets
- Resistance Bands Set — useful for lighter plantar-flexion exercises, ankle-control drills, and supplementary lower-leg training
- High-Density Foam Roller — optional tool for gentle calf self-massage and post-workout comfort when used appropriately
Tip: The dedicated lever machine is the primary equipment for this exercise. Other products support alternative calf exercises, mobility, or recovery. Therefore, prioritize secure machine positioning and controlled technique before purchasing additional accessories.