Standing Elevated Calf Stretch: Form, Benefits & Tips
Learn the Standing Elevated Calf Stretch on a step to improve calf flexibility and ankle mobility. Get safe setup instructions, hold times, tips, and FAQs.
Standing Elevated Calf Stretch
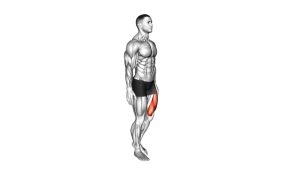
This exercise is useful for improving lower-leg flexibility and maintaining comfortable ankle movement. It can complement walking, running, cycling, strength training, and general mobility routines. Additionally, the staggered stance helps develop awareness of ankle positioning and balance.
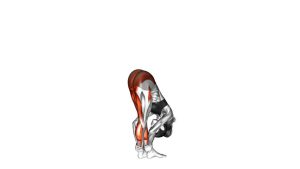
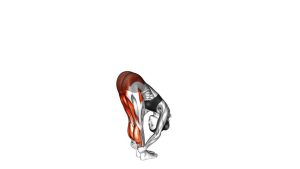
During the stretch, the rear leg remains relatively straight while the front foot rests on a higher step. Consequently, the gastrocnemius receives particular emphasis because it crosses both the knee and ankle joints. Meanwhile, the deeper soleus also contributes to the stretching sensation as the ankle moves into dorsiflexion.
For the best results, focus on gentle tension, steady breathing, and proper alignment. You should feel a manageable stretch through the calf, not sharp pain or uncomfortable pressure around the Achilles tendon.
Quick Overview
| Body Part | calves |
|---|---|
| Primary Muscle | Gastrocnemius and soleus (calf muscles), with particular gastrocnemius emphasis when the stretching knee remains straight |
| Secondary Muscle | Other ankle plantar flexors, including tibialis posterior, with the foot, hip, and core stabilizers assisting balance |
| Equipment | Stable staircase, exercise step, or elevated platform; optional handrail for balance support |
| Difficulty | Beginner — requires basic standing balance, comfortable ankle mobility, and controlled positioning |
Sets & Reps (By Goal)
Recommended Stretching Duration
- Strength training (post-workout): 2–3 sets × 20–30-second holds per leg, resting 15–30 seconds between holds.
- Hypertrophy training (cool-down): 2–3 sets × 25–40-second holds per leg, using gentle, consistent tension.
- Endurance and general recovery: 2–3 sets × 20–45-second holds per leg, depending on comfort and fatigue.
- Mobility and flexibility: 2–4 sets × 20–30-second holds per leg, gradually improving comfortable range.
- Rehab-style stretching: 1–2 sets × 10–20-second gentle holds per leg, only when appropriate for the individual and professionally advised if recovering from injury.
Progression rule: Begin with shorter holds and comfortable positioning. As flexibility improves, gradually increase hold duration before attempting a deeper stretch. However, never force additional range or use bouncing movements to increase intensity.
Training note: These are general stretching recommendations. Longer static holds are usually better suited to dedicated mobility work or cool-downs. Before explosive activities, combine a brief, comfortable stretch with an appropriate dynamic warm-up.
Setup / Starting Position
Platform and Foot Placement
- Choose a stable staircase: Stand beside or on a secure stepped platform. Ensure the steps are dry, level, and free from objects that could cause slipping.
- Position the front foot: Place one foot securely on a higher step, allowing the front knee to bend naturally. Keep the foot supported rather than balancing on the toes alone.
- Position the stretching leg: Extend the opposite leg behind and below the elevated foot. Keep this leg relatively straight while maintaining a comfortable knee position.
- Support the rear foot: Place the stretching foot securely on the lower step or floor. Keep its heel in contact with the support instead of deliberately lifting onto the toes.
- Align the feet: Point both feet generally forward, avoiding excessive inward or outward rotation at the ankle.
Upper-Body Position and Balance
Maintain an upright torso with your head balanced over your shoulders. Furthermore, keep the abdominal muscles lightly engaged without holding your breath.
Allow your arms to rest comfortably beside the body, as demonstrated in the exercise. Alternatively, use a stable handrail if additional balance support is necessary. Your hips should remain generally forward rather than rotating toward either side.
Starting-position tip: Before increasing the stretch, confirm that both feet feel secure and your weight is distributed comfortably. A lower step is preferable when ankle mobility or balance is limited.
Execution (Step-by-Step)
Entering the Calf Stretch
- Establish the staggered stance: Stand with one foot on the higher step and the opposite foot behind on a lower supported surface. Check that your body is balanced before proceeding.
- Keep the rear leg extended: Maintain a relatively straight knee on the stretching side. This position helps emphasize the gastrocnemius as the ankle moves into dorsiflexion.
- Maintain heel contact: Keep the stretching heel comfortably supported while directing your body slightly forward if needed. Avoid lifting the heel or allowing the ankle to roll inward.
- Increase tension gradually: Allow a small, controlled shift of body weight until you feel a gentle pulling sensation along the rear calf. Do not push into a painful position.
Holding and Releasing the Position
- Hold the stretch: Maintain the position for your selected duration, usually 20–30 seconds. Keep the movement static rather than repeatedly raising and lowering the heel.
- Breathe naturally: Take slow, comfortable breaths while keeping your shoulders relaxed. Additionally, avoid clenching the jaw or unnecessarily tightening the upper body.
- Release gradually: Reduce the forward weight shift and return to a comfortable neutral stance. Avoid suddenly pushing off the rear foot or stepping away without balance.
- Switch legs: Reverse your foot positions and repeat the same stretching duration on the opposite calf. Maintain equal attention to alignment and comfort on both sides.
Important: The uploaded animation mainly demonstrates a maintained stretching position. The suggested holding duration and switching of legs are practical training instructions, rather than separate repetitions visibly demonstrated in the video.
Pro Tips & Common Mistakes
Professional Stretching Tips
- Prioritize heel contact: Keeping the stretching heel securely supported helps establish a consistent ankle position and controlled calf stretch.
- Keep the stretching knee straight: A relatively extended knee increases gastrocnemius emphasis. However, avoid aggressively locking the knee backward.
- Use gradual tension: Increase the stretching sensation progressively rather than forcing your body into the deepest possible position.
- Control your breathing: Slow breathing encourages a relaxed stretching position and reduces unnecessary muscular bracing.
- Maintain neutral foot alignment: Keep the heel, ankle, and toes aligned naturally instead of twisting the stretching foot outward.
- Adjust the stance distance: A comfortable distance between the feet helps maintain balance while allowing an appropriate calf stretch.
Common Mistakes to Avoid
- Lifting the stretching heel: Rising onto the toes reduces the intended dorsiflexion stretch. Therefore, maintain comfortable heel contact whenever possible.
- Bending the rear knee excessively: A strongly bent knee reduces the relative emphasis on the gastrocnemius and changes the stretching characteristics.
- Using an unstable platform: Loose or slippery steps can compromise balance. Always select a secure surface and use a handrail when appropriate.
- Bouncing into the stretch: Repeated, forceful movements can increase discomfort. Instead, maintain gentle and consistent stretching tension.
- Leaning excessively forward: Large trunk movements may reduce balance and make ankle positioning harder to control. Keep the torso relatively upright.
- Ignoring Achilles tendon discomfort: Sharp or localized tendon pain is not a normal stretching target. Consequently, reduce the intensity or stop rather than forcing additional range.
- Rushing between legs: Switching positions without regaining balance increases the chance of slipping. Return to a stable stance first.
Pro tip: If you want to emphasize the deeper soleus muscle, a separate calf-stretch variation with a moderately bent rear knee can be useful. However, the straight-knee position better reflects the exercise demonstrated here.
FAQ
Muscles Worked and Exercise Benefits
What muscles does the Standing Elevated Calf Stretch target?
The Standing Elevated Calf Stretch primarily targets the gastrocnemius and soleus, which form the major calf muscle group. Because the rear knee stays relatively straight, the gastrocnemius receives particular emphasis. Additionally, the Achilles tendon and surrounding ankle tissues experience controlled tension during the stretching position.
Can this exercise improve ankle mobility?
Yes, regular calf stretching can help improve available ankle dorsiflexion when calf muscle tightness contributes to restricted movement. As a result, it may support comfortable movement during walking, squatting, and other lower-body activities. However, ankle mobility also depends on joint structure, strength, and individual movement limitations.
Is the Standing Elevated Calf Stretch suitable for beginners?
Yes, this stretch can be appropriate for beginners who can safely maintain a staggered standing position. Start with a low step, comfortable foot placement, and short holds. Furthermore, use a handrail or stable support when necessary. Beginners should prioritize smooth positioning over maximum stretching depth.
Stretching Technique and Frequency
How long should I hold the Standing Elevated Calf Stretch?
A practical starting point is 20–30 seconds per leg for two or three sets. However, shorter holds may be more suitable when flexibility is limited or the position feels unfamiliar. Gradually increase the duration as comfort improves. Throughout each hold, maintain gentle tension without bouncing or forcing the ankle.
Should I keep my stretching knee straight or bent?
Keep the stretching knee relatively straight to emphasize the gastrocnemius, as shown in the demonstrated position. In contrast, bending the knee reduces gastrocnemius tension and places greater relative emphasis on the soleus. Both variations can be useful, although they should be treated as different stretching positions rather than identical movements.
How often can I perform this calf stretch?
Gentle calf stretching can fit into a regular flexibility routine several days per week. For example, you may include it after lower-body workouts or during dedicated mobility sessions. Nevertheless, adjust frequency according to comfort, recovery, and training demands. Avoid repeatedly stretching through persistent soreness or pain.
Should I perform repeated heel drops during this exercise?
No. The demonstrated exercise primarily uses a static stretching position. Once the calf reaches a comfortable stretch, maintain that position without repeatedly lowering and lifting the heel. Dynamic heel drops and eccentric calf raises are different exercises with different training purposes.
Who should be cautious when performing this stretch?
People with an acute calf strain, recent ankle injury, significant balance problems, or symptomatic Achilles tendon conditions should avoid forcing this position. Additionally, anyone experiencing sudden calf swelling, severe pain, or unexplained symptoms should seek appropriate medical assessment before exercising. A qualified professional can recommend suitable modifications.
Recommended Equipment
- Adjustable Aerobic Step Platform — provides a stable elevated surface for practicing step-based calf stretching. Choose a wide, non-slip platform with an appropriate height.
- Non-Slip Stair Treads — help improve traction on suitable staircase surfaces and reduce the risk of slipping during positioning.
- Adjustable Calf Stretch Slant Board — offers an alternative elevated stretching surface for controlled calf flexibility and ankle mobility work.
- Non-Slip Exercise Mat — provides a comfortable training surface for complementary stretching and mobility exercises. Ensure any step used remains stable on the floor.
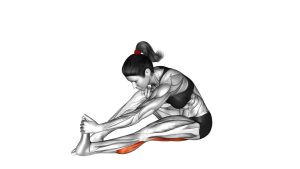
- Stretching Strap with Loops — supports alternative seated or lying calf stretches when standing balance or access to steps is limited.
Equipment tip: The most important requirement is a stable, non-slip elevated surface. Additional accessories are optional rather than necessary. Select equipment that supports your current flexibility, balance, and available training space.