Standing Toe-Down Hamstring Stretch: Form, Benefits, Tips & FAQ
Learn the Standing Toe-Down Hamstring Stretch to improve hamstring flexibility, hip hinge control, and lower-body mobility with safe form tips.
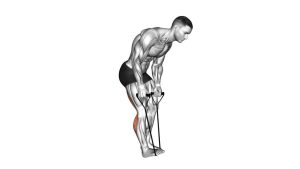
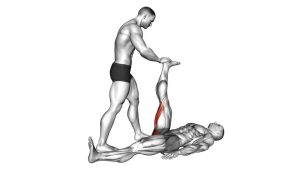
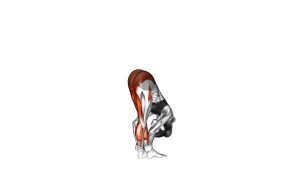
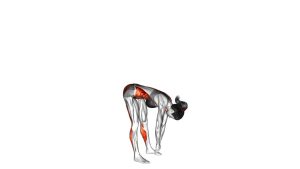
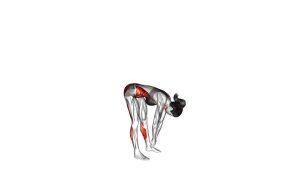
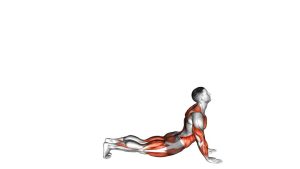
Standing Toe-Down Hamstring Stretch
This stretch works best when it is performed with a smooth hip hinge, relaxed breathing, and a controlled forward reach. Because the toes point downward, the ankle stays more plantarflexed, which can shift the sensation away from the calf and more toward the hamstring. Use this drill before training, after lower-body sessions, or during mobility work when you want a simple standing stretch for the posterior thigh.
Quick Overview
| Body Part | Hamstrings |
|---|---|
| Primary Muscle | Hamstrings |
| Secondary Muscle | Glutes, calves, hip stabilizers, lower back stabilizers |
| Equipment | No equipment required |
| Difficulty | Beginner |
Sets & Reps (By Goal)
- General flexibility: 2–4 sets × 20–40 seconds per leg
- Pre-workout mobility: 1–3 sets × 6–10 controlled reps per leg
- Post-workout recovery: 2–3 sets × 30–45 seconds per leg
- Daily mobility reset: 1–2 sets × 20–30 seconds per leg with relaxed breathing
Progression rule: Increase time under stretch before increasing depth. A clean hip hinge with mild tension is more useful than forcing a deeper reach with a rounded back.
Setup / Starting Position
- Stand tall: Place your feet about hip-width apart and keep your posture upright.
- Extend one leg forward: Step the working leg slightly in front of you with the knee mostly straight but not locked.
- Point the toes down: Keep the front foot in a toe-down position to reduce calf emphasis and focus more on the hamstrings.
- Brace lightly: Keep your ribs stacked, core gently active, and shoulders relaxed.
- Prepare to hinge: Think about pushing your hips back rather than folding from the spine.
Tip: If balance is difficult, place one hand on a wall, bench, rack, or chair so you can focus on the stretch instead of wobbling.
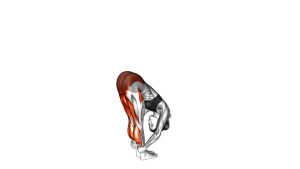
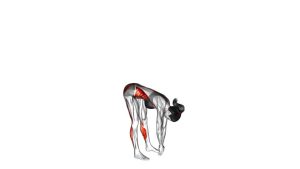
Execution (Step-by-Step)
- Start from a tall position: Keep your chest open, spine neutral, and front leg extended.
- Hinge at the hips: Push your hips backward while letting your torso move forward over the front leg.
- Keep the toes pointed down: Maintain the toe-down position as you descend so the stretch stays focused on the hamstrings.
- Reach only as far as you can control: Move your hands toward the front leg without rounding aggressively through the back.
- Pause and breathe: Hold the stretch while breathing slowly, keeping the knee soft and the neck relaxed.
- Return with control: Drive through the standing leg, bring the hips forward, and return to an upright position.
- Repeat on the other side: Match the same tempo, posture, and range of motion.
Pro Tips & Common Mistakes
- Keep the movement hip-driven: The hips should travel back as the torso folds forward.
- Avoid locking the knee: Keep a small softness in the working knee to reduce joint stress.
- Do not bounce: Use slow breathing and steady tension instead of quick pulses.
- Do not round hard through the back: A small torso lean is fine, but the stretch should come from the hamstrings.
- Keep the toes down: Pointing the toes down is the defining feature of this variation.
- Use support when needed: Holding a wall or rack can improve balance and stretch quality.
- Stay within a mild-to-moderate stretch: More range is not better if it causes pain or compensation.
FAQ
What muscles does the Standing Toe-Down Hamstring Stretch target?
It mainly targets the hamstrings, especially the back of the thigh. The glutes, calves, and hip stabilizers also assist with balance and posture.
Why are the toes pointed down during this stretch?
Pointing the toes down reduces the calf stretch bias and helps place more attention on the hamstrings. This makes it different from a toe-up hamstring stretch, which often adds more calf and nerve tension.
Should my back stay completely straight?
Your spine should stay controlled and mostly neutral. The main movement should come from the hips. If your lower back rounds heavily, reduce the depth and focus on pushing the hips backward.
Is this stretch better before or after a workout?
It can be used before a workout as a light dynamic mobility drill or after training as a slower flexibility stretch. Before training, keep the hold shorter and more active.
Who should be careful with this exercise?
Anyone with sharp hamstring pain, sciatic symptoms, recent muscle strain, or lower-back pain should use a smaller range of motion and avoid forcing the stretch.
Recommended Equipment (Optional)
- Yoga Mat — useful for comfortable mobility sessions and floor-based hamstring work
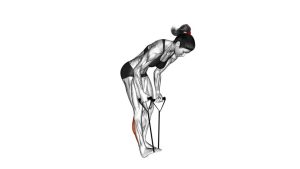
- Stretching Strap — helpful for deeper hamstring stretching variations and controlled flexibility work
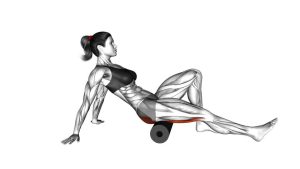
- Foam Roller — useful for warming up the hamstrings, calves, and glutes before stretching
- Massage Ball — helps target tight areas around the glutes, calves, and posterior chain
- Balance Pad — optional tool for improving ankle, hip, and single-leg stability
Tip: Equipment is optional. This stretch can be performed effectively with no tools as long as the hip hinge, toe-down position, and controlled breathing are maintained.