Push-Up Row: Proper Form, Muscles Worked, Sets, Tips & FAQ
Learn how to do the Push-Up Row with proper form. Discover muscles worked, setup tips, sets and reps by goal, common mistakes, FAQs, and recommended Amazon equipment.
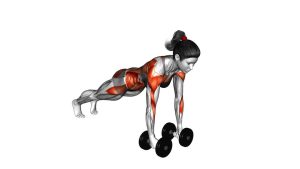
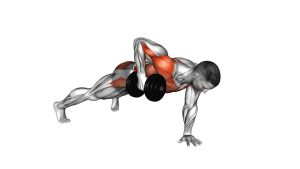
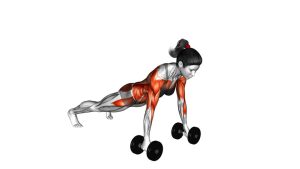
Push-Up Row
This exercise is especially useful for lifters who want to build upper-body strength and improve full-body stability at the same time. The pressing phase develops the chest, triceps, and front delts, while the rowing phase targets the lats, upper back, rear delts, and biceps. Because you are supporting yourself on one arm during each row, the core and glutes must work hard to keep the body square and controlled.
Quick Overview
| Body Part | Back |
|---|---|
| Primary Muscle | Pectorals, lats, and core stabilizers |
| Secondary Muscle | Anterior deltoids, rear deltoids, triceps, biceps, rhomboids, obliques, and glutes |
| Equipment | Two dumbbells |
| Difficulty | Intermediate to advanced due to the balance and anti-rotation demands |
Sets & Reps (By Goal)
- General strength: 3–4 sets × 5–8 reps per side using controlled form and full-body tension
- Muscle building: 3–4 sets × 8–12 reps per side with moderate dumbbells and steady tempo
- Core stability and conditioning: 2–4 sets × 6–10 reps per side with lighter dumbbells and minimal torso rotation
- Movement quality practice: 2–3 sets × 4–6 clean reps per side with extra focus on alignment
Progression rule: Add reps or improve control before increasing load. When you can keep the hips level and the row smooth on every rep, then move up in weight gradually.
Setup / Starting Position
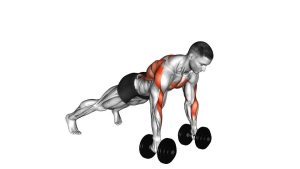
- Place the dumbbells on the floor: Set them shoulder-width apart with stable flat sides or hex heads so they do not roll.
- Grip the handles firmly: Get into a high plank with each hand on a dumbbell and your shoulders stacked over your wrists.
- Set the lower body: Extend the legs behind you and place the feet slightly wider than hip-width for better balance.
- Brace the torso: Squeeze the glutes, tighten the abs, and keep the body in one straight line from head to heels.
- Find a neutral neck: Look slightly ahead of the dumbbells so the head stays aligned with the spine.
A wider foot stance makes the exercise more stable. Narrower feet increase the anti-rotation challenge.
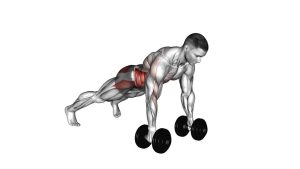
Execution (Step-by-Step)
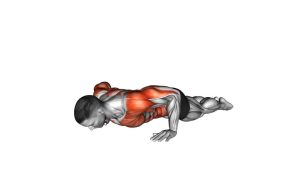
- Lower into the push-up: Bend the elbows and bring the chest toward the floor while keeping the torso rigid and the hips level.
- Press back up: Drive through both hands until you return to a strong plank position with fully extended arms.
- Shift and stabilize: Transfer slightly into one arm and both feet without letting the shoulders collapse.
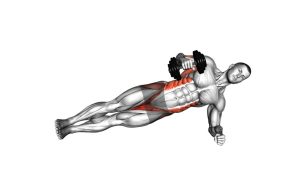
- Row the first dumbbell: Pull one dumbbell toward the ribcage with the elbow close to the body, squeezing the upper back at the top.
- Lower with control: Place the dumbbell back on the floor gently without rocking the torso.
- Repeat on the other side: Row the opposite dumbbell in the same controlled path while keeping the hips as square as possible.
- Reset the plank: Return to a stable high plank before beginning the next repetition cycle.
Pro Tips & Common Mistakes
- Use hex dumbbells if possible: They are more stable on the floor and safer for support work.
- Keep the feet wide enough: A slightly wider base helps you resist rotation during the row.
- Row to the hip or lower ribcage: Pulling too high can shift tension away from the lats and make the shoulder compensate.
- Do not rush the sequence: Fast reps usually turn into sloppy reps. Stay controlled on both the push-up and row.
- Avoid twisting the torso: The body should resist rotation, not exaggerate it.
- Do not let the hips sag: Keep the abs and glutes engaged throughout the set.
- Reduce load if needed: Many lifters use weights that are too heavy for clean anti-rotation control.
FAQ
What muscles does the Push-Up Row work?
It primarily works the chest, lats, and core, while also training the shoulders, triceps, biceps, upper back, obliques, and glutes. It is one of the better bodyweight-plus-dumbbell movements for combining pressing, pulling, and stabilization.
Is the Push-Up Row the same as a renegade row?
Not exactly. A standard renegade row usually refers to the plank row portion only, while the Push-Up Row adds a push-up before the alternating rows.
Should I use heavy or light dumbbells?
Start lighter than you think. This exercise is limited by stability and control more than raw rowing strength. Use a weight that allows you to keep the hips square and the push-up clean.
What if I cannot do the full movement yet?
You can modify it by doing incline push-ups on dumbbells, knee push-ups followed by rows, or by separating the push-up and row into two simpler exercises until your stability improves.
Is this exercise good for fat loss workouts?
Yes. Because it combines multiple muscle groups and keeps the core under constant tension, it can raise training density and energy demand. It still works best when done with proper form rather than speed alone.
Recommended Equipment
- Hex Dumbbells — the best option for stable hand support and controlled rows during this exercise
- Adjustable Dumbbells — practical for progressing load without buying multiple fixed pairs
- Exercise Mat — improves comfort under the feet and helps protect flooring during the set
- Wrist Wraps — useful for lifters who need extra wrist support during plank-based pressing movements
- Push-Up Handles — a useful alternative tool for improving wrist comfort when practicing the push-up pattern separately
Tip: Stable equipment matters a lot here. Wobbling dumbbells can break your rhythm and make the exercise harder to control than it needs to be.