Lying Prone W-to-Y: Proper Form, Sets, Tips & FAQ
Learn how to do the Lying Prone W-to-Y for better upper-back activation, shoulder stability, and posture. Includes form tips, sets and reps, common mistakes, FAQs, and recommended equipment.
Lying Prone W-to-Y
This exercise works best when you move slowly and stay precise. You should feel the muscles around the shoulder blades and upper back doing the work, especially the mid traps, lower traps, rear delts, and other stabilizers. The range of motion does not need to be huge. A smaller, cleaner movement is usually better than forcing the arms higher and losing scapular control.
Quick Overview
| Body Part | Back |
|---|---|
| Primary Muscle | Lower trapezius and middle trapezius |
| Secondary Muscle | Rear deltoids, rhomboids, rotator cuff stabilizers |
| Equipment | None; exercise mat or bench optional |
| Difficulty | Beginner to intermediate |
Sets & Reps (By Goal)
- Activation / warm-up: 2–3 sets × 8–12 reps with slow control and short pauses
- Posture and scapular control: 2–4 sets × 10–15 reps with light effort and perfect form
- Endurance and shoulder stability: 3 sets × 12–20 reps with a 1–2 second hold in the Y position
- Recovery / movement quality: 1–2 easy sets × 8–10 reps, focusing on smooth motion rather than fatigue
Progression rule: Add reps first, then add a brief pause in the top position, and only later increase difficulty with light resistance or longer time under tension.
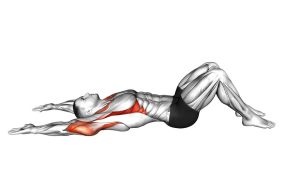
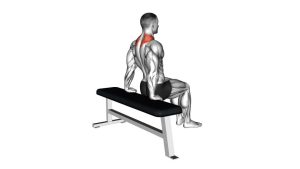
Setup / Starting Position
- Lie face down: Position yourself on the floor, an exercise mat, or a flat bench with your body long and relaxed.
- Set the head and neck: Keep the neck neutral and the forehead close to the floor. Avoid cranking the head upward.
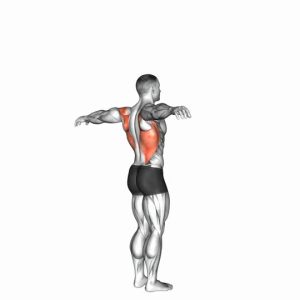
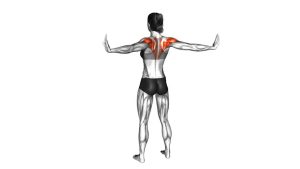
- Create the W shape: Bend the elbows and place the upper arms out to the sides so the arms form a W-like shape.
- Brace lightly: Tighten the abs gently and keep the ribs from flaring so the lower back does not overarch.
- Pull shoulders down: Before lifting, draw the shoulder blades slightly back and down to prepare the upper back.
Tip: If the floor feels uncomfortable, use a cushioned mat or perform the movement on an incline bench for a slightly different angle.
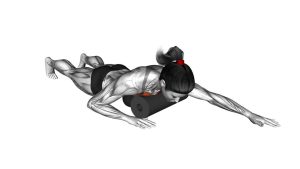
Execution (Step-by-Step)
- Start in the W position: Keep the elbows bent, shoulders packed, and chest lightly supported by the floor or bench.
- Lift with control: Gently raise the arms and upper chest just enough to create tension in the upper back without aggressively arching.
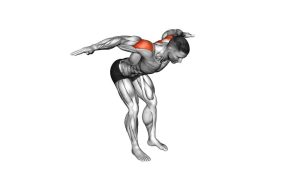
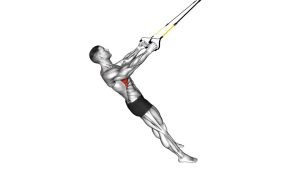
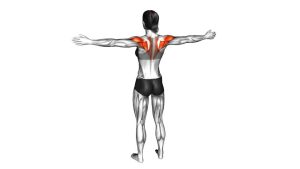
- Move from W to Y: Extend the arms overhead in a diagonal path until they form a Y shape, keeping the movement smooth and deliberate.
- Pause briefly: Hold the top position for 1–2 seconds while keeping the shoulders away from the ears.
- Return to W: Bring the arms back down and bend the elbows again under control, returning to the starting W position.
- Repeat evenly: Continue each rep with the same tempo, avoiding rushed transitions or swinging.
Pro Tips & Common Mistakes
- Lead with the upper back: Think about moving the shoulder blades first, then the arms.
- Keep the neck neutral: Looking too far forward can create unnecessary neck tension.
- Do not shrug: Keep the shoulders depressed instead of letting them creep toward the ears.
- Use a small clean range: Better control beats extra height.
- Avoid momentum: Swinging the arms makes the exercise easier but less effective.
- Do not overarch the spine: A slight chest lift is fine, but the movement should not turn into a low-back extension drill.
- Pause at the top: A short isometric hold improves awareness of the target muscles.
FAQ
What muscles does the Lying Prone W-to-Y target?
It mainly targets the middle and lower traps, while also training the rear delts, rhomboids, and smaller shoulder stabilizers.
Is this a strength exercise or a corrective drill?
It is mostly a movement-quality and activation exercise. It can build muscular endurance, but its main value is improving posture, scapular mechanics, and shoulder control.
Should I feel this more in the upper traps?
No. If you mostly feel shrugging or neck tension, your upper traps may be taking over. Reduce the range of motion and focus on keeping the shoulders down.
Can beginners do this exercise?
Yes. This is a great beginner-friendly drill because it uses bodyweight and teaches better shoulder-blade control. Start with small, slow reps and avoid forcing the lift height.
How can I make it harder?
You can increase the pause in the top position, add more reps, slow the tempo, or eventually use very light resistance. Keep form quality as the priority.
Recommended Equipment (Optional)
- Exercise Mat — adds comfort and support for floor-based prone drills
- Yoga Mat — useful for home workouts, mobility work, and bodyweight back exercises
- Resistance Bands Set — helpful for pairing this drill with rows, pull-aparts, and shoulder activation work
- Foam Roller — useful for thoracic mobility and recovery before or after upper-back training
- Light Dumbbells — optional progression tool for advanced versions when bodyweight becomes too easy
Tip: Keep the loading light for this kind of exercise. It works best as a controlled activation drill, not a heavy momentum-based movement.