Bodyweight Standing Straight-Arm Chest Fly: Form, Sets, Tips & FAQ
Learn how to do the Bodyweight Standing Straight-Arm Chest Fly to activate and strengthen the chest with no equipment. Step-by-step form, sets by goal, common mistakes, FAQs, and optional gear.
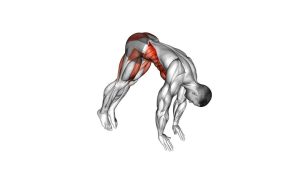
Bodyweight Standing Straight-Arm Chest Fly
This movement is best treated as a mind-muscle connection drill: smooth tempo, moderate range, and shoulder control. Keep your arms long (slight elbow softness is fine), and avoid turning it into a swinging arm circle. Done well, it feels like the chest is “pulling” the arms together.
Quick Overview
| Body Part | Chest |
|---|---|
| Primary Muscle | Pectoralis major |
| Secondary Muscle | Anterior deltoids, serratus anterior, biceps (stabilization), core stabilizers |
| Equipment | None (optional: resistance band, sliders, suspension straps) |
| Difficulty | Beginner (excellent for warm-ups, activation, and technique) |
Sets & Reps (By Goal)
- Warm-up / activation: 2–3 sets × 10–15 reps (slow + controlled, 30–45 sec rest)
- Mind-muscle connection (pre-press primer): 2–4 sets × 8–12 reps (1–2 sec squeeze, 45–60 sec rest)
- Endurance / mobility-style work: 2–3 sets × 15–25 reps (easy effort, smooth tempo)
- Rehab-style control (very light effort): 1–3 sets × 6–10 reps (3–5 sec pause, stop before fatigue)
Progression rule: First increase control (slower tempo + cleaner squeeze). Then add a light band or longer pauses. Avoid “chasing burn” with shoulder shrugging.
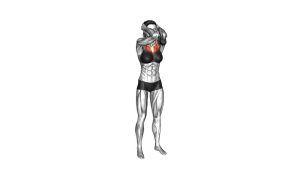
Setup / Starting Position
- Stand tall: Feet about shoulder-width, knees softly bent, ribs stacked over hips.
- Set shoulders: Pull shoulder blades slightly down and back (no aggressive pinching).
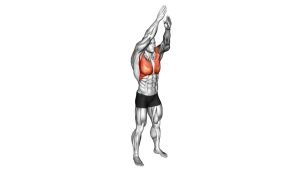
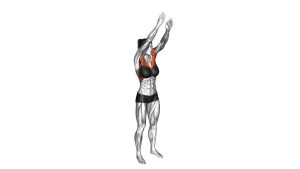
- Arms out wide: Raise arms to about shoulder height in a “T” shape, palms facing forward or slightly inward.
- Soft elbows: Keep arms mostly straight with a small bend (avoid locking out hard).
- Brace lightly: Tighten core just enough to prevent torso swaying.
Tip: If shoulder height feels uncomfortable, lower the arms slightly (30–45° down from shoulder level) and keep the range pain-free.
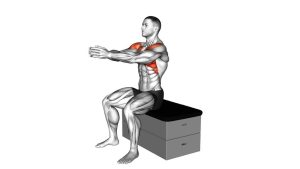
Execution (Step-by-Step)
- Start open: Arms wide, chest lifted, shoulders relaxed and stable.
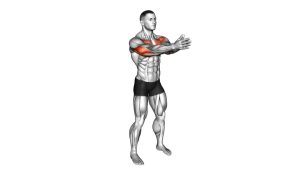
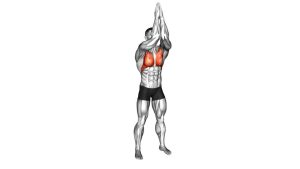
- Arc forward: Bring arms forward in a wide fly motion, keeping elbows nearly straight.
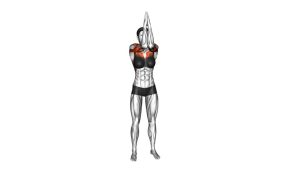
- Squeeze the chest: Hands meet or nearly meet in front of the chest at about mid-chest height.
- Pause: Hold 1–2 seconds while breathing calmly—feel the pecs contract.
- Return slowly: Open the arms back out under control to a comfortable stretch (no bouncing).
Pro Tips & Common Mistakes
- Keep the arc consistent: Think “fly” (wide arc), not “swing” (loose circles).
- Don’t shrug: Keep shoulders away from the ears to avoid trap takeover.
- Use a soft elbow: Slight bend is safer and more controllable than locked elbows.
- Control the return: The opening phase should be slow—don’t let the arms snap back.
- Adjust arm angle: Slightly lower than shoulder height often feels better for the shoulders.
- Upgrade smartly: Add a light resistance band or pauses before adding speed or range.
FAQ
Where should I feel this exercise?
Mostly in the chest (pecs) as you bring the arms together and squeeze. You’ll also feel light work in the front shoulders and serratus, but it shouldn’t feel like shoulder pinching or neck tension.
Do my elbows have to be perfectly straight?
No. A small, soft bend is ideal for control and joint comfort. Avoid turning it into a press by bending too much.
Is this a strength builder or a warm-up?
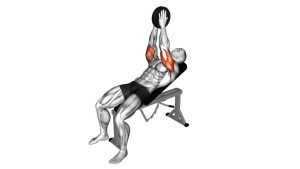
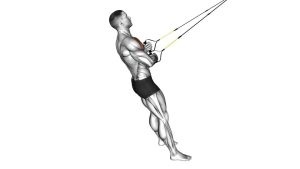
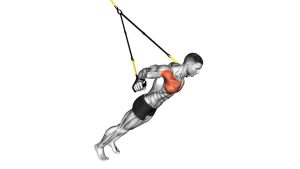
It’s best as a warm-up / activation drill or technique primer. For more challenge, add a light band, pauses, or do a harder variation (band fly, cable fly, or sliders).
What if my shoulders feel uncomfortable?
Reduce the range of motion, lower the arm angle slightly, and keep the shoulders down and stable. If discomfort persists, skip the drill and choose a shoulder-friendly chest option.
How do I make it harder without weights?
Add a resistance band, slow the tempo (3–4 seconds on the return), increase the pause at the squeeze, or use sliders (push-up fly variation) if you’re ready for more load.
Recommended Equipment (Optional)
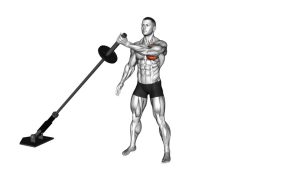
- Resistance Bands Set (with Door Anchor) — easy way to add load and turn this into a true standing band fly
- Suspension Trainer Straps — progress to chest fly variations with adjustable difficulty
- Exercise Sliders / Gliding Discs — upgrade to slider flys for a challenging chest-focused variation
- Chest Expander (Spring or Band Style) — simple chest adduction resistance for home training
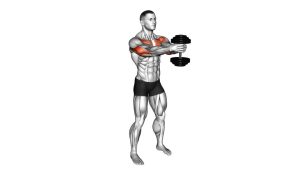
- Light Dumbbells (Optional) — useful if you want to progress toward controlled dumbbell fly mechanics
Tip: Start light. The goal is clean shoulder control and a strong chest squeeze—no shrugging, no joint strain.