Forward and Top Wall Push: Form, Benefits, Sets, Tips & FAQ
Learn how to do the Forward and Top Wall Push with proper form. Discover muscles worked, setup, step-by-step execution, sets and reps by goal, common mistakes, FAQs, and recommended equipment.
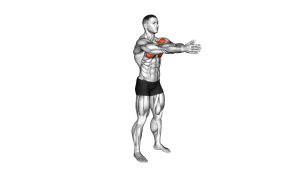
Forward and Top Wall Push
This exercise works best when you keep the body rigid, the hands planted firmly on the wall, and the motion smooth from rep to rep. The goal is not to create a huge range of motion, but to produce a clean forward-and-up press while keeping tension through the chest and arms. It is an excellent option for beginners, warm-ups, deload work, posture-focused training, or anyone building toward harder floor-based pushing variations.
Quick Overview
| Body Part | Chest |
|---|---|
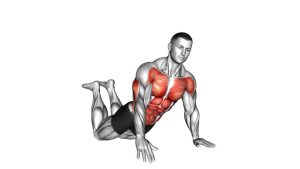
| Primary Muscle | Pectoralis major (with strong emphasis on the upper/clavicular fibers) |
| Secondary Muscle | Anterior deltoids, triceps brachii, serratus anterior |
| Equipment | Wall |
| Difficulty | Beginner |
Sets & Reps (By Goal)
- Warm-up / activation: 2–3 sets × 10–15 reps with slow, smooth tempo and short pauses
- Technique practice: 2–4 sets × 8–12 reps focusing on alignment and controlled elbow extension
- Muscular endurance: 3–4 sets × 15–20 reps with 30–45 sec rest
- Beginner strength foundation: 3–4 sets × 8–12 reps with 45–75 sec rest
Progression rule: Step your feet farther away from the wall, slow the lowering phase, or add a pause at full extension before moving to harder push-up progressions.
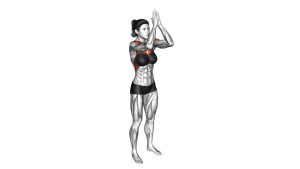
Setup / Starting Position
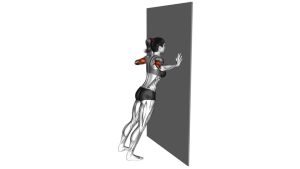
- Face the wall: Stand an arm’s length or slightly farther from a sturdy wall, depending on your strength level.
- Place your hands high: Set your palms on the wall above shoulder height so the press angle points slightly upward.
- Set your stance: Keep feet about hip- to shoulder-width apart for balance.
- Lean in: Allow the body to angle toward the wall while maintaining a straight line from head to heels.
- Brace lightly: Tighten the core, keep glutes engaged, and relax the neck.
- Start tall through the chest: Shoulders stay down and back lightly, not shrugged.
Tip: The closer you stand to the wall, the easier the exercise becomes. The farther you step back, the more bodyweight you press.
Execution (Step-by-Step)
- Begin in the incline setup: Hands stay planted high on the wall, elbows soft, body aligned.
- Lower under control: Bend the elbows and let the chest travel toward the wall without collapsing through the hips.
- Keep the angle consistent: The elbows move naturally while the shoulders remain stable and the body stays rigid.
- Press forward and upward: Drive through the palms to extend the elbows and push the body away from the wall along the same angled path.
- Finish tall: Reach full extension without locking out aggressively or shrugging the shoulders.
- Repeat smoothly: Use a controlled rhythm and keep constant tension through the chest and arms.
Pro Tips & Common Mistakes
- Keep a straight body line: Avoid bending at the hips or letting the stomach sag forward.
- Use the wall, don’t collapse into it: Control the lowering phase instead of dropping quickly.
- Press through the whole palm: Even hand pressure helps improve shoulder stability.
- Do not shrug: Keep the shoulders away from the ears to prevent upper-trap dominance.
- Match elbow bend to control: Go only as deep as you can while keeping clean alignment.
- Focus on direction: Think “push away and slightly upward,” not just “straight back.”
- Use tempo for difficulty: A 2–3 second lowering phase makes this simple exercise much more effective.
FAQ
What muscles does the Forward and Top Wall Push work?
It primarily targets the chest, especially the upper chest, while also training the front delts, triceps, and supporting shoulder stabilizers.
Is this exercise good for beginners?
Yes. It is an excellent beginner variation because the wall reduces loading and makes it easier to practice pressing form, body alignment, and basic chest engagement.
How is this different from a regular wall push-up?
The main difference is the higher hand placement and slightly upward pressing angle, which tends to shift more emphasis toward the upper chest and shoulder flexion pattern.
Can I use this as a warm-up before chest training?
Absolutely. It works well as a light activation drill before bench press, push-ups, cable fly work, or other upper-body sessions.
How do I make it harder?
Step the feet farther back, slow the tempo, add a pause near the wall, or progress toward lower incline push-up variations on a bench or bar.
Recommended Equipment (Optional)
- Non-Slip Yoga Mat — useful for warm-ups, floor progressions, mobility work, and comfortable home training
- Push-Up Bars — a solid next-step tool when progressing from wall presses to deeper push-up variations
- Resistance Bands Set — helpful for chest activation, warm-up presses, and light resistance work at home
- Foam Roller — useful for upper-back mobility and chest-opening prep before pressing sessions
- Posture Corrector — can complement posture-focused training and chest-opening routines
Tip: This exercise requires only a wall, but these tools can help support better warm-ups, posture habits, and progression options for chest training.