Dumbbell Incline One-Arm Hammer Press: Form, Sets, Tips & FAQ
Learn the Dumbbell Incline One-Arm Hammer Press for upper chest, triceps, and shoulder stability. Includes setup, execution, sets by goal, common mistakes, FAQs, and recommended equipment.
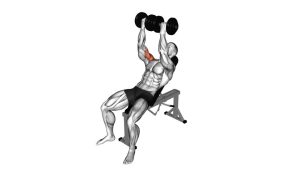
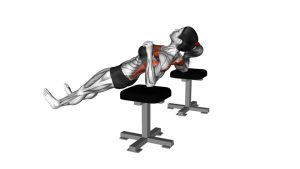
Dumbbell Incline One-Arm Hammer Press
This movement is best used when you want to train the upper chest while also improving side-to-side pressing balance. In addition, the neutral hand position helps place the shoulder in a stable pressing path. However, the exercise should not be rushed. Each rep should travel from the upper chest line to a strong top position without twisting the torso or letting the dumbbell drift forward.
Quick Overview
| Body Part | Chest |
|---|---|
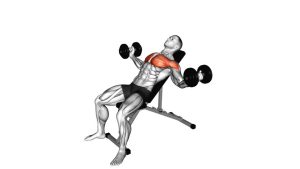
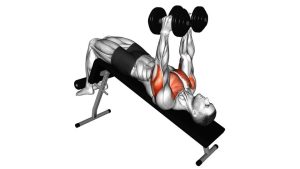
| Primary Muscle | Upper chest / clavicular head of the pectoralis major |
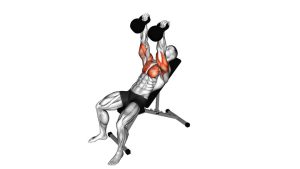
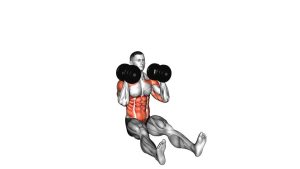
| Secondary Muscle | Triceps, anterior deltoid, serratus anterior, rotator cuff, and core anti-rotation muscles |
| Equipment | One dumbbell and an incline bench |
| Difficulty | Intermediate because the one-arm setup requires extra balance and shoulder control |
Sets & Reps (By Goal)
- Strength: 3–5 sets × 4–6 reps per side with a heavier dumbbell and 90–150 sec rest
- Muscle growth: 3–4 sets × 8–12 reps per side with controlled tempo and 60–90 sec rest
- Chest control and stability: 2–4 sets × 10–15 reps per side using slower eccentrics and 45–75 sec rest
- Warm-up or activation: 2 sets × 8–10 reps per side with a light dumbbell and clean alignment
Progression rule: Add reps first, then add weight. Also, keep both sides balanced by matching the same reps, tempo, and range of motion on each arm.
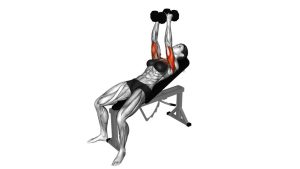
Setup / Starting Position
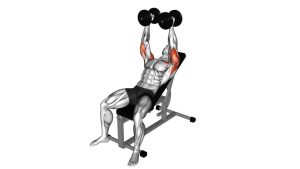
- Set the bench angle: Use a moderate incline, usually around 30–45 degrees, so the upper chest works without turning the press into a shoulder-dominant movement.
- Sit with control: Place your feet flat on the floor and keep your glutes, upper back, and head supported by the bench.
- Hold one dumbbell: Grip the dumbbell with a neutral hammer grip, meaning your palm faces inward toward your midline.
- Start near the upper chest: Position the dumbbell close to the shoulder/upper chest line with the wrist stacked above the elbow.
- Brace before pressing: Lightly tighten your core so your torso does not rotate as the dumbbell moves.
Tip: If the dumbbell pulls you to one side before the first rep, the load is probably too heavy for strict unilateral pressing.
Execution (Step-by-Step)
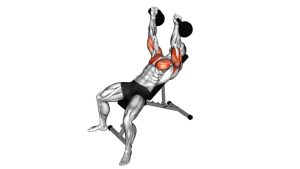
- Start stable: Keep your shoulder blade gently pulled back and down against the bench while your chest stays lifted.
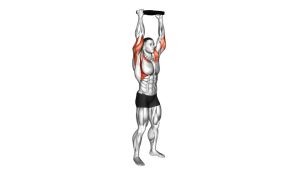
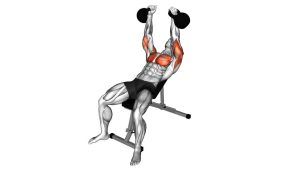
- Press upward: Drive the dumbbell up from the upper chest line while keeping the palm facing inward.
- Move slightly inward: As the arm extends, let the dumbbell travel slightly toward your midline instead of flaring far outside the shoulder.
- Finish strong: Stop near full elbow extension without aggressively locking out or letting the shoulder shrug.
- Lower with control: Bring the dumbbell back down slowly along the same path until the elbow returns near the starting angle.
- Reset each rep: Pause briefly at the bottom, re-brace your core, and repeat without bouncing.
Pro Tips & Common Mistakes
- Keep the elbow slightly tucked: A moderate tuck protects the shoulder and keeps the neutral-grip press smooth.
- Do not let the wrist collapse: Keep the knuckles stacked over the forearm so the dumbbell does not pull the wrist backward.
- Avoid torso rotation: Since this is a one-arm press, your core must resist twisting throughout the entire rep.
- Do not over-flare the elbow: Excessive flare can shift stress into the shoulder joint instead of the upper chest and triceps.
- Control the eccentric: Lowering slowly builds strength, improves stability, and makes the exercise safer.
- Use the same path every rep: Consistency matters more than lifting the heaviest dumbbell possible.
- Match both sides: Start with the weaker side first, then copy the same number of clean reps on the stronger side.
FAQ
What muscles does the Dumbbell Incline One-Arm Hammer Press work?
It mainly targets the upper chest. However, it also trains the triceps, anterior deltoid, rotator cuff, serratus anterior, and core stabilizers because the one-arm setup challenges your balance.
Is the hammer grip better than a regular incline dumbbell press?
It is not always better, but it can be more comfortable for many lifters. The neutral grip often allows a more natural elbow path and may reduce shoulder irritation compared with a wide, flared grip.
Should I press straight up or slightly inward?
Press mostly upward, but allow a small inward path toward the midline as the arm extends. This keeps the dumbbell stacked over the shoulder while still creating a strong chest press pattern.
Why does my body twist during the press?
Twisting usually means the dumbbell is too heavy, your feet are not stable, or your core is not braced. Therefore, use a lighter dumbbell, plant both feet firmly, and keep your ribs from rotating.
Can beginners do this exercise?
Beginners can perform it with a light dumbbell, but a two-arm incline dumbbell press is usually easier to learn first. Once you can control both arms well, the one-arm hammer press becomes a useful progression.
Recommended Equipment
- Adjustable Dumbbells — ideal for progressing one-arm presses without needing a full dumbbell rack
- Adjustable Incline Weight Bench — allows proper incline angles for upper chest pressing
- Rubber Hex Dumbbell Set — stable, durable dumbbells for strict unilateral strength work
- Weightlifting Wrist Wraps — useful for lifters who need extra wrist support during heavier pressing
- Home Gym Exercise Mat — protects flooring and improves bench stability in home workout spaces
Tip: For this exercise, the most important equipment is a stable bench and a dumbbell you can control through the full range without twisting.