Kettlebell Standing Slingshots: Form, Muscles Worked, Sets, Tips & FAQ
Learn how to perform Kettlebell Standing Slingshots with proper form. Discover muscles worked, setup, step-by-step execution, sets and reps by goal, common mistakes, FAQs, and recommended equipment.
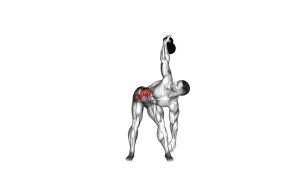
Kettlebell Standing Slingshots
This exercise is best performed with a controlled tempo and a light-to-moderate kettlebell. It trains the shoulders and upper body to stabilize while the core resists unnecessary twisting. Although it looks simple, the quality of the hand transfer and the ability to keep the kettlebell close to the body are what make the drill effective. It works well in warm-ups, coordination blocks, conditioning circuits, and light shoulder-focused training sessions.
Quick Overview
| Body Part | Shoulders |
|---|---|
| Primary Muscle | Deltoids (especially front and side delts during stabilization) |
| Secondary Muscle | Obliques, forearms, upper back stabilizers, traps, and grip muscles |
| Equipment | Single kettlebell |
| Difficulty | Beginner to Intermediate |
Sets & Reps (By Goal)
- Warm-up / activation: 2–3 sets × 10–16 total passes per direction with a light kettlebell
- Coordination and control: 2–4 sets × 8–12 smooth reps per direction with full focus on clean transfers
- Muscular endurance: 3–4 sets × 20–30 seconds per direction with controlled rhythm
- Conditioning finisher: 3 rounds × 30–45 seconds alternating directions, resting 30–45 seconds
Progression rule: First improve control and consistency, then add time, reps, or kettlebell load. Do not progress by simply moving faster if the hand transfer becomes messy.
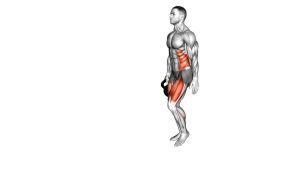
Setup / Starting Position
- Stand tall: Place your feet about shoulder-width apart with a soft bend in the knees.
- Brace your core: Keep your ribs stacked over your hips and maintain a neutral spine.
- Hold the kettlebell in front: Start with both hands near the front of the hips or lower abdomen.
- Relax the shoulders: Keep them down and back lightly, not shrugged toward the ears.
- Prepare to pass: Stay close to the body so the kettlebell travels around the waist, not far out from it.
Tip: Use a lighter kettlebell than you think you need when first learning the timing of the hand switch.
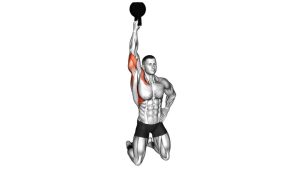
Execution (Step-by-Step)
- Start the circle: Move the kettlebell from the front of the body toward one hip in a smooth arc.
- Guide it behind the body: As the kettlebell passes around the back of the waist, release with one hand and receive it with the other.
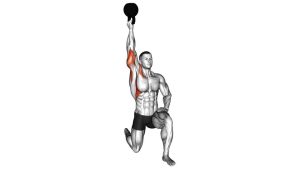
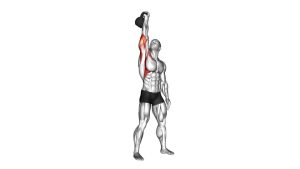
- Bring it around the opposite side: Continue the circular motion until the kettlebell returns to the front.
- Repeat fluidly: Maintain a steady rhythm and keep the bell traveling close to your body on every pass.
- Switch direction: After completing the planned reps or time on one side, reverse the circle and repeat in the opposite direction.
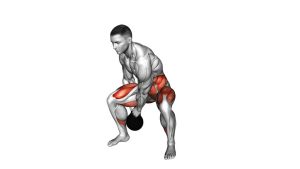
Pro Tips & Common Mistakes
- Keep the kettlebell close: A tighter path is easier to control and places less stress on the shoulders and low back.
- Stay tall: Avoid leaning, collapsing the chest, or twisting the spine excessively to chase the weight.
- Use your core: Brace the midsection so the shoulders and arms can guide the kettlebell cleanly.
- Pass, don’t toss: The hand transfer should feel smooth and deliberate, not like a throw behind your back.
- Relax the neck and traps: Do not shrug as the kettlebell moves around the body.
- Train both directions: Doing the drill equally clockwise and counterclockwise helps keep shoulder and coordination development balanced.
- Avoid going too heavy too soon: This is a skill-and-control exercise first, not a max-load movement.
FAQ
What muscles do Kettlebell Standing Slingshots work?
They primarily challenge the shoulders through stabilization, while the obliques, forearms, grip, and upper back assist in controlling the circular path of the kettlebell.
Is this exercise for beginners?
Yes, provided you use a light kettlebell and focus on smooth hand transfers. Beginners should prioritize rhythm and control before using more load or speed.
Should the kettlebell swing far away from my body?
No. Keep it close to the waist and hips. A wide swing usually means less control and more unnecessary stress on the shoulders and torso.
How fast should I perform slingshots?
Start at a slow, controlled tempo. Once the movement is consistent and the transfer is clean, you can gradually increase pace without losing posture or control.
Can I use this as a warm-up?
Absolutely. Kettlebell Standing Slingshots work well as a warm-up, shoulder activation drill, or coordination exercise before kettlebell training, upper-body sessions, or conditioning work.
Recommended Equipment
- Cast Iron or Coated Kettlebell — the main tool for this exercise; choose a weight you can control smoothly
- Adjustable Kettlebell — practical for home gyms if you want multiple resistance options in one unit
- Exercise Mat — helps define your training space and adds comfort for warm-up or accessory work
- Weightlifting Gloves — optional for comfort and grip support if your hands fatigue quickly
- Kettlebell Set — useful if you want lighter and heavier options for warm-ups, technique work, and progression
Tip: Choose a kettlebell with a comfortable handle and enough room for clean hand transfers behind the body.