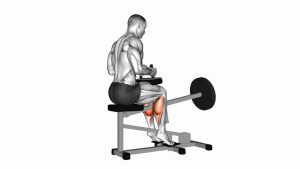
Suspender Calf Raise: Proper Form, Muscles Worked & Tips
Learn the Suspender Calf Raise using suspension straps for stronger calves and steadier ankles. Get safe setup, controlled technique, sets, tips, and FAQs.
Suspender Calf Raise
The Suspender Calf Raise is useful for developing lower-leg strength while improving control during standing heel raises. Unlike unsupported variations, suspension straps provide an additional point of stability throughout the exercise. Therefore, beginners can concentrate on ankle movement without allowing balance difficulties to dominate the repetition.
Additionally, the nearly straight-knee position emphasizes the gastrocnemius while the soleus continues to assist. Both feet work together, and the torso remains relatively stable. As a result, this exercise can complement general strength training, athletic preparation, walking fitness, and controlled lower-body conditioning.
Quick Overview
| Body Part | Calves |
|---|---|
| Primary Muscle | Gastrocnemius (medial and lateral heads), with substantial assistance from the soleus |
| Secondary Muscle | Soleus, tibialis posterior, peroneal muscles, intrinsic foot stabilizers, and core stabilizers |
| Equipment | Suspension trainer with secure overhead or elevated anchor, adjustable straps, handles, and stable non-slip flooring |
| Difficulty | Beginner to Intermediate, depending on body angle, suspension support, ankle strength, and movement control |
Sets & Reps (By Goal)
- Strength: Perform 3–4 sets of 8–12 controlled repetitions, resting 60–90 seconds between sets. Choose a challenging but manageable body angle. Additionally, maintain a brief pause at the highest heel position.
- Hypertrophy: Complete 3–4 sets of 12–20 repetitions with a controlled lowering phase of approximately 2–3 seconds. Therefore, prioritize consistent calf tension rather than rushing through additional repetitions.
- Muscular endurance: Perform 2–3 sets of 20–30 smooth repetitions, resting 30–60 seconds between sets. However, shorten the set if ankle alignment or heel height becomes inconsistent.
- Mobility and movement control: Use 2–3 sets of 8–12 repetitions with comfortable ankle movement. Moreover, pause briefly at the bottom without bouncing or forcing additional range.
- Rehab-style training: If approved by a healthcare professional, begin with 1–2 sets of 6–10 gentle repetitions. Consequently, progression should depend on symptom response, controlled technique, and individual rehabilitation guidance.
Progression rule: Begin with comfortable repetitions and consistent heel height. Once movement quality improves, increase repetitions, extend the top pause, or adjust the body angle to increase difficulty. Later, a stable elevated calf-raise platform may provide additional range of motion. However, avoid increasing difficulty if balance, ankle alignment, or control deteriorates.
Setup / Starting Position
- Secure the suspension trainer: Attach the straps to a stable, manufacturer-approved elevated anchor. Before beginning, verify that both handles and attachment points can safely support the intended exercise loading.
- Position yourself correctly: Stand facing away from the anchor and step forward until the straps become taut. This orientation matches the demonstrated suspension-assisted calf raise.
- Establish your stance: Place both feet approximately hip-width apart or slightly narrower. Meanwhile, point the toes generally forward and distribute body weight evenly across both feet.
- Hold the handles: Grip the suspension handles comfortably with both hands. Keep the elbows bent beside the torso, allowing the straps to extend backward toward the anchor.
- Create a slight forward lean: Maintain gentle tension in the straps while inclining your body forward. However, keep the head, torso, hips, and legs approximately aligned instead of folding forward at the waist.
- Set your knee position: Keep both knees nearly straight with a slight natural softness. Additionally, avoid locking them aggressively or bending deeply into a squat.
- Prepare the ankles and core: Engage your abdominal muscles lightly, relax the shoulders, and keep both heels grounded. Finally, establish a stable starting position before raising your heels.
Setup tip: Adjust the straps so they remain comfortably tensioned throughout the exercise. If the forward lean causes instability, reduce the angle and reposition your feet before continuing.
Execution (Step-by-Step)
- Establish your starting position: Stand with both heels on the floor, maintaining a slight forward body inclination. Additionally, keep the suspension straps taut and your elbows comfortably bent.
- Shift pressure toward the forefeet: Gradually transfer pressure through the balls of both feet. Meanwhile, maintain balanced contact across the big-toe and little-toe sides of each forefoot.
- Raise both heels: Contract the calf muscles and extend both ankles simultaneously. As a result, your heels rise while the balls of your feet remain in contact with the floor.
- Maintain body alignment: Keep the torso and hips relatively stable throughout the upward movement. Furthermore, avoid using the arms to pull yourself upward or bending the knees to create momentum.
- Reach the highest controlled position: Continue lifting until you achieve a comfortable peak contraction. At this point, both heels should be elevated without excessive ankle rolling or loss of balance.
- Pause at the top: Hold the raised-heel position for approximately 1–2 seconds while breathing normally. Consequently, the calves remain active without relying on bouncing or uncontrolled momentum.
- Lower the heels slowly: Gradually reverse the movement over approximately 2–3 seconds. Keep the knees nearly straight and maintain controlled tension through the ankles.
- Return to the starting position: Allow both heels to approach or gently touch the floor. Finally, reset your posture and repeat the exercise without swinging, jumping, or rushing.
Pro Tips & Common Mistakes
- Keep both heels synchronized: Raise and lower the heels together. Otherwise, uneven timing may shift excessive pressure onto one ankle and reduce consistent bilateral calf activation.
- Use the straps correctly: The suspension handles help maintain position and stability. However, pulling excessively with the arms changes the exercise and reduces the focus on calf-driven movement.
- Control your forward lean: Maintain a comfortable body angle without allowing the hips to sag or the torso to collapse. Additionally, avoid leaning farther forward than your stability allows.
- Maintain nearly straight knees: A stable knee position helps emphasize the gastrocnemius. In contrast, repeatedly bending the knees changes the movement mechanics and may reduce consistent loading.
- Avoid bouncing at the bottom: Sudden heel rebounds can increase unwanted stress around the Achilles tendon. Instead, lower gradually and begin the next repetition through muscular effort.
- Keep the ankles properly aligned: Distribute forefoot pressure evenly while lifting. Furthermore, avoid rolling onto the outer foot edges or collapsing excessively toward the inner arches.
- Use a comfortable range of motion: Raise the heels as high as possible without losing alignment. Nevertheless, do not force additional ankle movement if it produces discomfort or instability.
- Prioritize the lowering phase: A controlled descent supports consistent technique and muscular loading. Therefore, avoid allowing gravity to drop your heels suddenly toward the floor.
- Maintain steady breathing: Exhale naturally while raising your heels and inhale during the descent. Meanwhile, keep the shoulders relaxed instead of holding unnecessary upper-body tension.
- Progress gradually: Once repetitions become comfortable, adjust the body angle or increase time under tension. However, add difficulty only when the suspension anchor, ankle control, and overall technique remain reliable.
FAQ
What muscles does the Suspender Calf Raise work?
The Suspender Calf Raise primarily trains the gastrocnemius and soleus, which produce ankle plantarflexion. Additionally, smaller foot and ankle stabilizers assist with balance and alignment. Because the knees remain nearly straight, the gastrocnemius receives substantial emphasis. However, the soleus remains active throughout the movement.
Is the Suspender Calf Raise suitable for beginners?
Yes. The suspension straps provide additional balance assistance, making this variation accessible to many beginners. Initially, use a modest forward lean and perform slow repetitions. Furthermore, maintain nearly straight knees and keep both feet working together. As your control improves, gradually increase the challenge without sacrificing proper form.
Should I lean forward during the Suspender Calf Raise?
Yes, the demonstrated variation uses a slight forward-inclined standing position with the suspension straps extending behind the exerciser. However, the lean should remain comfortable and controlled. Keep the head, torso, and legs aligned while raising the heels. Excessive leaning may compromise stability or encourage unwanted upper-body assistance.
How often should I perform Suspender Calf Raises?
For general strength and muscle development, begin with 2–3 training sessions per week, allowing recovery between challenging sessions. Alternatively, lighter technique practice may be appropriate more frequently when well tolerated. However, training frequency should reflect your overall workload, recovery capacity, and any existing ankle or Achilles tendon concerns.
How can I make Suspender Calf Raises more challenging?
First, improve your heel height, balance, and lowering control. Next, increase repetitions or extend the pause at the top. Additionally, you can adjust the forward body angle to change the challenge. An elevated step may offer greater ankle range, although it is not part of the demonstrated floor-based version. Progress only when the anchor and footing remain secure.
Recommended Equipment
- Adjustable Suspension Trainer with Handles — the primary equipment for supported calf raises, allowing adjustable strap length and controlled body positioning
- Suspension Trainer Door Anchor — provides an alternative attachment option when compatible with the straps and installed according to manufacturer instructions
- Heavy-Duty Suspension Trainer Anchor Mount — a dedicated mounting option for structurally suitable walls or ceilings when properly installed and load-rated
- Non-Slip Exercise Floor Mat — useful for creating a stable training area when the mat remains firmly positioned and does not slide under load
- Adjustable Aerobic Step Platform — an optional progression tool for additional calf-raise range of motion after mastering the floor-based version
Equipment tip: Start with a reliable suspension trainer and secure anchor before considering additional accessories. Furthermore, choose equipment appropriate for your body weight, training environment, and manufacturer’s loading requirements. For this exercise, stability and controlled movement are more important than adding unnecessary resistance.