Standing Hip Circle: Form, Benefits, Sets, Tips & FAQ
Learn the Standing Hip Circle exercise to improve hip mobility, pelvic control, warm-up quality, and lower-body movement with safe form tips.
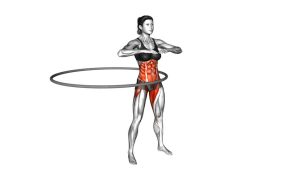
Standing Hip Circle
This exercise focuses on controlled hip movement rather than speed or intensity. The goal is to create a clean circular motion through the pelvis while keeping the chest lifted, shoulders relaxed, and feet stable. Additionally, the hands-on-hips position helps you feel whether the movement is smooth, balanced, and centered.
Quick Overview
| Body Part | Legs |
|---|---|
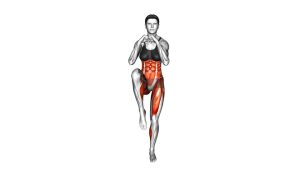
| Primary Muscle | Hip flexors, glutes, and deep hip stabilizers |
| Secondary Muscle | Core stabilizers, obliques, lower back, and adductors |
| Equipment | None |
| Difficulty | Beginner |
Sets & Reps (By Goal)
- General warm-up: 1–2 sets × 8–12 circles per direction
- Hip mobility practice: 2–3 sets × 10–15 slow circles per direction
- Pelvic control: 2–3 sets × 6–10 very controlled circles per direction
- Desk-break movement reset: 1–2 sets × 6–8 gentle circles per direction
Progression rule: First improve smoothness and balance. Then, gradually increase the circle size only if your torso stays controlled and your lower back does not pinch.
Setup / Starting Position
- Stand tall: Place your feet about hip-width apart on a stable surface.
- Place hands on hips: Keep both hands resting on the hips so you can feel the circular motion clearly.
- Relax the upper body: Keep the shoulders down, chest lifted, and neck neutral.
- Soften the knees: Avoid locking the knees completely. A slight soft bend helps the hips move more naturally.
- Brace lightly: Keep the core gently active so the movement comes from the pelvis instead of uncontrolled spinal swinging.
Start with small circles. As a result, you can learn the movement pattern without forcing range or losing balance.
Execution (Step-by-Step)
- Begin in neutral: Stand upright with the hips centered under the torso.
- Shift the hips forward: Move the pelvis gently forward without leaning the chest too far back.
- Circle to one side: Glide the hips laterally while keeping both feet planted.
- Move the hips backward: Continue the circle by sending the hips slightly behind you without over-arching the lower back.
- Shift to the opposite side: Sweep the hips across to complete the circular path.
- Return to center: Finish one smooth circle, then repeat with the same controlled tempo.
- Reverse direction: After completing your reps, perform the same number of circles in the opposite direction.
Pro Tips & Common Mistakes
- Keep the movement slow: This drill works best when you control each part of the circle instead of rushing through it.
- Avoid excessive lower-back arching: When the hips move backward, keep the ribs controlled and do not force the spine into a deep arch.
- Do not twist the shoulders: The pelvis should create the circle while the upper body stays stable.
- Keep both feet planted: Lifting the heels or shifting too aggressively can reduce balance and control.
- Use equal circles both ways: Practice clockwise and counterclockwise to keep the hips moving evenly.
- Make the circle smaller if needed: A smaller clean circle is better than a large, sloppy movement.
- Breathe normally: Avoid holding your breath because relaxed breathing helps the hips move more freely.
FAQ
What is the Standing Hip Circle good for?
The Standing Hip Circle is useful for warming up the hips, improving pelvic control, and preparing the lower body for exercise. Additionally, it can help you become more aware of hip movement before squats, lunges, running, or mobility work.
Should I feel this exercise in my lower back?
You may feel light movement around the lower back because the pelvis is moving. However, you should not feel sharp pain, pinching, or strong lumbar strain. If that happens, reduce the range and keep the core lightly engaged.
How big should the hip circle be?
The circle should be comfortable and controlled. Start small, then increase the range only when you can keep your feet planted, torso steady, and hips moving smoothly.
Can beginners do Standing Hip Circles?
Yes. This is a beginner-friendly mobility drill because it uses bodyweight only and does not require equipment. Still, beginners should move slowly and avoid forcing the hips into a painful range.
When should I do this exercise?
You can use Standing Hip Circles before lower-body training, after long sitting periods, or during a mobility warm-up. For best results, perform them before more demanding movements that need hip mobility.
Recommended Equipment (Optional)
- Exercise Mat — useful for warm-ups, mobility flows, and floor-based hip drills
- Mini Resistance Bands — helpful for adding light glute activation before or after hip circles
- Foam Roller — useful for loosening surrounding hip, thigh, and glute areas before mobility work
- Yoga Blocks — helpful for supported stretching and mobility routines around the hips
- Balance Pad — optional tool for progressing balance and lower-body stability drills
Tip: The Standing Hip Circle itself does not require equipment. However, these tools can support a fuller hip mobility and warm-up routine.