Pelvic Tilt Exercise: Proper Form, Core Benefits, Sets & Tips
Learn the pelvic tilt exercise for deep core control, lower-back stability, posture, and beginner-friendly abdominal activation.
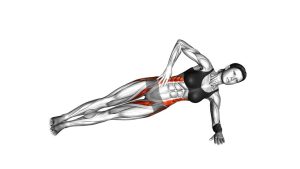
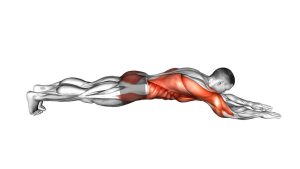
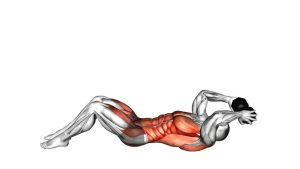
Pelvic Tilt
This movement looks simple, but it builds an important foundation for better core control. During the exercise, the pelvis rotates slightly backward while the abdominal muscles engage. As a result, the lower back moves closer to the floor without lifting the hips into a bridge. The motion should stay slow, small, and precise.
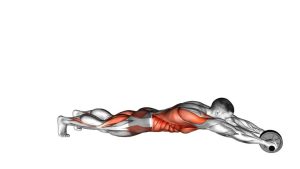
The pelvic tilt is especially useful for beginners, people learning proper spinal positioning, and anyone who wants a low-impact way to activate the deep core. It can also prepare the body for dead bugs, glute bridges, bird dogs, planks, and many other core or lower-body exercises.
Quick Overview
| Body Part | Core |
|---|---|
| Primary Muscle | Deep core muscles, especially transverse abdominis and lower abdominal stabilizers |
| Secondary Muscle | Glutes, pelvic floor, lumbar stabilizers, and hip control muscles |
| Equipment | No equipment required. Optional: exercise mat, yoga mat, small pillow, or towel |
| Difficulty | Beginner |
Sets & Reps (By Goal)
- Beginner core activation: Perform 2–3 sets of 8–12 controlled reps. Hold each tilt for 2–3 seconds.
- Lower-back stability practice: Perform 2–4 sets of 10–15 reps using a slow tempo and relaxed breathing.
- Warm-up before core training: Perform 1–2 sets of 8–10 reps before dead bugs, bridges, planks, or leg raises.
- Rehab-style control: Perform 2–3 sets of 6–10 reps with a 3–5 second hold. Keep the effort gentle.
- Daily posture reset: Perform 1–2 easy sets of 6–8 reps, especially after long periods of sitting.
Progression note: First improve control, breathing, and consistency. After that, progress to dead bugs, heel taps, glute bridges, or marching pelvic tilts.
Setup / Starting Position
- Lie on your back: Start on a comfortable mat with your knees bent and your feet flat on the floor.
- Place your feet evenly: Keep the feet about hip-width apart. Point the toes forward and keep both heels grounded.
- Relax your upper body: Let your arms rest beside your body. Keep the shoulders, neck, and jaw relaxed.
- Find neutral spine: Allow a small natural arch under your lower back before starting the first rep.
- Set your breathing: Take a calm breath in through the nose. Prepare to engage the lower abs as you exhale.
Your starting position should feel stable, not tense. The movement should come from pelvic control and abdominal engagement, not from pushing hard through the feet.
Execution (Step-by-Step)
- Begin in neutral: Keep your knees bent, feet flat, and lower back naturally curved.
- Exhale gently: As you breathe out, tighten the lower abdominals as if you are lightly drawing the belly button inward.
- Tuck the pelvis: Rotate the pelvis backward by gently bringing the tailbone slightly upward toward the ceiling.
- Flatten the lower back: Let the lower back move toward the floor. Do not slam it down or force the position.
- Hold with control: Pause for 2–5 seconds while keeping the ribs down and the neck relaxed.
- Return slowly: Release the tilt and allow the pelvis to come back to neutral. Let the small lower-back arch return naturally.
- Repeat smoothly: Continue for the target reps without lifting the hips or rushing the motion.
Pro Tips & Common Mistakes
Pro Tips
- Use your breath: Exhale as you tilt the pelvis. This helps the lower abs engage more naturally.
- Keep the movement small: A clean pelvic tilt does not need a large range of motion.
- Move slowly: Control matters more than speed. A slow return teaches better spinal awareness.
- Keep the ribs down: Avoid flaring the rib cage as the pelvis moves.
- Stay relaxed above the waist: Your shoulders, neck, and face should not tense during the exercise.
Common Mistakes
- Lifting the hips: If the hips rise off the floor, you are turning the drill into a bridge.
- Using too much glute squeeze: Light glute activity is normal, but the lower abs should guide the movement.
- Holding the breath: Breath-holding can create unnecessary pressure and reduce core control.
- Forcing the back flat: The lower back should move gently toward the floor, not be jammed down.
- Moving through pain: Discomfort is a sign to reduce range, slow down, or stop.
FAQ
What muscles does the pelvic tilt work?
The pelvic tilt mainly trains the deep core muscles, especially the transverse abdominis and lower abdominal stabilizers. It also involves the glutes, pelvic floor, and small stabilizing muscles around the lower back and hips.
Is the pelvic tilt good for beginners?
Yes. The pelvic tilt is one of the best beginner core exercises because it teaches pelvic control, breathing, and lower-back positioning without heavy loading or complex coordination.
Should my lower back touch the floor?
During the tilt, your lower back should gently move toward the floor. However, you should not force it down. The goal is controlled flattening through abdominal engagement, not aggressive pressure.
Is a pelvic tilt the same as a glute bridge?
No. In a pelvic tilt, the hips stay on the floor while the pelvis rotates. In a glute bridge, the hips lift off the floor. The pelvic tilt is smaller and more focused on core control.
How often can I do pelvic tilts?
Many beginners can practice pelvic tilts several times per week or even daily at low intensity. Start with a small amount of volume, then increase only if the movement feels comfortable.
Can pelvic tilts help with posture?
They can help improve awareness of pelvic and spinal position. For better posture results, combine pelvic tilts with glute strengthening, hip mobility, upper-back work, and consistent movement breaks.
Recommended Equipment
- Exercise Mat — adds comfort and support while lying on the floor.
- Thick Yoga Mat — useful for beginners who need extra cushioning for the spine and hips.
- Small Exercise Pillow — can support the head or neck during supine core drills.
- Foam Roller — helpful for warm-ups, mobility work, and releasing tight hips or back muscles.
- Resistance Bands Set — useful for progressing into glute bridges, hip work, and core stability exercises.
Tip: Equipment is optional for this exercise. A comfortable mat is usually enough. Choose tools that improve comfort and control, not tools that make the movement feel forced.