Weighted Stretch Lunge: Form, Benefits, Sets, Tips & FAQ
Learn the Weighted Stretch Lunge to improve hip mobility, glute strength, and lower-body control with safe form, sets, tips, FAQs, and gear.
Weighted Stretch Lunge
This exercise works best when you treat it as a strength-mobility drill, not a heavy power exercise. The front leg supports balance and glute control, while the back leg receives a strong hip-flexor stretch. The load should help you settle into position without forcing your joints or causing sharp discomfort.
Quick Overview
| Body Part | Legs |
|---|---|
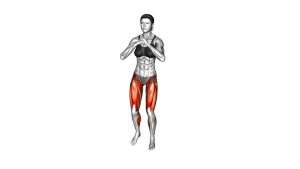
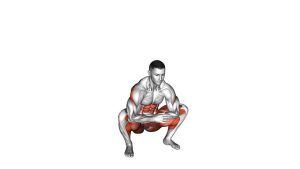
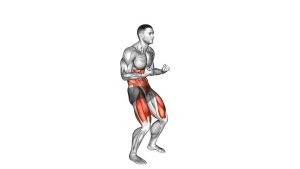
| Primary Muscle | Glutes and hip flexors |
| Secondary Muscle | Quadriceps, hamstrings, adductors, calves, and core stabilizers |
| Equipment | Dumbbells, kettlebells, or weight plates |
| Difficulty | Intermediate because it requires balance, hip control, and loaded range-of-motion awareness |
Sets & Reps (By Goal)
- Hip mobility: 2–3 sets × 20–40 seconds per side with slow breathing
- Glute activation: 2–4 sets × 8–12 small pulses per side
- Loaded mobility strength: 3–4 sets × 6–10 controlled reps or pulses per side
- Warm-up preparation: 1–2 sets × 15–25 seconds per side using light weight
Progression rule: Increase control and hold time before increasing weight. Do not add load if your front heel lifts, your low back arches, or your back hip feels pinched.
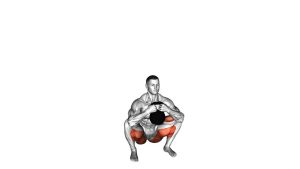
Setup / Starting Position
- Choose your load: Hold one dumbbell in each hand, one kettlebell, or two weight plates by your sides.
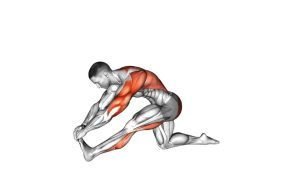
- Step into a long split stance: Place one foot forward and extend the other leg behind you with the back heel lifted.
- Lower into the stretch: Bend the front knee and let the back hip move downward until you feel a strong but manageable stretch.
- Keep the front foot stable: Press through the heel, big toe, and little toe so the foot does not roll inward.
- Stack your torso: Keep the chest open, ribs controlled, and core lightly braced.
- Let the arms hang naturally: The weights should stay close to your sides without swinging.
Tip: Start with a shorter stance if your hips feel restricted. A longer stance creates more hip-flexor stretch but also requires more control.
Execution (Step-by-Step)
- Set your base: Hold the deep lunge position with the front foot flat and the back leg extended behind you.
- Sink slowly: Allow the hips to move slightly downward while keeping the torso controlled.
- Pause in the stretch: Hold the bottom position and breathe calmly without bouncing.
- Add a small pulse if desired: Move only a few centimeters up and down while staying in the deep range.
- Keep the load passive: Let the weight increase the stretch, but do not use momentum or swinging.
- Return with control: Push gently through the front foot to rise slightly or step out carefully before switching sides.
Pro Tips & Common Mistakes
- Do not bounce aggressively: Small controlled pulses are safer and more effective than fast bouncing.
- Keep the front heel down: A lifting heel usually means the stance is too long or the depth is too aggressive.
- Avoid low-back arching: Brace lightly and keep the ribs stacked over the pelvis.
- Use the weight as assistance, not force: The load should deepen the position gradually, not pull you into pain.
- Control the front knee: Let it track in line with the toes without collapsing inward.
- Breathe into the stretch: Slow exhales help reduce tension and improve control in the bottom range.
- Switch sides evenly: Spend equal time on both legs to avoid mobility imbalance.
FAQ
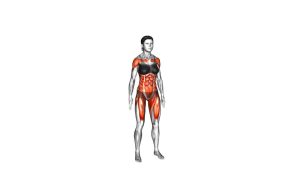
What muscles does the weighted stretch lunge work?
The weighted stretch lunge targets the glutes of the front leg and strongly stretches the hip flexors of the rear leg. It also trains the quads, adductors, hamstrings, calves, and core stabilizers.
Is this exercise a strength move or a mobility move?
It is both. The deep position improves loaded hip mobility, while the front leg and core must work to stabilize the body under tension.
Should I use heavy weight?
No. Start light. This exercise depends on control, depth, and breathing. Heavy weight can reduce movement quality and increase stress on the knee, hip, or lower back.
Where should I feel the stretch?
You should feel a strong stretch through the front of the rear hip and thigh. You may also feel the front glute working to stabilize the position.
Is the weighted stretch lunge good before leg training?
Yes, when done lightly. It can prepare the hips for squats, lunges, split squats, sled work, and athletic lower-body movements.
Recommended Equipment
- Adjustable Dumbbells — useful for gradually loading the stretch without needing many separate weights
- Kettlebell Set — excellent for goblet-style or side-loaded lunge variations
- Weight Plates with Handles — easy to hold at the sides for controlled loaded mobility work
- Exercise Mat — adds comfort and traction when working in deep lunge positions
- Stretching Strap — helpful for additional lower-body mobility work before or after training
Tip: Choose equipment that allows smooth control. For this exercise, better positioning matters more than heavier loading.