Kneeling Toe-Up Hamstring Stretch: Form, Benefits, Tips & FAQ
Learn the Kneeling Toe-Up Hamstring Stretch to improve hamstring flexibility, calf mobility, hip hinge control, and lower-body range of motion.
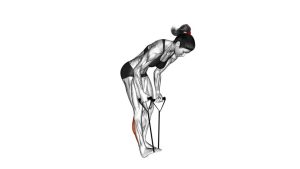
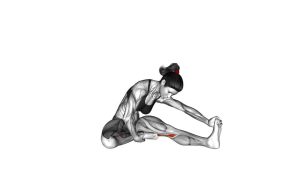
Kneeling Toe-Up Hamstring Stretch
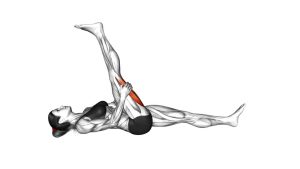
This stretch is especially useful for improving hamstring flexibility, calf mobility, and hip hinge awareness. Because the front foot stays dorsiflexed, the stretch can feel stronger than a normal kneeling hamstring stretch. Move slowly, breathe steadily, and focus on creating a long stretch through the back of the thigh rather than simply trying to touch the foot.
Quick Overview
| Body Part | Hamstrings |
|---|---|
| Primary Muscle | Hamstrings — biceps femoris, semitendinosus, semimembranosus |
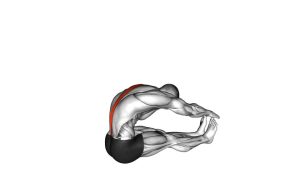
| Secondary Muscle | Calves, glutes, lower back stabilizers, hip stabilizers |
| Equipment | None required; optional exercise mat, yoga block, or stretching strap |
| Difficulty | Beginner to intermediate, depending on hamstring flexibility |
Sets & Reps (By Goal)
- General flexibility: 2–3 sets × 20–30 seconds per side
- Post-workout recovery: 2 sets × 30–45 seconds per side with relaxed breathing
- Mobility warm-up: 1–2 sets × 6–10 controlled reps per side using a gentle hinge-and-return pattern
- Deep mobility focus: 3–4 sets × 30–60 seconds per side, only if the stretch stays pain-free
- Beginner tight-hamstring option: 2 sets × 15–20 seconds per side with a smaller range of motion
Progression rule: Increase time under stretch before increasing depth. Your best range is the position where the front leg stays straight, the toes stay up, and the stretch feels controlled.
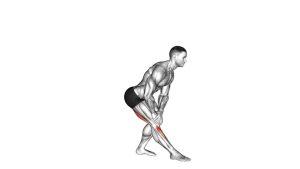
Setup / Starting Position
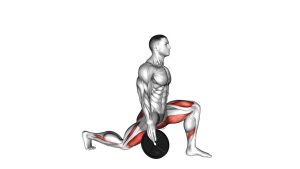
- Start in a half-kneeling position: Place one knee on the floor and extend the opposite leg forward.
- Straighten the front leg: Keep the front knee extended without locking it aggressively.
- Pull the toes upward: Dorsiflex the front foot so the toes point toward the shin.
- Square your hips: Keep both hips facing forward so the stretch stays focused on the front hamstring.
- Lengthen your torso: Keep the chest open and spine long before you begin reaching forward.
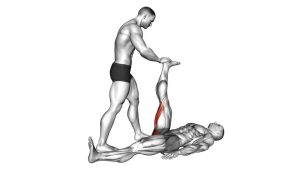
- Use support if needed: Place your hands on the floor, a yoga block, or your thigh if balance is difficult.
Tip: If the floor feels uncomfortable on the rear knee, place an exercise mat or folded towel underneath it.
Execution (Step-by-Step)
- Set the front foot: Pull the toes upward and keep the heel grounded.
- Begin the hip hinge: Push the hips slightly backward while keeping the front leg straight.
- Reach forward gradually: Move your hands toward the shin, ankle, or foot without forcing the range.
- Keep tension controlled: Stop when you feel a strong but manageable stretch through the back of the thigh.
- Hold the position: Breathe slowly and avoid bouncing at the bottom.
- Return with control: Lift the torso back up by reversing the hip hinge.
- Repeat on the other side: Match the same stretch duration and quality on both legs.
Pro Tips & Common Mistakes
- Keep the front leg straight: A slight natural softness is fine, but avoid bending the knee so much that the hamstring stretch disappears.
- Pull the toes up: The toe-up position increases calf involvement and creates a stronger posterior-chain stretch.
- Hinge before you round: Start by moving from the hips rather than collapsing the spine immediately.
- Avoid bouncing: Fast bouncing can irritate the hamstrings or behind-the-knee area.
- Do not chase the foot: Reaching the toes is not required. Clean tension matters more than depth.
- Keep the hips square: Rotating the pelvis can reduce the stretch and shift tension away from the target side.
- Use calm breathing: Exhale slowly as you settle into the stretch to reduce unnecessary guarding.
- Adjust for tight hamstrings: Place your hands on blocks or your thigh instead of reaching all the way down.
FAQ
What muscles does the Kneeling Toe-Up Hamstring Stretch target?
It primarily targets the hamstrings. Because the toes are pulled upward, it also increases stretch tension through the calves, especially the gastrocnemius.
Should I keep my back completely flat?
Start with a long spine and a clean hip hinge. A small amount of rounding may happen near the end range, but you should not collapse aggressively through the lower back.
Why do I feel this stretch behind my knee?
A mild stretch behind the knee can happen because the hamstrings and calf tissues cross that area. If the feeling is sharp, tingling, or nerve-like, reduce the range or stop the stretch.
Is this stretch good before leg workouts?
Yes, but use it dynamically before training. Perform gentle hinge-and-return reps instead of long static holds. Save longer holds for after training or separate mobility sessions.
How long should I hold the stretch?
Most people do well with 20–45 seconds per side. Beginners can start with shorter holds and gradually increase duration as flexibility improves.
Can beginners do this exercise?
Yes. Beginners should use a smaller range of motion, keep the hands supported, and avoid forcing the reach toward the toes.
Recommended Equipment (Optional)
- Exercise Mat — adds comfort for the rear knee during kneeling stretches
- Yoga Blocks — useful for supporting the hands if hamstring flexibility is limited
- Stretching Strap — helps maintain toe-up positioning without overreaching
- Knee Pad for Exercise — protects the kneeling knee on hard floors
- Foam Roller for Legs — useful before or after stretching to relax the hamstrings and calves
Tip: Equipment is optional. The most important tools are controlled breathing, a stable kneeling position, and a pain-free range of motion.