Side-Lying Internal Rotation: Form, Rotator Cuff Benefits, Sets & FAQ
Learn how to do the Side-Lying Internal Rotation with proper form to strengthen the subscapularis and improve shoulder stability. Includes setup, step-by-step execution, sets by goal, common mistakes, FAQ, and recommended equipment.
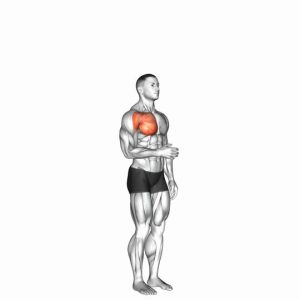
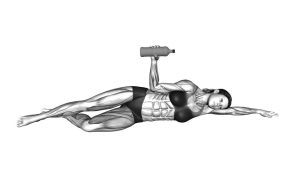
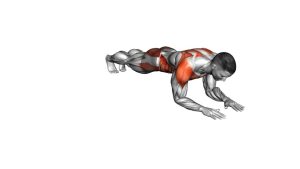
Side-Lying Internal Rotation
This exercise is best used for rotator cuff strengthening, shoulder health, and joint control. It is not meant to be a heavy pressing-style movement. Instead, the goal is to isolate internal rotation while keeping the upper arm stable against the body. You should feel the front side of the shoulder working gently, without neck tension, torso twisting, or elbow drift.
Quick Overview
| Body Part | Shoulders |
|---|---|
| Primary Muscle | Subscapularis |
| Secondary Muscle | Anterior deltoid, pectoralis major (minimal), shoulder stabilizers |
| Equipment | Light dumbbell, light plate, or very light resistance tool |
| Difficulty | Beginner (excellent for rehab-style control and shoulder stability training) |
Sets & Reps (By Goal)
- Shoulder health / maintenance: 2–3 sets × 10–15 reps per side with light weight and smooth control
- Rotator cuff strength: 3–4 sets × 8–12 reps per side with a strict tempo and 45–75 sec rest
- Rehab-style control: 2–3 sets × 8–10 reps per side using very light resistance and a slow tempo
- Warm-up activation: 1–2 sets × 12–15 reps per side before pressing or upper-body training
Progression rule: Increase reps first, then slightly increase load only if your elbow stays fixed, the shoulder stays pain-free, and the movement remains slow and controlled.
Setup / Starting Position
- Lie on your side: Keep your head, torso, and hips stacked in a straight line on the bench, floor, or mat.
- Set the working arm: Bend the elbow to roughly 90 degrees and pin the upper arm close to your torso.
- Hold the weight lightly: Use a light dumbbell or similar resistance that allows clean control.
- Start in a comfortable range: Let the forearm begin slightly raised or neutral, depending on your mobility and setup.
- Brace gently: Keep the shoulder down and relaxed, with no shrugging or twisting through the trunk.
Tip: Placing a small towel between the elbow and ribcage can improve alignment and help keep the shoulder position consistent.
Execution (Step-by-Step)
- Lock in the elbow position: Keep the upper arm glued to your side throughout the set.
- Rotate inward slowly: Move the forearm downward in a controlled arc by internally rotating the shoulder.
- Stay strict: Do not roll your torso forward or let the shoulder tip inward aggressively.
- Pause briefly: Stop at the end of your comfortable range and hold for a moment without forcing extra depth.
- Return with control: Reverse the movement slowly back to the start position without bouncing.
Pro Tips & Common Mistakes
- Use light resistance: The rotator cuff responds best to control, not ego lifting.
- Keep the elbow pinned: Letting it drift changes the movement and reduces isolation.
- Avoid torso rotation: The shoulder should move, not the whole body.
- Don’t rush the rep: Slow eccentrics improve control and shoulder awareness.
- Work in a pain-free range: You do not need a huge range of motion to get a strong training effect.
- Pair it smartly: This works well with external rotations, face pulls, and rear-delt work for balanced shoulder function.
FAQ
What muscle does the Side-Lying Internal Rotation work most?
The main target is the subscapularis, the rotator cuff muscle responsible for internal rotation and helping stabilize the shoulder joint.
Should this exercise be heavy or light?
It should usually be performed with light resistance. The goal is precise control and joint-friendly strengthening, not maximum loading.
Is this exercise good for shoulder rehab?
Yes, it is commonly used in rehab-style shoulder programs and rotator cuff strengthening routines, especially when performed with excellent technique and appropriate resistance.
How do I know if I’m doing it correctly?
Your elbow should stay close to your side, the motion should feel smooth, and you should not need to twist your torso or shrug the shoulder to finish the rep.
Can beginners use this exercise?
Absolutely. It is a beginner-friendly movement when done with very light resistance and careful form, making it useful for both prevention and shoulder control work.
Recommended Equipment
- Light Neoprene Dumbbells — ideal for precise shoulder isolation and beginner-friendly rotator cuff work
- Fractional Weight Plates — useful for very small load progressions when standard jumps feel too heavy
- Exercise Mat — adds comfort and support for side-lying positioning on the floor
- Small Exercise Towel — helpful between the elbow and torso to improve alignment and shoulder position
- Light Resistance Bands — great for pairing with other shoulder stability drills and rotator cuff exercises
Tip: For rotator cuff exercises, small weight increases matter. Prioritize comfort, smooth reps, and joint control over heavier resistance.