Handstand: Form, Sets, Tips & FAQ
Learn the Handstand to build shoulder stability, upper-body control, balance, and body tension. Includes setup, step-by-step execution, sets by goal, common mistakes, FAQ, and recommended equipment.
Handstand
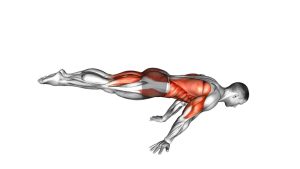
This exercise works best when you treat it as a balance and body-position skill, not just a shoulder challenge. The hands press firmly into the floor, the elbows stay straight, the shoulders elevate and stabilize, and the trunk stays tight so the legs and hips do not drift. Small adjustments in the fingers, wrists, shoulders, and ribs are constantly used to keep the body stacked.
Quick Overview
| Body Part | Shoulders |
|---|---|
| Primary Muscle | Deltoids (especially anterior deltoids) |
| Secondary Muscle | Triceps, upper chest, serratus anterior, traps, forearms, core, glutes |
| Equipment | Bodyweight, floor space, optional wall and padding |
| Difficulty | Advanced (high coordination, balance, and body-control demand) |
Sets & Reps (By Goal)
- Skill practice: 4–6 sets of 10–30 second holds or 4–8 kick-up attempts
- Balance development: 5–8 sets of short controlled holds with full rest between efforts
- Wall-assisted technique work: 3–5 sets of 20–40 second holds focusing on alignment
- Bodyweight strength & overhead stability: 3–5 sets of 15–30 second holds
Progression rule: Increase hold quality before hold duration. First build a straighter line, better shoulder elevation, and more consistent balance. Then gradually extend time under control.
Setup / Starting Position
- Choose your space: Use a flat, non-slip surface with enough room overhead and around you.
- Set the hands: Place the hands about shoulder-width apart with fingers spread wide for balance control.
- Prepare the shoulders: Push actively into the floor and think about lifting the shoulders away from the ears while staying stable.
- Brace the trunk: Tighten the abs and glutes to help keep the ribs from flaring and the lower back from over-arching.
- Start from a kick-up stance: Lean forward onto the hands and prepare to drive one leg upward while the other follows.
Tip: Beginners often learn faster by practicing with a wall behind them, but even then the goal should be a stacked, active handstand, not collapsing into the wall.
Execution (Step-by-Step)
- Plant the hands firmly: Grip the floor with the fingertips and root through the full hand.
- Shift weight forward: Bring the shoulders over the hands so the body is ready to invert.
- Kick one leg upward: Use a smooth, controlled leg drive instead of a wild jump.
- Bring the second leg up: Let the trailing leg follow until the hips stack over the shoulders.
- Lock the elbows: Keep the arms straight and active rather than soft or bent.
- Elevate the shoulders: Press tall through the upper back so you do not sink into the neck.
- Create a straight line: Keep the ribs down, pelvis controlled, legs together, and toes pointed if possible.
- Balance with the hands: Use the fingers to stop tipping forward and the heel of the hand to stop tipping backward.
- Exit under control: Lower one leg at a time and return to the floor smoothly rather than falling out.
Pro Tips & Common Mistakes
- Press through the fingers: Your fingers are your brakes and steering wheel for balance.
- Do not over-kick: Too much momentum makes the handstand harder to control.
- Keep the elbows straight: Bent arms often turn a clean balance drill into a shaky strength struggle.
- Shrug up actively: Strong shoulder elevation creates a safer, stronger overhead position.
- Avoid the banana shape: Do not let the ribs flare and lower back overextend.
- Use controlled exits: Learning how to come down safely is part of mastering the skill.
- Train wrists progressively: Sudden high-volume handstand work can overload the wrists quickly.
FAQ
What muscles does the handstand work the most?
The handstand mainly challenges the shoulders and upper-body stabilizers, especially the deltoids, triceps, traps, serratus anterior, forearms, and core.
Is the handstand a strength exercise or a balance exercise?
It is both, but for most people it is primarily a balance and body-control skill. You need enough strength to support your bodyweight, but the real challenge is stacking and stabilizing the position.
Should beginners learn handstands with a wall?
Yes, many beginners benefit from wall practice because it helps them get used to being inverted. Just make sure you still practice active shoulders, a braced trunk, and controlled alignment instead of leaning passively.
Why do my wrists hurt during handstands?
Wrist discomfort is common if mobility, tolerance, or warm-up are lacking. Reduce volume, warm up the wrists, use a gradual progression, and consider wrist-support tools or parallettes if needed.
How long should I hold a handstand?
Start with short high-quality holds, even just a few seconds. Clean alignment and repeatable control matter more than forcing long shaky holds.
Recommended Equipment
- Wrist Wraps — helpful for added wrist support during repeated kick-ups and inverted holds
- Parallettes / Push-Up Bars — reduce wrist extension demand and give a more comfortable grip for handstand practice
- Handstand Pad / AbMat-Style Cushion — useful for head and floor protection during wall drills, kick-up practice, and progressions
- Resistance Bands — great for shoulder warm-ups, scapular activation, and accessory stability work
- Non-Slip Exercise Mat — improves grip, comfort, and floor confidence when practicing entries and exits
Tip: The best equipment for handstand training is anything that improves control, joint comfort, and consistency without changing the mechanics of the skill too much.