Side Bend on Stability Ball: Oblique Form, Sets, Tips & FAQ
Learn the Side Bend on Stability Ball to strengthen obliques, improve lateral core control, and build waist stability with safe form cues.
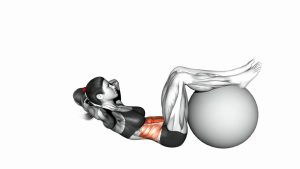
Side Bend on Stability Ball
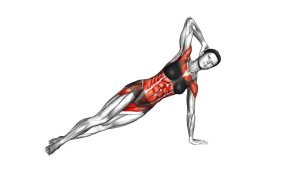
This movement works best when the body stays in one clear side-bending line. The hips should remain steady, the feet should stay firmly grounded, and the torso should move through a controlled arc. As a result, the obliques perform the main work instead of the lower back, hip flexors, or neck.
In addition, the stability ball adds a balance challenge. Therefore, each repetition should be slow enough to keep the ball from rolling, shifting, or bouncing. If the exercise feels unstable, widen the stance, place the feet against a wall, or reduce the range of motion until the movement becomes smooth.
Quick Overview
| Body Part | Core |
|---|---|
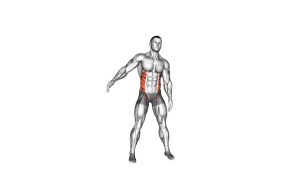
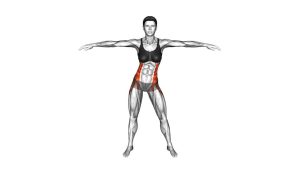
| Primary Muscle | Obliques |
| Secondary Muscle | Quadratus lumborum, rectus abdominis, spinal stabilizers, glutes |
| Equipment | Stability ball / Swiss ball / exercise ball |
| Difficulty | Beginner to Intermediate |
Sets & Reps (By Goal)
- Beginner control: 2–3 sets × 8–10 reps per side, using a slow and short range.
- Oblique strength: 3–4 sets × 10–15 reps per side, with a brief squeeze at the top.
- Core endurance: 2–3 sets × 15–20 reps per side, using steady breathing and smooth tempo.
- Warm-up activation: 1–2 sets × 8–12 reps per side before rotational or lateral core work.
- Balance and control: 3 sets × 8–12 slow reps per side, emphasizing still hips and stable feet.
Progression rule: First improve balance, tempo, and range of motion. After that, increase reps, add a longer top squeeze, or hold a light weight only if your form stays clean.
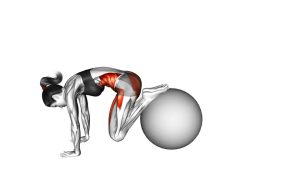
Setup / Starting Position
- Place the stability ball beside your hip: Position the ball so your side torso can rest comfortably over it without collapsing forward.
- Set your lower hip on the ball: Let the ball support the side of your hip and waist. Your torso should be angled sideways over the ball.
- Anchor your feet: Place your feet on the floor in a staggered or stacked position. For more support, press the feet against a wall or use a wider stance.
- Place the top hand behind your head: Keep the elbow open, but avoid pulling the head forward. The hand is only a light guide.
- Stack your body sideways: Keep your chest open, hips steady, and torso facing forward rather than rotating toward the floor.
- Brace gently: Tighten the core just enough to control the ball. However, keep your breathing relaxed.
Setup tip: If your feet slide or the ball rolls too much, reduce the range and secure your feet before continuing. A stable base makes the obliques work better.
Execution (Step-by-Step)
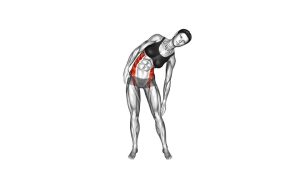
- Start in a side-bent position: Allow your torso to lower gently over the ball. You should feel a mild stretch along the side of your waist.
- Keep your hips quiet: Before lifting, check that the hips are not rolling forward or backward. This helps keep the movement focused on lateral flexion.
- Lift from the obliques: Contract the side of your waist and raise your torso upward. Move slowly, and avoid jerking with momentum.
- Stop near neutral: Lift until your body forms a strong side line. Do not overextend or twist at the top.
- Squeeze briefly: Hold the top position for one second while keeping your neck relaxed and your chest open.
- Lower under control: Return over the ball slowly. Let the side of the waist lengthen without dropping suddenly.
- Repeat, then switch sides: Complete all reps on one side before changing sides. Match the same range, tempo, and control on both sides.
Pro Tips & Common Mistakes
Pro Tips
- Think “rib to hip” on the working side: This cue helps you contract the obliques without yanking the neck.
- Move in a smooth arc: A controlled lift and controlled return create better tension than fast reps.
- Keep the elbow open: Your hand can support the head lightly, but the elbow should not pull the torso up.
- Use the ball as support, not momentum: Let it guide the path, but do not bounce off it.
- Match both sides: Because side-to-side differences are common, use the weaker side to set the standard.
Common Mistakes
- Twisting the torso: Rotation reduces oblique isolation and can shift tension into the lower back.
- Pulling on the head: This can strain the neck. Instead, lift the ribs with the side waist.
- Using too much range: A deep drop may feel intense, but it can also create poor control. Stay within a strong range.
- Letting the ball roll: If the ball moves too much, your base is not stable enough. Reset your feet and slow the tempo.
- Overarching at the top: Stop near neutral. More height is not better if it comes from spinal compensation.
- Holding the breath: Exhale as you lift and inhale as you lower to keep the core active without stiffness.
FAQ
What muscles does the Side Bend on Stability Ball work?
The main target is the obliques, especially during the upward side-bending phase. The quadratus lumborum, rectus abdominis, glutes, and spinal stabilizers also assist because the ball requires balance and trunk control.
Is the Side Bend on Stability Ball good for beginners?
Yes, it can be beginner-friendly when performed with a small range and stable foot position. However, beginners should focus on slow reps, steady hips, and controlled breathing before increasing range or resistance.
Should I feel this exercise in my lower back?
A small amount of stabilizing work around the lower back can be normal. However, the main feeling should be along the side of the waist. If your lower back dominates, reduce the range, avoid twisting, and keep the lift controlled.
Can I hold a dumbbell while doing this exercise?
You can add a light dumbbell after mastering bodyweight form. Even then, use caution. The stability ball already adds instability, so extra weight should only be used when the hips, torso, and neck stay controlled.
How do I make the exercise easier?
Widen your stance, place your feet against a wall, reduce the range of motion, or keep both hands across the chest. These changes improve balance and reduce unnecessary strain.
How do I make the exercise harder?
Slow the lowering phase, pause at the top, increase reps, or hold a light weight against the chest. However, progression should never cause twisting, bouncing, or neck pulling.
Recommended Equipment
- Anti-Burst Stability Ball — the main tool for performing the exercise safely and comfortably.
- Thick Non-Slip Exercise Mat — helps protect the floor and improves foot grip during setup.
- Stability Ball Base Ring — useful for beginners who need extra control while learning the position.
- Light Dumbbell Set — optional progression once bodyweight side bends feel stable and controlled.
- Resistance Bands Set — useful for pairing this exercise with anti-rotation and core stability drills.
Equipment tip: Choose a stability ball size that lets your hip and side torso rest comfortably without forcing your body into an extreme bend.