Celebratory Hip Thrust: Glute Activation, Form, Sets, Tips & FAQ
Learn the Celebratory Hip Thrust for glute activation, hip extension, and bodyweight control with step-by-step form, sets, tips, FAQs, and gear.
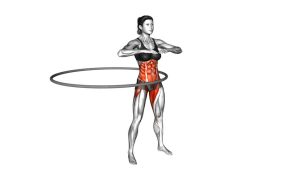
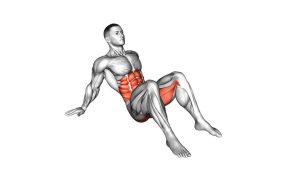
Celebratory Hip Thrust
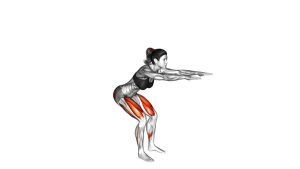
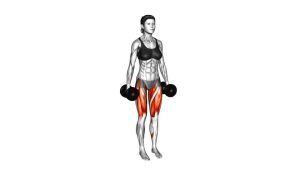
This exercise works best when the movement comes from the hips, not from excessive lower-back arching. Because the video shows a standing version, the goal is to keep the chest lifted, bend the knees slightly, squeeze the glutes at the forward position, and return smoothly without snapping the hips forward. As a result, the movement becomes controlled, athletic, and easy to repeat.
Quick Overview
| Body Part | Glutes |
|---|---|
| Primary Muscle | Gluteus maximus |
| Secondary Muscle | Hamstrings, quadriceps, core stabilizers, hip flexors during reset |
| Equipment | None |
| Difficulty | Beginner |
Sets & Reps (By Goal)
- Warm-up activation: 2–3 sets × 10–15 reps with a smooth rhythm.
- Glute awareness: 2–4 sets × 8–12 reps with a 1-second squeeze at the front.
- Coordination and rhythm: 3–5 sets × 15–25 seconds using controlled repeated thrusts.
- Beginner lower-body practice: 2–3 sets × 8–10 reps with slow tempo and full balance control.
Progression rule: First improve control, balance, and glute squeeze. Then add more reps or longer rhythmic sets. Do not progress by arching the lower back harder.
Setup / Starting Position
- Stand tall: Place your feet about hip-width apart and keep your weight balanced through both feet.
- Soften the knees: Bend the knees slightly so the hips can move without locking the legs.
- Brace lightly: Keep the ribs stacked over the pelvis and tighten the core enough to avoid excessive back arching.
- Relax the upper body: Keep the shoulders down and allow the arms to stay natural or move slightly for rhythm.
- Start neutral: Begin with the hips underneath the torso before each forward drive.
Since this is a standing bodyweight movement, balance matters. Use a smaller range if your feet shift or your lower back takes over.
Execution (Step-by-Step)
- Begin in a stable stance: Keep the feet planted, knees soft, chest lifted, and core lightly braced.
- Drive the hips forward: Push the pelvis forward by squeezing the glutes, not by leaning backward aggressively.
- Pause briefly: At the front position, hold for a short moment and feel the glutes contract.
- Return to neutral: Let the hips come back under control until the body returns to the starting position.
- Repeat rhythmically: Continue the same small forward-and-back pattern while keeping the torso mostly upright.
Pro Tips & Common Mistakes
- Use the glutes first: Think “squeeze and drive,” not “throw the hips.”
- Keep the knees soft: Locked knees reduce control and can make the movement feel stiff.
- Avoid over-arching: Do not turn the thrust into a lower-back extension.
- Stay balanced: Keep pressure even through the feet instead of rocking onto the toes.
- Control the return: The backward phase should be smooth, not loose or uncontrolled.
- Use a small range: A clean short thrust is better than a large sloppy one.
- Breathe naturally: Exhale slightly during the forward hip drive and inhale as you reset.
FAQ
Is the Celebratory Hip Thrust the same as a regular hip thrust?
No. A regular hip thrust is usually done with the upper back supported on a bench and the hips moving against gravity or load. However, the video shows a standing bodyweight hip-thrust pattern, so this version is more rhythmic and coordination-based.
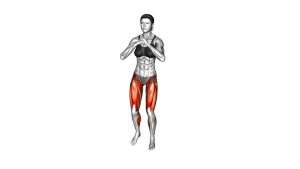
What muscles does the Celebratory Hip Thrust work?
The main target is the gluteus maximus because the hips extend forward. Additionally, the hamstrings, quadriceps, and core assist with balance and control during the movement.
Should I feel this in my lower back?
You may feel light spinal stabilization, but the lower back should not dominate. If your back feels pinched or tight, reduce the range, bend the knees slightly, and focus on squeezing the glutes.
Can beginners do this exercise?
Yes. This movement is beginner-friendly because it uses bodyweight only. Still, beginners should keep the range small and controlled until balance and glute activation improve.
Can I use this as a warm-up?
Yes. It works well before glute bridges, squats, lunges, hip thrusts, or lower-body workouts because it wakes up the hips and reinforces hip-extension timing.
Recommended Equipment (Optional)
- Exercise Mat — useful for warm-ups, glute bridges, and floor-based hip-extension drills.
- Glute Resistance Bands — helpful for adding light hip and glute activation work before lower-body training.
- Mini Loop Resistance Bands — compact option for hip warm-ups, lateral walks, and glute engagement drills.
- Hip Thrust Pad — useful if you later progress to barbell or loaded hip-thrust variations.
- Adjustable Ankle Weights — optional for related glute drills such as standing kickbacks and controlled hip-extension work.
Tip: This video variation does not require equipment. Therefore, use these tools only if you want to expand your glute warm-up or progress into other lower-body exercises.