Bodyweight Windmill: Proper Form, Core Benefits, Sets, Tips & FAQ
Learn the Bodyweight Windmill for oblique strength, hip mobility, and shoulder stability. Step-by-step form, sets, tips, FAQs, and gear.
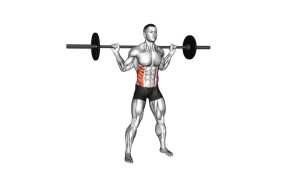
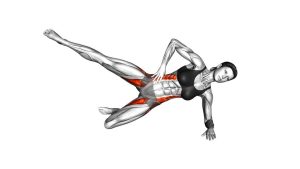
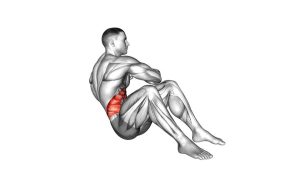
Bodyweight Windmill
This exercise works best when every rep is slow, balanced, and intentional. First, create a wide base with your feet. Then, reach one arm overhead and slide the opposite hand down the leg as the torso tilts to the side. During the descent, keep the top arm stacked, the chest slightly open, and the spine long. Therefore, the goal is not to drop as low as possible; instead, the goal is to move with control while keeping your hips, core, and shoulders connected.
Quick Overview
| Body Part | Core |
|---|---|
| Primary Muscle | Obliques |
| Secondary Muscle | Abs, glutes, hamstrings, hips, spinal stabilizers, and shoulder stabilizers |
| Equipment | None |
| Difficulty | Beginner to intermediate, depending on mobility and control |
Sets & Reps (By Goal)
- Mobility warm-up: 2 sets × 6–8 reps per side with a slow, easy range.
- Core control: 3 sets × 8–12 reps per side with a 1–2 second pause near the bottom.
- Balance and coordination: 2–4 sets × 6–10 reps per side using a slower tempo.
- Beginner practice: 1–3 sets × 5–8 reps per side while keeping the movement shallow.
Progression rule: Add range only after you can keep the top arm stable, the chest open, and the hips controlled. Additionally, increase reps before adding external load.
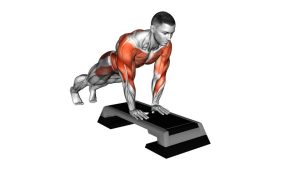
Setup / Starting Position
- Stand wide: Place your feet slightly wider than shoulder-width for balance.
- Turn the toes slightly out: Use a comfortable angle that lets the hips shift without knee discomfort.
- Reach one arm overhead: Keep the raised arm long and stacked above the shoulder.
- Let the opposite arm point down: This hand will slide along the thigh, shin, or toward the ankle.
- Brace lightly: Keep your ribs controlled, your neck neutral, and your shoulders relaxed.
Start with a smaller range if your hamstrings, hips, or shoulders feel tight. A clean short rep is better than a forced deep rep.
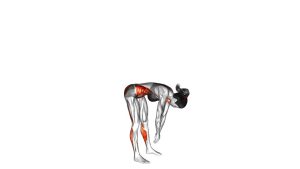
Execution (Step-by-Step)
- Set your base: Stand tall with a wide stance and reach one arm straight up.
- Shift the hips: Push the hips slightly to the side as you begin to tilt the torso.
- Slide the lower hand: Let the lower hand travel down the same-side leg in a controlled path.
- Keep the chest open: Avoid collapsing forward. Instead, maintain a slight upward rotation through the chest.
- Hold the top arm steady: Keep the raised arm vertical or as stacked as your shoulder mobility allows.
- Pause with control: Stop at your comfortable bottom position without bouncing.
- Return smoothly: Drive through the hips and obliques to bring the torso back to standing.
- Repeat on the other side: Switch arms and perform the same controlled pattern evenly.
Pro Tips & Common Mistakes
- Move from the hips first: Begin by shifting the hips, then let the torso follow.
- Keep the top arm active: Reach upward without shrugging the shoulder toward your ear.
- Avoid rounding forward: The chest should stay open, because the exercise is not a standard toe touch.
- Control the descent: Lower slowly so the obliques and hips manage the movement.
- Do not lock the knees hard: Keep the legs long, but avoid forcing the joints into a rigid position.
- Use a comfortable range: Stop where you can keep balance, breathing, and alignment.
- Avoid rushing the return: Stand back up smoothly instead of snapping the torso upright.
- Watch shoulder position: If the raised arm drifts forward or causes pinching, reduce the reach or lower the arm slightly.
FAQ
What muscles does the Bodyweight Windmill work?
The Bodyweight Windmill mainly trains the obliques. However, it also involves the abs, hips, glutes, hamstrings, spinal stabilizers, and shoulder stabilizers. Because the movement uses the full body, it is useful for both core control and mobility practice.
Is the Bodyweight Windmill good for beginners?
Yes, beginners can use it when the range is controlled and shallow. However, the movement requires balance, hip mobility, and shoulder awareness. Therefore, beginners should start slowly and avoid reaching too far down.
Should I touch the floor during the Bodyweight Windmill?
No, touching the floor is not required. In fact, forcing the hand toward the floor can cause rounding, twisting, or loss of balance. Instead, lower only as far as you can while keeping the chest open and the top arm stable.
Why does my lower back feel tight during this exercise?
Lower-back tightness can happen if you bend forward too much, rotate aggressively, or use more range than your hips allow. Reduce the depth, slow the tempo, and focus on shifting the hips while keeping the spine long.
Can I do the Bodyweight Windmill every day?
You can perform it often as a light mobility drill, especially if you keep the effort moderate. Nevertheless, if you feel lingering soreness or joint discomfort, reduce the volume and allow more recovery.
Recommended Equipment (Optional)
- Exercise Mat — provides a stable surface for warm-ups, mobility drills, and core work.
- Yoga Blocks — useful as a height target if you need support before reaching lower.
- Foam Roller — helpful for preparing the upper back, hips, and hamstrings before training.
- Resistance Bands Set — useful for pairing the windmill with shoulder activation and upper-back work.
- Adjustable Kettlebell — optional for advanced progressions after bodyweight form is controlled.
Tip: Master the bodyweight version first. After that, progress slowly only if your shoulder stays stable and your torso control remains clean.