Walking Lunge: Proper Form, Muscles Worked, Sets, Tips & FAQ
Learn the Walking Lunge for stronger legs, glutes, balance, and lower-body control. Includes form steps, sets, mistakes, FAQs, and equipment tips.
Walking Lunge
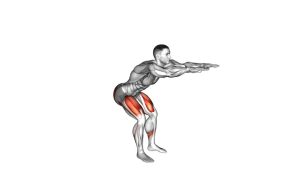
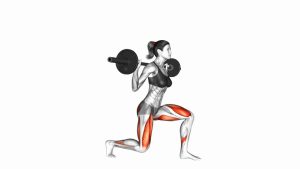
The walking lunge is excellent for building functional lower-body strength because each repetition challenges one leg at a time while the body travels forward. This makes it more athletic and coordination-based than a stationary lunge. To perform it well, focus on clean knee tracking, stable foot placement, controlled depth, and a smooth transition into the next step.
Quick Overview
| Body Part | Legs |
|---|---|
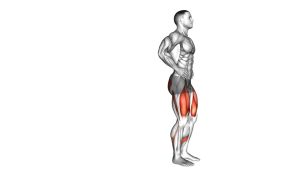
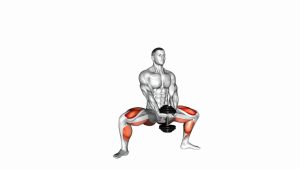
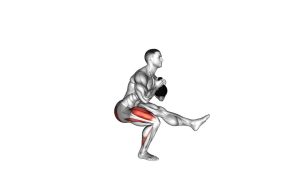
| Primary Muscle | Quadriceps, gluteus maximus |
| Secondary Muscle | Hamstrings, calves, gluteus medius, adductors, core stabilizers |
| Equipment | Bodyweight only; optional dumbbells, kettlebells, or weighted vest |
| Difficulty | Intermediate because it requires strength, balance, coordination, and controlled forward movement |
Sets & Reps (By Goal)
- Beginner technique practice: 2–3 sets × 6–8 reps per leg with bodyweight only.
- Muscle building: 3–4 sets × 8–12 reps per leg with controlled tempo.
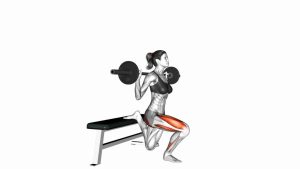
- Strength focus: 3–5 sets × 6–10 reps per leg using dumbbells or kettlebells.
- Conditioning: 2–4 rounds × 12–20 total steps with short rest periods.
- Warm-up activation: 1–2 sets × 6–10 steps per leg using slow, clean movement.
Progression rule: First improve balance and depth. Then increase total steps, slow the tempo, or add external load. Do not add weight if your knees cave inward or your torso leans excessively.
Setup / Starting Position
- Stand tall: Place your feet hip-width apart with your chest lifted and your core lightly braced.
- Set your upper body: Keep your shoulders relaxed. Place your hands on your hips, at your sides, or hold weights if advanced.
- Look forward: Keep your head neutral and eyes forward to help maintain balance.
- Create space: Use a clear path where you can step forward safely without obstacles.
- Brace before stepping: Lightly tighten your core before the first step to keep the pelvis stable.
Tip: A slightly longer step usually increases glute involvement, while a shorter step tends to emphasize the quadriceps more.
Execution (Step-by-Step)
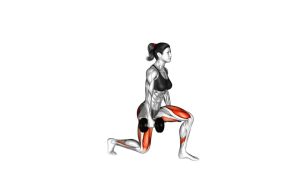
- Step forward: Take a controlled step forward with one leg, landing through the heel and midfoot.
- Lower under control: Bend both knees and lower your hips straight down toward the floor.
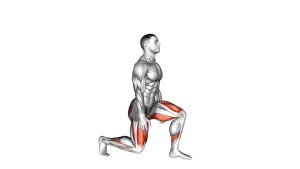
- Reach good depth: Aim for the front knee near 90 degrees and the rear knee close to the floor without touching hard.
- Keep alignment: Keep the front knee tracking over the toes and avoid letting it collapse inward.
- Drive forward: Push through the front foot to stand and bring the rear leg forward into the next lunge.
- Repeat smoothly: Continue alternating legs with a controlled walking rhythm.
Pro Tips & Common Mistakes
- Use a controlled stride: Avoid stepping too short, which may crowd the knee, or too long, which may reduce control.
- Keep the front heel grounded: Driving through the heel and midfoot helps activate the glutes and quads effectively.
- Do not let the knee cave inward: Keep the knee aligned with the toes throughout the descent and drive phase.
- Avoid leaning forward: A slight natural torso angle is fine, but excessive forward lean reduces control.
- Control the rear knee: Lower close to the floor without smashing the knee down.
- Do not rush the transition: Stand tall between reps and step forward with balance.
- Start with bodyweight: Add dumbbells only after your reps are stable and symmetrical.
FAQ
What muscles do walking lunges work?
Walking lunges mainly work the quadriceps and glutes. They also train the hamstrings, calves, adductors, gluteus medius, and core stabilizers.
Are walking lunges good for glutes?
Yes. Walking lunges can be very effective for glute training, especially when you use a controlled step, drive through the front heel, and avoid rushing the movement. A slightly longer stride can increase glute emphasis.
Are walking lunges better than stationary lunges?
Neither is automatically better. Walking lunges are more dynamic and challenge balance, coordination, and forward movement. Stationary lunges are easier to control and may be better for beginners learning the pattern.
Should my knee go past my toes during walking lunges?
Some forward knee travel is normal, but it should be controlled. The more important point is that the knee tracks in line with the toes and does not collapse inward.
Why do I lose balance during walking lunges?
Balance issues usually come from stepping too narrow, moving too fast, or not bracing the core. Step slightly wider, slow the tempo, and keep your eyes forward.
Can beginners do walking lunges?
Beginners can do walking lunges, but stationary lunges or assisted lunges may be better first. Once you can control depth, knee tracking, and balance, walking lunges become a useful progression.
Recommended Equipment
- Adjustable Dumbbells — useful for progressing walking lunges with added resistance.
- Kettlebell Set — great for suitcase, goblet, or front-loaded walking lunge variations.
- Weighted Vest — adds load while keeping the hands free and posture natural.
- Resistance Bands Set — helpful for glute activation drills before lower-body training.
- Thick Exercise Mat — useful for warm-ups, mobility work, and knee-friendly lunge practice.
Tip: Start with bodyweight first. Add equipment only when your walking lunge stays balanced, smooth, and pain-free.