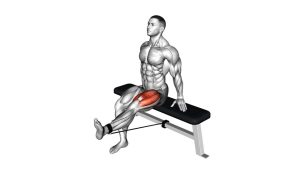
Supported Sissy Squat: Proper Form, Muscles Worked, Sets & Tips
Learn the Supported Sissy Squat (Bench-Assisted) with proper quad-focused technique, setup, sets and reps, common mistakes, safe progressions, and FAQs.
Supported Sissy Squat (Bench-Assisted)
The Supported Sissy Squat emphasizes the quadriceps through a movement pattern that differs significantly from standard squatting exercises. Instead of sitting backward and bending deeply at the hips, the athlete moves the knees forward while keeping the torso and thighs approximately aligned.
As a result, the exercise creates substantial demand on the knee extensors, particularly during the slow lowering phase. Additionally, maintaining a controlled backward lean challenges balance, ankle stability, and trunk control.
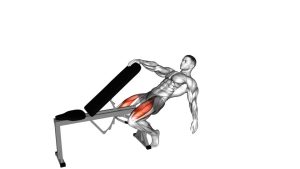
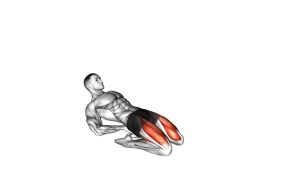
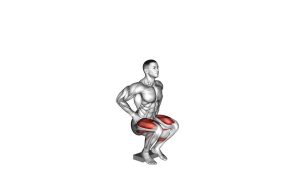
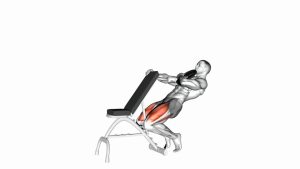
In the demonstrated variation, the athlete stands behind an inclined bench-like support and holds it with both hands. She then bends both knees, raises her heels, and leans backward before returning to an upright position. Although some versions include external resistance, no separate weight is clearly visible in this demonstration.
Quick Overview
| Body Part | Legs |
|---|---|
| Primary Muscle | Quadriceps femoris (rectus femoris, vastus lateralis, vastus medialis, and vastus intermedius) |
| Secondary Muscle | Calves (gastrocnemius and soleus), abdominal stabilizers, hip stabilizers, and supporting trunk musculature |
| Equipment | Bodyweight and a stable bench, fixed rail, or sturdy support for balance |
| Difficulty | Intermediate; requires controlled knee flexion, quadriceps strength, and adequate balance |
Sets & Reps (By Goal)
Training volume should match your current strength, knee tolerance, and movement quality. Because sissy squats emphasize the quadriceps through substantial knee flexion, controlled repetitions matter more than excessive volume.
- Beginner movement control: 2–3 sets × 5–8 partial-range reps. Use a slow tempo and rest 60–90 seconds. Focus on balance and comfortable knee movement.
- Muscle hypertrophy: 3–4 sets × 8–12 controlled reps. Rest 90–120 seconds between sets. Maintain consistent quadriceps tension.
- Strength development: 3–4 sets × 6–8 controlled reps. Rest 90–150 seconds. Prioritize stable technique before increasing difficulty.
- Muscular endurance: 2–3 sets × 12–15 reps. Rest 45–75 seconds. Use only a range that remains comfortable.
- Rehabilitation-style practice: Only with professional guidance, perform 1–2 sets × 4–6 shallow, assisted reps. Progress according to individual symptoms and tolerance.
How to Progress Safely
First, improve your ability to lower and rise without bouncing, shifting sideways, or losing contact with the support. Next, increase repetitions while keeping the same controlled movement pattern.
Once you can complete every repetition comfortably, you may gradually increase the range of motion. However, deeper movement is not automatically better. Therefore, avoid pushing beyond the depth your knees can tolerate.
Progression rule: Master shallow bodyweight repetitions before adding external resistance. For most beginners, consistent technique and adequate recovery are more valuable than additional load.
Setup / Starting Position
Establish a Stable Starting Position
- Choose a secure support: Position yourself behind a sturdy bench or fixed support structure. Ensure the equipment cannot roll, tip, or slide when you hold it.
- Stand close to the support: Position both feet approximately hip-width apart or slightly narrower. Keep your feet parallel or slightly turned outward, depending on your comfortable knee alignment.
- Grip the support: Hold the inclined bench section or a fixed handrail with both hands. Your grip should provide balance assistance without creating excessive shoulder tension.
- Set your upper body: Maintain a tall posture with the chest open, shoulders relaxed, and abdominal muscles gently engaged.
- Prepare the lower body: Begin with both knees nearly extended. Keep your hips relatively straight and distribute your weight evenly between both legs.
- Prepare for heel elevation: Shift pressure toward the balls of your feet. Allow the heels to rise naturally as the lowering phase begins.
Important Alignment Cues
Before descending, imagine creating a long, controlled line from your knees through your hips and shoulders. Meanwhile, keep your abdominal muscles active to avoid excessive lower-back arching.
Your hands should provide a reliable point of support throughout the movement. However, the bench must remain completely stable when you apply force to it. If the equipment shifts, select a fixed handrail or another secure support instead.
Setup tip: Practice a few shallow repetitions before attempting greater depth. This helps establish balance and assess knee comfort.
Execution (Step-by-Step)
Lowering Phase: Controlled Knee Flexion
- Begin from standing: Stand tall behind the support with both hands holding it securely. Keep your shoulders relaxed and your abdominal muscles gently braced.
- Raise the heels: Shift pressure onto the balls of your feet. As the movement begins, allow your heels to lift gradually while maintaining balance.
- Move the knees forward: Slowly bend both knees together. Meanwhile, allow your knees to travel forward in the direction of your toes.
- Lean the body backward: As your knees flex, gradually incline your torso backward. Keep the hips relatively extended instead of sitting backward like a conventional squat.
- Maintain body alignment: Keep the trunk and thighs approximately aligned while controlling the descent. Additionally, prevent excessive arching through your lower back.
- Reach a comfortable bottom position: Continue lowering only while you can maintain balance and knee control. Pause briefly without bouncing or forcing additional range of motion.
Rising Phase: Quadriceps Contraction
- Initiate the upward movement: Contract your quadriceps to begin extending both knees. Keep pressure distributed through the forefoot while maintaining your grip.
- Return the body upright: Gradually straighten your knees as your torso moves toward the starting position. Avoid suddenly pulling yourself upward with your arms.
- Maintain controlled alignment: Keep both knees tracking consistently. Meanwhile, prevent the hips from folding forward or the torso from collapsing.
- Complete the repetition: Return to a nearly upright standing position. Then, lower your heels comfortably and prepare for the next repetition.
Breathing and Movement Tempo
Inhale during the lowering phase and exhale as you extend your knees to rise. For example, use a two- to three-second descent followed by a controlled ascent.
Additionally, avoid holding your breath unnecessarily during moderate-effort repetitions. Instead, maintain natural breathing and concentrate on smooth quadriceps contraction.
Pro Tips & Common Mistakes
Pro Tips for Better Quadriceps Engagement
- Prioritize knee control: Move both knees forward smoothly. Therefore, avoid sudden changes in direction during the lowering phase.
- Keep the hips relatively extended: Maintain alignment between the thighs and torso. This helps preserve the intended knee-dominant movement pattern.
- Use the hands for balance: Maintain contact with the support throughout the repetition. However, let the quadriceps perform most of the lifting work.
- Control heel elevation: Allow both heels to rise gradually. Keep your forefoot stable and avoid rolling excessively toward either edge.
- Keep the core engaged: Brace gently to support a stable trunk. Additionally, avoid leaning backward by arching only through the lower back.
- Choose a manageable depth: Stop before balance or knee control deteriorates. As your technique improves, increase depth gradually without forcing the joints.
Common Mistakes to Avoid
- Sitting backward like a normal squat: Excessive hip flexion changes the exercise and reduces its distinctive quadriceps emphasis.
- Dropping too quickly: Rapid descent makes the movement harder to control. Instead, use slow and deliberate knee flexion.
- Pulling excessively with the arms: Heavy upper-body assistance can hide insufficient quadriceps control. Therefore, reduce the difficulty when necessary.
- Forcing extreme knee flexion: Greater depth is not always appropriate. Stop at a range that remains comfortable and mechanically controlled.
- Allowing the knees to collapse inward: Keep both knees moving consistently with the direction of the toes.
- Arching the lower back: Excessive spinal extension can disrupt trunk alignment. Instead, engage the abdomen and maintain a controlled body position.
- Using unstable equipment: A moving bench or unsupported handhold creates an unnecessary balance risk. Always verify equipment stability before starting.
- Adding weight too early: External resistance increases exercise demand. Consequently, master bodyweight repetitions before attempting weighted progressions.
Training tip: Use supported sissy squats as an accessory movement after more general lower-body training. For example, they may complement conventional squats, split squats, and other quadriceps exercises when your knees tolerate them well.
FAQ
Muscles Worked and Exercise Technique
What muscles does the Supported Sissy Squat work?
The Supported Sissy Squat primarily targets the quadriceps femoris, including the rectus femoris, vastus lateralis, vastus medialis, and vastus intermedius. Because the exercise emphasizes knee extension, these muscles perform most of the lifting work.
Additionally, the calves help stabilize the elevated-heel position, while the abdominal and hip stabilizers maintain body alignment. However, the glutes play a smaller dynamic lifting role than during conventional squats.
What is the difference between a Supported Sissy Squat and a regular squat?
A regular squat involves substantial movement at both the hips and knees. In contrast, a supported sissy squat keeps the hips relatively extended while the knees bend forward and the torso leans backward.
Consequently, the supported sissy squat places a greater relative emphasis on knee extension. Meanwhile, the handhold provides additional balance assistance throughout the repetition.
Why do my heels rise during a Supported Sissy Squat?
Heel elevation is a normal feature of many traditional sissy squat variations. As the knees travel forward, the athlete shifts pressure toward the balls of the feet.
Therefore, the heels may lift naturally to accommodate the movement. However, both feet should remain stable, and the ankle position should feel controlled.
Difficulty, Knee Comfort, and Progression
Is the Supported Sissy Squat suitable for beginners?
The assisted variation is easier to balance than an unsupported sissy squat. Nevertheless, the movement can still be demanding for the quadriceps and knees.
Beginners should first establish comfortable knee control using a stable handhold and a shallow range. Additionally, conventional squats or supported squat variations may provide a simpler starting point.
Are Supported Sissy Squats bad for your knees?
Supported sissy squats are not automatically harmful, but they create substantial loading demands around the knee. Therefore, individual tolerance, technique, training history, and exercise depth matter.
If you experience sharp pain, swelling, instability, or symptoms that worsen after training, stop and seek professional advice. Furthermore, anyone recovering from a knee injury should obtain appropriate guidance before using this demanding variation.
How deep should I lower during a Supported Sissy Squat?
Lower only as far as you can maintain controlled knee movement, stable balance, and a comfortable range of motion. For many beginners, this means using partial repetitions initially.
As strength and control improve, deeper movement may become appropriate. However, never force additional depth simply to imitate an advanced demonstration.
Training Frequency and Equipment
How often should I perform Supported Sissy Squats?
Many exercisers can begin with one or two sessions per week, depending on their current lower-body training volume.
Additionally, allow sufficient recovery between demanding quadriceps sessions. If soreness or knee discomfort persists, reduce the training volume or range before progressing further.
Can I perform Supported Sissy Squats without a bench?
Yes. A secure squat rack, fixed handrail, or other immovable support may provide suitable balance assistance.
However, avoid holding unstable chairs, lightweight furniture, or equipment that can tip under pressure. Instead, choose a structure that remains secure throughout the entire repetition.
Can I add weights to Supported Sissy Squats?
Yes, advanced exercisers may eventually use a weighted vest, dumbbell, or weight plate to increase resistance. However, adding weight is unnecessary when bodyweight repetitions are already challenging.
First, develop consistent balance, comfortable knee movement, and controlled depth. Then, consider gradual loading only if your technique and joint tolerance remain reliable.
Recommended Equipment
The Supported Sissy Squat requires little equipment, but a reliable handhold is essential for safe execution. Additionally, suitable training accessories can support balance, comfort, and gradual progression.
- Heavy-Duty Adjustable Weight Bench — provides a bench-style support similar to the demonstrated setup when the selected bench is stable and suitable for the intended handhold
- Heavy-Duty Squat Rack With Support Bar — offers an alternative fixed handhold for balance assistance during controlled sissy squat repetitions
- Non-Slip Strength Training Shoes — provide reliable forefoot traction and help maintain stable foot contact during heel-raised movements
- Squat Wedge / Slant Board — allows an optional supported-heel variation for exercisers who prefer a stable elevated-heel position
- Adjustable Weighted Vest — offers optional external resistance for experienced exercisers who have already mastered controlled bodyweight repetitions
Equipment tip: Always prioritize the stability of your support structure and the traction beneath your feet. Furthermore, optional wedges and external weights should only be introduced when they suit your movement ability and training experience. For most exercisers, a secure handhold and controlled bodyweight repetitions are sufficient to begin.