Lever Leg Extension: Proper Form, Quad Training Tips & FAQ
Learn the Lever Leg Extension to isolate your quadriceps with controlled form, safe setup, sets by goal, common mistakes, FAQs, and equipment tips.
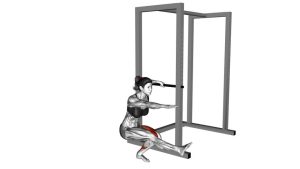
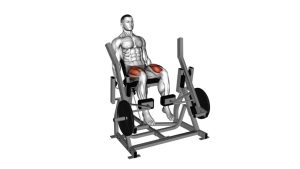
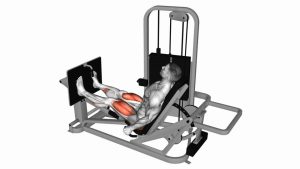
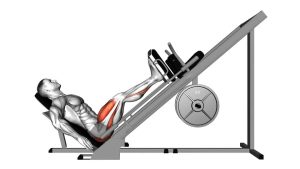
Lever Leg Extension
This exercise is excellent for targeting the front of the thighs because it limits hip movement and places most of the work directly on the quadriceps. It is commonly used for leg-day hypertrophy, quad finishing sets, knee-extension strength, and controlled lower-body training. The best results come from a steady tempo, a strong top contraction, and a slow lowering phase without letting the weight stack slam.
Quick Overview
| Body Part | Quads |
|---|---|
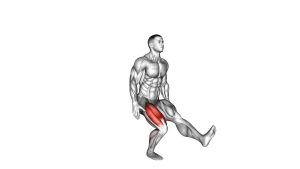
| Primary Muscle | Quadriceps: rectus femoris, vastus lateralis, vastus medialis, and vastus intermedius |
| Secondary Muscle | Hip flexors and lower-leg stabilizers assist lightly, but the movement should stay quad-dominant |
| Equipment | Lever leg extension machine or seated leg extension machine |
| Difficulty | Beginner to Intermediate |
Sets & Reps (By Goal)
- Muscle growth: 3–5 sets × 10–15 reps with a controlled 2–3 second lowering phase.
- Strength focus: 3–4 sets × 6–10 reps using a challenging load without swinging.
- Beginner technique: 2–3 sets × 10–12 reps with light-to-moderate resistance.
- Quad finisher: 2–4 sets × 15–25 reps using smooth, constant tension.
- Rehab-style control: 2–3 sets × 8–12 reps with light resistance and strict pain-free motion.
Progression rule: Add reps first, then increase weight gradually. The load is too heavy if your hips lift, your torso rocks, or you cannot lower the lever under control.
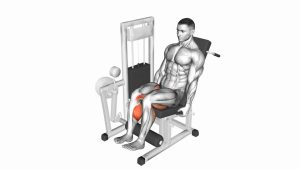
Setup / Starting Position
- Adjust the seat: Sit with your back fully supported and your knees aligned close to the machine’s pivot point.
- Set the roller pad: Position the lower pad against the front of your lower legs, just above the ankles.
- Choose the load: Start with a weight that allows clean extension without swinging or locking out aggressively.
- Grip the handles: Hold the side handles to keep your hips stable and your torso still.
- Set your posture: Keep your chest relaxed, ribs controlled, and lower back supported against the pad.
- Prepare the legs: Begin with knees bent and feet relaxed or slightly dorsiflexed.
Tip: The machine should feel aligned with your knee joint. If the roller pulls your legs awkwardly or creates knee pressure, adjust the seat and pad position before starting.
Execution (Step-by-Step)
- Brace lightly: Grip the handles and keep your hips pressed into the seat.
- Extend the knees: Lift the roller pad upward by straightening your legs in a smooth arc.
- Control the top: Stop just before a hard knee lockout and squeeze the quadriceps for a brief pause.
- Lower slowly: Return the lever under control until the knees are bent again.
- Keep tension: Avoid letting the weight stack slam at the bottom.
- Repeat consistently: Keep each rep smooth, symmetrical, and controlled from start to finish.
Pro Tips & Common Mistakes
- Do not kick the weight: Use quad control instead of momentum.
- Avoid hard lockout: Stop near full extension without snapping the knees straight.
- Control the eccentric: Lower the pad slowly to increase time under tension.
- Keep hips down: If your hips rise off the seat, the load is likely too heavy.
- Align the knees: Keep both knees tracking naturally and evenly throughout the rep.
- Use a full but comfortable range: Train through a range that feels strong and pain-free.
- Pause at the top: A short squeeze improves quad engagement and reduces bouncing.
- Adjust before loading heavy: Poor pad and seat setup can increase knee stress.
FAQ
What muscles does the Lever Leg Extension work?
The Lever Leg Extension primarily works the quadriceps, including the rectus femoris, vastus lateralis, vastus medialis, and vastus intermedius. It is one of the most direct machine exercises for isolating the front of the thighs.
Is the Lever Leg Extension good for building bigger quads?
Yes. It is useful for quad hypertrophy because it allows focused knee extension without much hip involvement. For muscle growth, use controlled reps, moderate-to-high volume, and a strong squeeze near the top.
Should I lock my knees at the top?
Avoid snapping into a hard lockout. Extend until your legs are nearly straight, squeeze the quads, then lower under control. This keeps tension on the muscles and may reduce unnecessary joint stress.
Where should the roller pad sit?
The roller pad should sit against the lower front of your legs, usually just above the ankles. It should not press directly on the knees or sit too high on the shins.
Can beginners do the Lever Leg Extension?
Yes. Beginners can use this exercise because the machine guides the movement path. Start light, learn the setup, and focus on smooth knee extension before adding heavier weight.
Why do my knees hurt during leg extensions?
Knee discomfort may come from too much weight, poor seat alignment, a pad position that is too high or too low, fast reps, or forcing the lockout. Reduce the load, adjust the machine, and use a pain-free range.
Recommended Equipment
- Leg Extension Machine — ideal for direct quadriceps isolation at home or in a gym setup
- Adjustable Weight Bench with Leg Extension Attachment — compact option for home leg training and quad-focused accessory work
- Cable Machine Ankle Straps — useful for cable-based knee extension variations when a machine is unavailable
- Knee Sleeves — provides warmth and light support during lower-body training
- Resistance Bands for Legs — useful for warm-ups, quad activation, and lighter knee-extension alternatives
Tip: Equipment should support clean technique, not force your body into an uncomfortable position. If a machine setup causes knee pressure, adjust the seat and pad before increasing resistance.