Lateral Step-Up with Knee Drive: Form, Muscles & Tips
Master the Lateral Step-Up with Knee Drive for stronger quads, glutes, and balance. Learn proper form, sets, common mistakes, and training tips.
Lateral Step-Up with Knee Drive
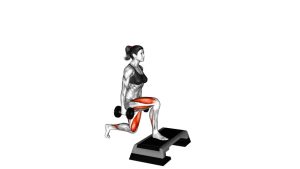
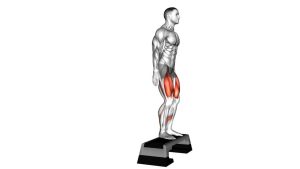
The Lateral Step-Up with Knee Drive challenges each leg independently while developing functional lower-body strength. During the upward phase, the supporting quadriceps and glutes generate force to elevate the body. Meanwhile, the opposite hip flexors lift the free knee toward the torso.
Additionally, the gluteus medius and core stabilizers help maintain pelvic alignment throughout the movement. Consequently, this exercise can support improved coordination during stair climbing, hiking, sports, and other single-leg activities.
Although the movement looks straightforward, its effectiveness depends on controlled weight transfer and precise knee alignment. Therefore, beginners should master a lower step before increasing platform height, repetition speed, or external resistance.
Quick Overview
| Body Part | Legs |
|---|---|
| Primary Muscle | Quadriceps and gluteus maximus |
| Secondary Muscle | Gluteus medius, gluteus minimus, hip flexors, hamstrings, calves, and core stabilizers |
| Equipment | Aerobic step platform, low exercise box, or sturdy elevated step |
| Difficulty | Intermediate, with beginner-friendly modifications using a lower platform and external balance support |
Sets & Reps (By Goal)
- Beginner control: Perform 2–3 sets of 6–8 repetitions per leg, resting 45–75 seconds between sets. First, use a low platform and prioritize balance over movement speed.
- Muscle strength: Complete 3–4 sets of 8–10 repetitions per leg, resting 60–90 seconds between sets. Additionally, emphasize a deliberate upward drive and controlled descent.
- Muscle hypertrophy: Perform 3–4 sets of 10–15 repetitions per leg, resting 60–90 seconds between sets. Once bodyweight control improves, suitable external resistance may increase the training challenge.
- Balance and coordination: Complete 2–3 sets of 8–12 repetitions per leg, holding the top position for 1–2 seconds. Meanwhile, maintain a level pelvis and steady torso.
- Lower-body endurance: Perform 2–3 sets of 12–20 repetitions per leg with 30–60 seconds of rest. However, reduce the repetitions if fatigue causes knee collapse or unstable landings.
- Mobility and controlled rehabilitation: If approved by a qualified healthcare professional, perform 1–2 sets of 5–8 slow repetitions per leg. Use a low step and stable support when needed.
Progression rule: Begin with a comfortable platform height and consistent bodyweight repetitions. Next, improve the top-position pause and lowering control. Only afterward should you consider additional repetitions, a slightly higher step, or light weights. Throughout the progression, prioritize knee alignment and stable single-leg balance.
Setup / Starting Position
- Select a secure platform: Choose a low aerobic step or stable exercise box with a non-slip surface. Ideally, its height should allow comfortable hip and knee movement without excessive effort or compensation.
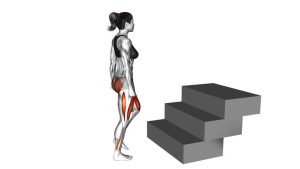
- Stand beside the platform: Position your body laterally, with the step directly beside one leg. Unlike a conventional step-up, you should not face the platform.
- Establish your stance: Stand with your feet approximately hip-width apart. Keep both feet flat, distribute your weight evenly, and allow your arms to hang naturally.
- Maintain upright posture: Lift your chest, relax your shoulders, and keep your head aligned with your spine. Additionally, engage your abdominal muscles without holding your breath.
- Prepare the working leg: Identify the foot closest to the platform. This foot will step sideways onto the surface and support your body during the upward drive.
- Align your knee and foot: Keep your supporting knee directed toward the same general line as your toes. Meanwhile, avoid allowing the knee to collapse inward as your weight transfers onto the platform.
- Prepare for the knee drive: Keep your opposite leg relaxed and ready to lift. Before beginning, visualize rising through the platform leg while bringing the free knee toward hip height.
Setup tip: Start on the side that allows the most comfortable movement pattern. Then reposition yourself on the opposite side of the platform to train the other leg. If balance is challenging, use a stable support within reach.
Execution (Step-by-Step)
- Begin in the lateral stance: Stand upright beside the platform with your shoulders relaxed and core gently engaged. Keep your gaze forward and maintain a comfortable hip-width starting position.
- Place the working foot on the step: Lift the foot nearest the platform and move it sideways onto the elevated surface. Ensure the entire sole makes secure contact before transferring your body weight.
- Transfer weight to the elevated leg: Shift your center of mass over the planted foot. Meanwhile, maintain a stable knee position and avoid excessive forward or sideways leaning.
- Drive upward through the working leg: Press firmly through your midfoot and heel while extending the supporting knee and hip. As a result, your body rises vertically above the elevated platform.
- Lift the opposite knee: As you approach the standing position, bend the free leg and drive its knee upward toward your torso. Ideally, raise the thigh toward hip height without forcing the movement.
- Stabilize at the top: Briefly balance on the supporting leg while keeping your chest lifted. Additionally, maintain a level pelvis, steady breathing, and controlled knee alignment.
- Lower the raised knee: Gradually reverse the knee-drive movement and guide the free leg toward the floor. Avoid swinging the leg or allowing your upper body to collapse sideways.
- Step down with control: Bend the supporting knee and hip while lowering your body beside the platform. Then place the free foot gently on the floor before removing the working foot from the step.
- Return to the starting stance: Bring both feet back onto the floor and restore your original standing posture. Finally, reset your balance before beginning the next controlled repetition.
Pro Tips & Common Mistakes
Pro Tips for Better Technique
- Use the correct platform height: Start with a low step that allows smooth knee and hip extension. As your balance improves, increase the challenge gradually rather than immediately selecting a taller platform.
- Drive through the entire working foot: Apply pressure through the heel and midfoot while keeping the foot firmly planted. This helps maintain stability during the upward drive and knee lift.
- Keep the pelvis level: Engage your hip stabilizers to prevent excessive side-to-side movement. Additionally, maintain a steady torso instead of shifting your shoulders away from the supporting leg.
- Raise the knee under control: Lift the free knee through active hip flexion. However, avoid swinging the leg aggressively or leaning backward to create extra height.
- Pause briefly at the top: A short balance hold improves awareness of the supporting leg. Furthermore, it encourages controlled movement rather than relying on momentum.
- Control the lowering phase: Descend gradually while maintaining knee alignment. Consequently, the supporting muscles remain engaged throughout both phases of the exercise.
Common Mistakes to Avoid
- Jumping from the trailing leg: Excessive pushing from the floor reduces the work performed by the supporting leg. Instead, transfer your weight smoothly onto the elevated foot.
- Allowing the knee to collapse inward: Poor alignment can reduce movement control. Therefore, keep the supporting knee tracking in the general direction of the toes.
- Leaning excessively sideways: Large torso shifts often indicate insufficient balance or excessive platform height. In that case, lower the step and emphasize pelvic stability.
- Placing only the toes on the platform: Partial foot contact creates unnecessary instability. Instead, position the entire working foot securely on the step before rising.
- Rushing the knee drive: Fast, uncontrolled movements can disrupt balance. As a result, focus on smooth hip flexion and a brief top-position pause.
- Dropping quickly to the floor: A sudden descent reduces eccentric control. Therefore, lower your body deliberately and allow the returning foot to land softly.
- Using excessive resistance too early: Heavy dumbbells may compromise coordination. Instead, establish consistent bodyweight technique before increasing the training load.
FAQ
Muscles Worked and Exercise Benefits
What muscles does the Lateral Step-Up with Knee Drive work?
The exercise primarily targets the quadriceps and gluteus maximus during the step-up. Additionally, the gluteus medius and minimus help stabilize the pelvis while standing on one leg. Meanwhile, the opposite hip flexors actively raise the knee toward the torso. The calves, hamstrings, and core also contribute to balance and movement control.
What are the main benefits of the Lateral Step-Up with Knee Drive?
This movement develops unilateral lower-body strength, balance, coordination, and hip stability. Furthermore, the lateral approach challenges frontal-plane control while the knee drive introduces a dynamic single-leg balance requirement. As a result, the exercise can complement functional training for walking, climbing stairs, hiking, and athletic movements.
Does this exercise target the glutes or quadriceps more?
Both muscle groups contribute substantially. The quadriceps extend the supporting knee, while the gluteus maximus extends the hip. Additionally, the gluteus medius supports pelvic control during single-leg balance. However, the relative emphasis depends on platform height, body proportions, technique, and individual movement patterns.
Technique and Training Frequency
How is a lateral step-up different from a regular step-up?
A traditional step-up usually begins with the athlete facing the platform. In contrast, the lateral variation starts beside the elevated surface and involves stepping sideways onto it. Furthermore, the knee-drive variation requires the opposite leg to lift while the supporting foot remains planted. Consequently, balance and coordination become important parts of the movement.
Should the opposite foot touch the platform during the knee drive?
No. During the demonstrated variation, the opposite foot does not step onto the platform at the top. Instead, the free leg bends and lifts while the working foot supports the body. Afterward, the free leg lowers toward the floor before the athlete returns to the starting position.
How often should I perform lateral step-ups with knee drives?
Most healthy exercisers can include this movement in lower-body training approximately two or three times per week, depending on training volume and recovery. For example, perform it after a general warm-up or within a unilateral strength circuit. Additionally, allow sufficient recovery between demanding leg-training sessions.
Difficulty, Progression, and Safety
Is the Lateral Step-Up with Knee Drive suitable for beginners?
Beginners can learn a modified version using a low platform and stable hand support. However, the full movement requires adequate single-leg strength, coordination, and balance. Therefore, practice ordinary low step-ups before introducing the knee drive. Once the movement becomes consistent, gradually reduce external support.
Can I perform this exercise with dumbbells?
Yes. Light dumbbells can increase the resistance required during the step-up. Nevertheless, additional weight should only be introduced after consistent bodyweight control. Begin with a manageable load and maintain an upright torso. Moreover, reduce the weight immediately if knee alignment or balance deteriorates.
Why do I lose balance during the knee-drive phase?
Balance difficulties may result from excessive platform height, weak hip stabilizers, rushed movement, or incomplete weight transfer. Additionally, swinging the raised leg can shift the body’s center of mass. To improve control, use a lower platform and pause briefly at the top. If necessary, hold a stable support until your balance improves.
Is this exercise safe for people with knee pain?
Suitability depends on the cause and severity of the knee symptoms. Although a lower step may reduce the movement demand, it does not guarantee a pain-free exercise. Therefore, avoid forcing painful repetitions. If you have persistent knee pain, recent injury, or significant instability, consult a qualified healthcare professional before attempting the movement.
Recommended Equipment
- Non-Slip Aerobic Step Platform — provides a stable elevated surface for lateral step-ups and knee-drive training; adjustable height options support gradual progression
- Rubber Gym Floor Tiles — provide a firm training surface and help protect the floor; ensure the platform remains stable and does not shift on the tiles
- Mini Loop Resistance Bands — useful for supplementary glute activation and hip-stability exercises before lower-body training
- Lightweight Adjustable Dumbbells — allow gradual resistance progression once bodyweight step-ups and knee drives can be completed with consistent balance
- Cross-Training Shoes with Grippy Soles — provide secure foot contact and lateral support during controlled step-ups, balance drills, and gym workouts
Equipment tip: A stable step platform is the only essential training tool for this exercise. Additionally, prioritize a non-slip surface and suitable footwear before considering external resistance. As your technique improves, progress gradually while maintaining controlled movement and consistent balance.