Alternate Heel Touch Side Kick Squat: Form, Benefits & Tips
Learn the Alternate Heel Touch Side Kick Squat with proper form, sets, reps, benefits, common mistakes, and tips to improve leg strength and mobility.
Alternate Heel Touch Side Kick Squat
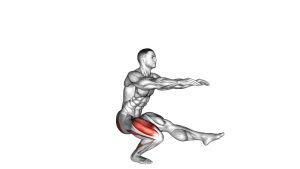
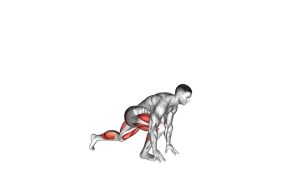
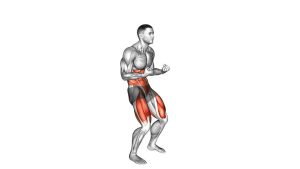
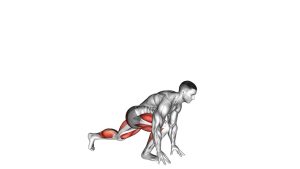
This exercise combines lower-body strength with controlled lateral mobility. First, the athlete shifts weight onto one leg while extending the opposite leg sideways. Next, the supporting knee bends as the hips descend into a lateral squat. Meanwhile, the torso inclines forward, allowing the hands to reach toward the extended foot or heel. Finally, the athlete rises and repeats the sequence on the opposite side.
Because the movement requires coordination across several joints, proper technique is essential. Furthermore, controlled repetitions encourage better hip positioning and supporting-leg stability. Although a deeper squat increases the mobility challenge, beginners should prioritize a comfortable range. As a result, the exercise can be adapted to different experience levels without additional equipment.
Quick Overview
| Body Part | Legs |
|---|---|
| Primary Muscle | Quadriceps and Gluteus Maximus |
| Secondary Muscle | Hip Adductors, Hamstrings, Gluteus Medius, Calves, and Core Stabilizers |
| Equipment | None (Bodyweight) |
| Difficulty | Intermediate (beginner-friendly with reduced depth and support) |
Sets & Reps (By Goal)
Strength and Muscle Development
Training volume should reflect your strength, mobility, and ability to maintain consistent technique. For example, controlled repetitions are generally more useful than rushing through a larger number of squats. Additionally, adequate recovery helps preserve movement quality between sets.
- Strength: 3–4 sets × 6–10 reps per side, with 60–90 seconds of rest. Focus on controlled lowering and a powerful but smooth return to standing.
- Hypertrophy: 3–4 sets × 10–15 reps per side, with 45–75 seconds of rest. Maintain muscular tension throughout each repetition without using excessive momentum.
- Muscular Endurance: 2–3 sets × 15–20 reps per side, with 30–60 seconds of rest. Use a manageable squat depth to maintain consistent movement quality.
Mobility and Movement Control
Mobility-focused sessions emphasize smooth joint movement rather than muscular fatigue. Therefore, use a comfortable range and avoid bouncing into the bottom position. Meanwhile, controlled pauses can help develop confidence in deeper lateral positions.
- Mobility: 2–3 sets × 6–10 reps per side. Pause briefly near the bottom while maintaining comfortable hip and knee alignment.
- Rehab-Style Control: 1–3 sets × 5–8 shallow, supported reps per side. Use this variation only when appropriate for your condition and approved by your clinician.
Progression rule: Improve balance and technique before increasing repetitions. Subsequently, increase squat depth gradually as your mobility allows. However, avoid adding difficulty when the supporting heel lifts or knee control deteriorates.
Setup / Starting Position
Establish a Stable Starting Position
Proper setup creates a stable foundation for alternating lateral movement. Before beginning, choose a clear training area with enough space to extend either leg sideways. Additionally, use a firm, non-slip surface to reduce unnecessary balance challenges.
- Stand upright: Position your feet approximately hip-width apart. Distribute your body weight evenly while keeping both knees relaxed.
- Align your posture: Maintain a neutral spinal position with your chest comfortably lifted and shoulders relaxed.
- Engage your core: Gently brace your abdominal muscles to support controlled torso movement throughout the exercise.
- Position your arms: Keep your hands comfortably in front of your body. Subsequently, allow them to descend during the heel-reaching phase.
- Prepare the hips: Slightly bend both knees and prepare to shift your weight laterally without twisting your torso excessively.
Prepare for the Side Extension
Before descending, imagine moving your hips backward and toward the supporting leg. Meanwhile, the opposite leg should extend sideways without a forceful kicking action. As a result, the exercise remains a controlled lateral squat rather than an explosive kick.
If balance feels challenging, place a sturdy support nearby. Alternatively, shorten the side extension and perform a shallower squat. Once stability improves, gradually increase your range while maintaining smooth movement.
Setup tip: Keep the supporting foot firmly planted and allow the knee to track naturally with the toes. Moreover, avoid forcing the extended knee into an uncomfortable locked position.
Execution (Step-by-Step)
Phase 1: Lateral Weight Shift and Descent
Begin each repetition by transferring your body weight toward one leg. As the supporting knee bends, guide your hips backward and sideways. Meanwhile, extend the opposite leg laterally while maintaining controlled foot placement.
- Shift your weight: Transfer your body weight toward one leg while keeping the supporting foot stable against the floor.
- Lower into the squat: Bend the supporting knee and move your hips backward. Consequently, your torso will incline slightly forward.
- Extend the opposite leg: Move the free leg sideways while keeping its knee relatively straight. Allow the heel to approach or contact the floor comfortably.
Phase 2: Controlled Heel Reach
As the hips descend, the extended leg creates a wider lateral position. Next, incline your torso forward from the hips and reach toward the extended foot. However, avoid sacrificing spinal control simply to touch the heel.
- Incline your torso: Lean forward from the hips while maintaining comfortable spinal alignment and steady breathing.
- Reach toward the heel: Lower your hand or hands toward the extended foot. If necessary, shorten the reach to preserve balance and posture.
- Control the bottom position: Maintain stable supporting-leg alignment and avoid bouncing or forcing additional squat depth.
Phase 3: Return to Standing
After reaching the bottom position, initiate the upward movement through the supporting leg. Simultaneously, raise your torso and begin drawing the extended leg inward. Therefore, the return should remain coordinated rather than rushed.
- Drive through the supporting foot: Extend the supporting knee and hip while maintaining controlled pressure through the foot.
- Return the extended leg: Draw the leg inward as your body rises. Meanwhile, keep your core engaged to maintain balance.
- Stand upright: Return toward a neutral standing position without snapping the knees or excessively arching your lower back.
Phase 4: Alternate to the Opposite Side
Once standing, prepare to repeat the sequence in the opposite direction. First, shift your weight toward the other supporting leg. Then, extend the free leg sideways while lowering into another controlled lateral squat.
- Switch sides: Transfer your weight toward the opposite leg and repeat the squat, side extension, heel reach, and upward return.
Breathing and Movement Rhythm
Inhale as you lower into the lateral squat. Next, exhale while pushing through the supporting foot to return toward standing. Additionally, maintain steady breathing during the heel reach instead of holding your breath unnecessarily.
For consistent execution, follow a simple rhythm: shift, lower, reach, rise, and alternate. Nevertheless, slow the movement whenever balance becomes difficult. As coordination improves, the transitions should feel smoother without requiring excessive speed.
Pro Tips & Common Mistakes
Professional Technique Tips
Effective repetitions depend on controlled movement rather than maximum squat depth. Therefore, focus on stable foot placement and coordinated hip movement. Additionally, maintain comparable technique on both sides without forcing identical ranges of motion.
- Move through the hips: Guide your hips backward and sideways as the supporting knee bends. Consequently, the movement remains controlled.
- Keep the supporting heel grounded: Maintain stable foot contact throughout the squat. If the heel rises, reduce your depth.
- Control the side extension: Extend the opposite leg smoothly. Moreover, avoid using momentum to swing it outward.
- Maintain comfortable spinal alignment: Hinge from the hips during the heel reach instead of excessively rounding your back.
- Use deliberate breathing: Inhale during descent and exhale while rising. Meanwhile, avoid unnecessary breath-holding.
- Train both sides consistently: Alternate sides with similar control. However, respect natural differences in hip mobility.
Common Mistakes to Avoid
Several technique errors can reduce the effectiveness of this exercise. Fortunately, most can be corrected by slowing the movement and reducing squat depth. For example, maintaining stable foot contact often improves balance immediately.
- Rushing the repetitions: Excessive speed may reduce control. Instead, use a smooth tempo during both lowering and rising.
- Allowing the knee to collapse inward: Poor knee tracking can compromise stability. Therefore, guide the supporting knee toward the toes.
- Forcing excessive squat depth: Descending beyond comfortable mobility may disturb your alignment. Consequently, use a manageable range.
- Reaching too aggressively: Forcing heel contact can encourage excessive spinal rounding. Instead, shorten the reaching distance.
- Lifting the supporting heel: Losing heel contact may indicate limited mobility or excessive depth. Accordingly, adjust your stance or squat range.
- Using a forceful side kick: Swinging the extended leg changes the movement pattern. Rather, maintain a controlled lateral extension.
Beginner and Advanced Adjustments
Beginners should start with shallow lateral squats and a shorter heel reach. Additionally, using a stable support can make the alternating movement easier. As balance improves, gradually increase the side extension and squat depth.
Advanced athletes can emphasize slower lowering phases or brief bottom-position pauses. However, external resistance is unnecessary until bodyweight technique becomes consistent. Ultimately, movement quality should determine progression rather than repetition speed.
FAQ
Muscles and Exercise Benefits
What muscles does the Alternate Heel Touch Side Kick Squat work?
The exercise primarily targets the quadriceps and gluteus maximus. Additionally, the hip adductors help control lateral movement, while the hamstrings, calves, and core muscles contribute to stabilization. Consequently, this variation challenges several lower-body muscle groups simultaneously.
Can this exercise improve lower-body strength?
Yes. The supporting leg performs a demanding squat while the opposite leg extends sideways. Therefore, regular practice can develop bodyweight strength and muscular endurance. However, progressively loaded exercises may be more effective for maximizing long-term strength and muscle development.
Does the movement help improve hip mobility?
The lateral extension challenges the inner-thigh muscles through an active range of motion. Furthermore, controlled squatting develops strength in different hip positions. As a result, consistent practice may improve usable mobility over time. Nevertheless, progress depends on individual flexibility and training consistency.
Technique and Difficulty
Is the Alternate Heel Touch Side Kick Squat suitable for beginners?
Beginners can perform a modified version with reduced squat depth and a shorter side extension. However, the full movement requires greater balance, hip mobility, and supporting-leg strength. Therefore, practicing basic lateral squats first is a sensible progression.
Should the extended leg remain completely straight?
The extended knee generally remains relatively straight during the movement. However, a slight comfortable bend is acceptable when mobility is limited. Additionally, avoid forcing the knee into a locked position. Instead, prioritize controlled movement and comfortable joint alignment.
Do I need to touch my heel during every repetition?
No. The heel reach is a movement target rather than a strict requirement. If reaching the heel causes excessive spinal rounding or instability, shorten the distance. Consequently, you can maintain proper squat mechanics while gradually improving your mobility.
Training Frequency and Programming
How many repetitions should I perform?
Most healthy exercisers can begin with 6–10 controlled repetitions per side. Subsequently, increase volume according to your training goal and recovery capacity. However, maintaining consistent technique is more important than reaching a particular repetition target.
Can I perform this exercise at home?
Yes. Because the movement requires no equipment, it fits home workouts and bodyweight training sessions. Additionally, it pairs well with conventional squats, glute bridges, and other lower-body exercises. Therefore, it can complement a balanced leg-training routine.
Is this exercise similar to a Cossack squat?
Both movements involve lateral weight shifting, a bent supporting leg, and an extended opposite leg. However, this variation emphasizes an alternating heel-reaching action. Consequently, it can be described as a dynamic Cossack-style squat variation.
Safety and Exercise Modifications
Who should modify or avoid this exercise?
Individuals experiencing significant knee or hip pain, acute injuries, or joint instability should avoid forcing the movement. Instead, consider a shallow supported variation when appropriate. Furthermore, consult a qualified healthcare professional if symptoms persist or worsen.
Recommended Equipment (Optional)
The Alternate Heel Touch Side Kick Squat requires no external equipment. However, optional accessories can support mobility preparation, balance practice, and complementary lower-body training. Therefore, choose equipment according to your individual needs rather than treating it as essential.
- Non-Slip Exercise Mat — useful for floor-based mobility drills and warm-ups. However, perform standing lateral squats on a firm, stable, non-slip surface.
- High-Density Yoga Blocks — can provide a closer reaching target during mobility practice. Nevertheless, avoid placing substantial body weight on unstable foam blocks.
- Mini Loop Resistance Bands — useful for complementary glute activation and lateral band walks. Additionally, they can support separate hip-strengthening exercises.
- High-Density Foam Roller — suitable for optional pre-workout or post-workout soft-tissue routines. For example, it can be used around the quadriceps and glutes.
- Non-Slip Balance Pad — useful for separate ankle-stability and balance drills. However, perform the full lateral squat on stable ground.
Equipment tip: Begin with bodyweight practice before considering additional accessories. Furthermore, choose stable equipment that matches your experience and training goals. The Amazon links above lead to product search results rather than specific product listings.