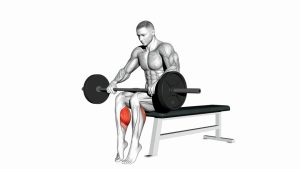
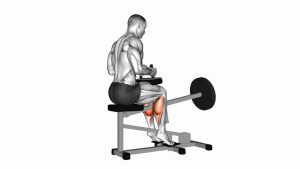
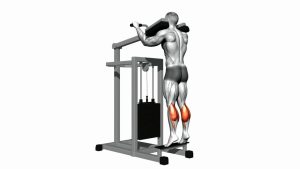
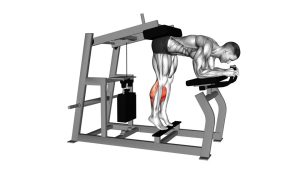
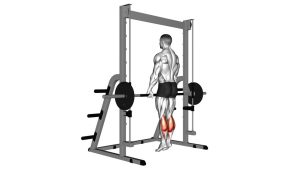
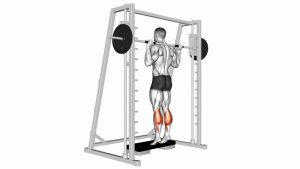
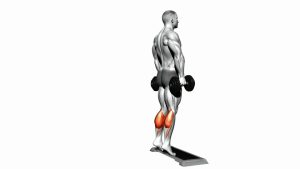
Lever Seated One-Leg Calf Raise: Form, Muscles & Tips
Learn the Lever Seated One-Leg Calf Raise with correct machine setup, controlled ankle motion, sets by goal, calf-building tips, mistakes, and FAQs.
Lever Seated One-Leg Calf Raise
The Lever Seated One-Leg Calf Raise allows each calf to work independently, making it useful for developing unilateral lower-leg strength and muscular control. Additionally, the supported seated position reduces balance demands, allowing greater concentration on ankle movement and consistent resistance. The exercise can complement standing calf raises, which place the gastrocnemius in a different working position.
When performed correctly, the movement strengthens the ankle plantar flexors and challenges the calf throughout the available range of motion. Furthermore, training one leg at a time can reveal differences in strength, coordination, or endurance between sides. However, proper machine adjustment and controlled loading remain essential for comfortable, effective repetitions.
Quick Overview
| Body Part | Calves |
|---|---|
| Primary Muscle | Soleus — the deeper calf muscle responsible for ankle plantar flexion, particularly important during bent-knee calf raises. |
| Secondary Muscle | Gastrocnemius, with assistance from smaller ankle plantar flexors and foot-stabilizing muscles, including the tibialis posterior and fibularis muscles. |
| Equipment | Plate-loaded or selectorized lever seated calf raise machine with an adjustable thigh pad and forefoot platform. |
| Difficulty | Beginner to Intermediate, depending on machine familiarity, ankle mobility, unilateral control, and resistance selection. |
Sets & Reps (By Goal)
- Strength: Perform 3–5 sets × 6–10 repetitions per leg. Use challenging but manageable resistance, maintain controlled movement, and rest 90–180 seconds between demanding sets.
- Hypertrophy (Muscle Growth): Complete 3–4 sets × 10–15 repetitions per leg. Focus on consistent ankle movement, a brief upper-position contraction, and approximately 2–3 seconds during the lowering phase. Rest 60–90 seconds between sets.
- Muscular Endurance: Perform 2–4 sets × 15–25 repetitions per leg using lighter resistance. Maintain smooth repetitions and avoid sacrificing technique as fatigue increases.
- Mobility and Movement Control: Complete 2–3 sets × 10–15 controlled repetitions per leg with light resistance. Additionally, emphasize comfortable ankle dorsiflexion and steady forefoot pressure.
- Rehabilitation-Style Training: When approved by a qualified rehabilitation professional, use individually prescribed loading, often beginning with 2–3 sets of 8–12 comfortable repetitions. Resistance, tempo, and range should reflect symptoms and recovery stage.
Progression rule: First master smooth, pain-free repetitions with a stable knee and full control of the machine. Then gradually increase repetitions or resistance. Because each leg works independently, begin with the weaker side and use comparable repetitions and technique on both legs. Allow appropriate recovery between challenging sessions.
Setup / Starting Position
- Choose the correct machine: Select a lever seated calf raise machine with a stable seat, padded thigh support, and raised forefoot platform. Additionally, confirm that its movement mechanism operates smoothly.
- Adjust the thigh pad: Sit on the machine and position the pad securely across the lower working thigh, just above the knee. Avoid placing direct pressure on the kneecap.
- Position the working foot: Place the ball of one foot securely on the platform. Meanwhile, allow the heel to remain unsupported so it can travel upward and downward during each repetition.
- Position the opposite leg: Keep the non-working leg relaxed and clear of the moving lever. Depending on the machine design, rest that foot on a safe stationary surface without assisting the lift.
- Establish your seated posture: Keep your hips against the seat, torso upright, and shoulders relaxed. Furthermore, maintain a comfortable bend in the working knee throughout the exercise.
- Hold the machine handles: Grip the handles to stabilize your upper body. However, avoid pulling aggressively with your arms or lifting your hips to help move the resistance.
- Select an appropriate weight: Begin with light resistance to establish ankle control. If the machine uses a safety catch, release it according to the manufacturer’s instructions before starting.
Setup tip: Your forefoot should remain supported while the heel moves freely. Therefore, adjust your position before increasing the load. If you cannot maintain stable foot contact, reduce resistance and correct the setup.
Execution (Step-by-Step)
- Establish the starting position: Sit upright with the working thigh secured beneath the lever pad. Keep the ball of your foot planted on the platform and your heel free to move.
- Prepare the calf muscles: Maintain gentle abdominal tension and relaxed shoulders. Next, establish steady pressure through the forefoot without rolling the ankle inward or outward.
- Raise the working heel: Push through the ball of the foot and contract the calf to lift the heel. As a result, the ankle moves into plantar flexion while the machine lever rises against resistance.
- Maintain knee and hip stability: Keep the working knee bent and the hips seated throughout the lifting phase. Avoid pushing upward by extending the knee or rocking your torso.
- Reach the upper position: Continue lifting until you reach a comfortable height without losing foot contact or ankle alignment. Then pause briefly while maintaining controlled tension in the working calf.
- Begin the lowering phase: Slowly allow the heel to descend as the ankle moves toward dorsiflexion. Meanwhile, resist the downward movement instead of allowing the lever to drop.
- Control the bottom position: Lower until you feel a comfortable calf stretch without forcing excessive ankle range. Subsequently, reverse direction smoothly rather than bouncing.
- Complete and alternate: Repeat the same controlled movement for the prescribed repetitions. Finally, secure the machine, reposition your legs, and perform the exercise on the opposite side.
Pro Tips & Common Mistakes
- Prioritize the soleus: Maintain the bent-knee position throughout the movement. Because the gastrocnemius crosses both the knee and ankle, this position places relatively greater emphasis on the soleus.
- Control the lowering phase: Avoid dropping the weight after reaching the top. Instead, lower over approximately 2–3 seconds to maintain muscular tension and consistent technique.
- Keep the heel moving vertically: Focus on ankle plantar flexion rather than shifting your entire leg forward. Consequently, the calf performs the intended work more effectively.
- Avoid excessive resistance: Heavy loading can encourage bouncing, hip lifting, and restricted ankle movement. Therefore, select resistance that allows controlled repetitions across a comfortable range.
- Maintain stable foot alignment: Keep pressure distributed across the ball of the foot. Avoid aggressively rolling onto the inner or outer edge during the lift.
- Do not extend the knee: Straightening the working leg changes the intended exercise mechanics. Instead, maintain a consistent knee bend while the ankle moves.
- Do not lift your hips: Keep your glutes against the seat and your upper body relaxed. Otherwise, unnecessary body movement can reduce the quality of calf isolation.
- Train both legs consistently: Start with the weaker side when appropriate. Additionally, match the number of repetitions and movement quality on the opposite leg.
- Combine calf exercise variations: Include both seated and standing calf raises when suitable for your program. Although seated variations emphasize bent-knee strength, standing versions train the calf muscles with a different knee position.
- Avoid forcing the bottom stretch: Lower the heel only through a comfortable range. If the Achilles tendon or ankle becomes painful, stop and reassess your technique and loading.
Training tip: Consistency matters more than excessive loading. Therefore, use a repeatable tempo, track repetitions on each leg, and increase resistance gradually as your technique improves.
FAQ
What muscles does the Lever Seated One-Leg Calf Raise work?
The exercise primarily emphasizes the soleus, a deep calf muscle responsible for ankle plantar flexion. Additionally, the gastrocnemius assists with raising the heel, while smaller muscles help stabilize the ankle and foot. Because the knee remains bent, the soleus receives relatively greater emphasis than during straight-knee calf raises.
Is the Lever Seated One-Leg Calf Raise good for beginners?
Yes, beginners can perform this exercise when the machine is adjusted correctly and resistance remains manageable. However, single-leg loading requires greater control than using both legs. Therefore, start with light resistance, practice smooth heel movement, and increase the load only after establishing consistent technique.
What is the difference between seated and standing calf raises?
Seated calf raises keep the knee bent and place relatively greater emphasis on the soleus. In contrast, standing calf raises use a straighter knee position, allowing the gastrocnemius to contribute more effectively. Both variations train ankle plantar flexion and can complement each other within a complete calf-strengthening program.
How far should I raise and lower my heel?
Raise the heel as high as you comfortably can while maintaining stable forefoot pressure and ankle alignment. Then lower slowly until you feel a manageable stretch through the calf. However, avoid forcing excessive dorsiflexion or bouncing at the bottom. The correct range depends on your ankle mobility and comfort.
How often should I perform one-leg seated calf raises?
Many healthy trainees can include challenging calf-strengthening sessions approximately 2–3 times per week, depending on total training volume and recovery. For example, perform 3–4 controlled sets per leg during a lower-body workout. Additionally, monitor soreness and ankle comfort before increasing frequency or resistance.
Recommended Equipment
- Plate-Loaded Seated Calf Raise Machine — provides seated lever resistance for strengthening the soleus and performing unilateral calf raises when the machine supports them
- Olympic Weight Plates — allow progressive resistance adjustments on compatible plate-loaded seated calf raise machines
- Adjustable Calf Stretch Slant Board — useful for separate calf-stretching and controlled ankle mobility exercises outside the machine
- Resistance Bands for Ankle Exercises — offer adjustable resistance for ankle warm-ups, plantar flexion drills, and supplementary lower-leg training
- Calf Massage Foam Roller — provides an optional self-massage tool for calf comfort and post-workout mobility routines
Equipment tip: Choose a seated calf raise machine with comfortable thigh padding, a stable foot platform, and an adjustable resistance system. Furthermore, confirm weight-plate compatibility before purchasing additional plates. Accessories can support your training routine, but they do not replace controlled exercise technique.