Explosive Kneeling Push-Up : Form, Sets, Tips & FAQ
Learn the Explosive Kneeling Push-Up to build chest power and pressing explosiveness with less joint stress than full plyo push-ups. Step-by-step form, sets by goal, common mistakes, FAQs, and recommended equipment.
Explosive Kneeling Push-Up
This movement rewards quality reps, not fatigue chaos. Your best rep looks like a normal push-up on the way down, followed by a fast, crisp press and a controlled landing. If your shoulders shrug, elbows flare, or you “face-plant” into the floor, reduce intensity and focus on clean mechanics first.
Quick Overview
| Body Part | Chest |
|---|---|
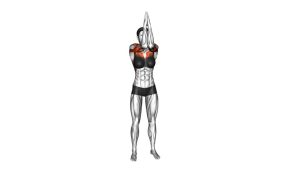
| Primary Muscle | Pectoralis major (chest) |
| Secondary Muscle | Triceps, anterior deltoids, serratus anterior (stability) |
| Equipment | None (optional: exercise mat, push-up handles, wrist supports) |
| Difficulty | Intermediate (plyometric landing control required) |
Sets & Reps (By Goal)
- Power (best use): 4–6 sets × 3–6 reps (full reset, 60–120 sec rest)
- Hypertrophy with explosiveness: 3–5 sets × 6–10 reps (45–90 sec rest, keep landings clean)
- Conditioning finisher: 2–4 sets × 8–12 reps (30–60 sec rest, moderate pop only)
- Warm-up “primer”: 2–3 sets × 3–5 reps (submaximal speed, perfect form)
Progression rule: First improve landing quietness and consistency. Then add 1 rep per set, and only later increase explosiveness or progress to full push-up plyometrics.
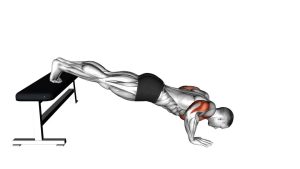
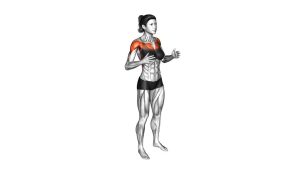
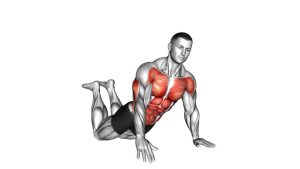
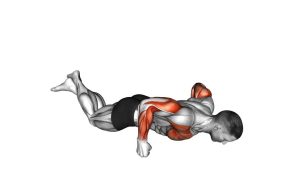
Setup / Starting Position
- Knees down: Kneel on a comfortable surface (mat recommended). Knees about hip-width apart.
- Hands planted: Place hands slightly wider than shoulder-width. Fingers spread, palms rooted.
- Stack and brace: Create a straight line from shoulders to knees. Squeeze glutes lightly and brace abs.
- Shoulders set: Think “push the floor away” so shoulder blades are stable (no shrugging).
- Head neutral: Eyes slightly ahead of your hands, neck long.
Tip: If wrists get cranky, use push-up handles or do the move on fists on a soft mat (only if your knuckles tolerate it).
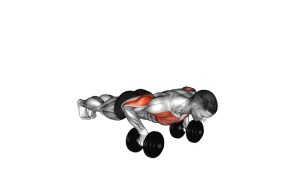
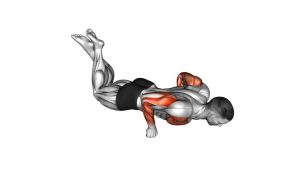
Execution (Step-by-Step)
- Lower under control: Bend elbows and lower the chest toward the floor. Keep elbows about 30–45° from your torso.
- Stay rigid: Maintain a straight shoulder-to-knee line—avoid hip sag or pushing your head forward.
- Quick rebound: At the bottom, minimize pause (don’t collapse). Keep tension and prepare to drive.
- Explode up: Press hard through the palms. Aim for “light hands” or a brief hand float.
- Land softly: Catch yourself with elbows slightly bent, absorb the impact, and reset before the next rep.
Pro Tips & Common Mistakes
- Explode, don’t bounce: Power comes from a controlled descent + fast press, not collapsing into the bottom.
- Elbows slightly tucked: Avoid flaring elbows straight out—this often irritates shoulders.
- Brace the core: If hips sag, power leaks and the lower back takes stress.
- Land with “soft elbows”: Locked elbows on impact can irritate wrists/elbows/shoulders.
- Stop before form breaks: For power work, end the set when explosiveness drops.
- Progress smart: Build strength with standard kneeling push-ups first, then add explosion.
FAQ
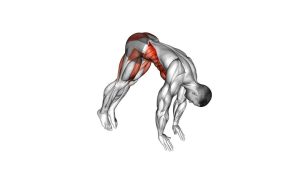
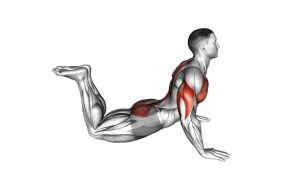
Where should I feel the explosive kneeling push-up?
Mostly in the chest and triceps, with the shoulders helping. You should also feel your core working to keep the torso stable. If you only feel wrists or shoulders, adjust hand position and reduce intensity.
Do my hands have to leave the floor?
No. The goal is explosive intent. “Light hands” with a fast press and a soft landing is enough. Full airtime comes later as strength and control improve.
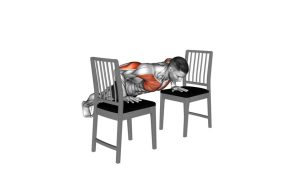
How do I make it harder without going to full plyo push-ups?
Add a small pause (1 second) near the bottom, increase reps slightly, or use push-up handles to press deeper. You can also progress to a kneeling depth push-up using yoga blocks.
Is this safe for wrists and shoulders?
It can be, if landings are controlled and pain-free. If your wrists hurt, use handles or do it on a mat. If shoulders hurt, reduce elbow flare, slow the descent, and build strength with standard push-ups first.
How often can I train this exercise?
For power work, 1–3 times per week is usually plenty. Keep reps low and high-quality, and give joints time to recover, especially if you also bench press or do heavy dips.
Recommended Equipment (Optional)
- Push-Up Handles / Parallettes — reduce wrist extension and can increase pressing comfort
- Thick Exercise Mat — cushions knees and improves stability on hard floors
- Wrist Wraps (Training Support) — helpful if wrists feel stressed during plyometric landings
- Resistance Bands Set — great for pairing with warm-up (band pull-aparts) and shoulder stability work
- Yoga Blocks (Foam) — useful for range-of-motion targets and controlled depth progressions
Tip: If any tool changes your mechanics or increases pain, remove it and regress the movement. Plyometrics should feel fast and controlled, not harsh.