Elbow Prayer Push Circle Draw: Form, Muscles Worked, Sets, Tips & FAQ
Learn how to do the Elbow Prayer Push Circle Draw with proper form. Discover muscles worked, setup, step-by-step execution, sets and reps by goal, common mistakes, FAQs, and recommended equipment.
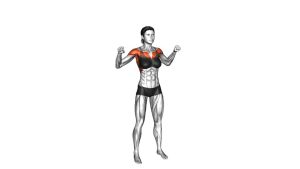
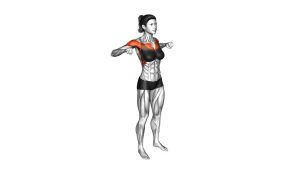
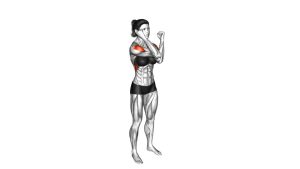
Elbow Prayer Push Circle Draw
This exercise looks simple, but quality matters. The goal is to maintain firm palm pressure while the elbows travel in a smooth circular path. Done correctly, it creates a chest squeeze throughout the movement while the shoulders and upper arms guide the circle. Keep the torso tall, avoid rushing, and focus on feeling the pecs work from start to finish.
Quick Overview
| Body Part | Chest |
|---|---|
| Primary Muscle | Pectoralis major |
| Secondary Muscle | Anterior deltoids, serratus anterior, biceps stabilizers, core stabilizers |
| Equipment | None |
| Difficulty | Beginner |
Sets & Reps (By Goal)
- Warm-up activation: 2–3 sets × 8–12 circles per direction
- Mind-muscle connection / pump: 2–4 sets × 10–15 circles per direction
- Light endurance: 2–3 sets × 20–30 seconds continuous tension
- Between pressing sets: 1–2 easy rounds × 6–10 smooth circles to re-engage the chest
Progression rule: Increase time under tension, slow the tempo, or improve squeeze quality before adding complexity. Better tension beats bigger circles.
Setup / Starting Position
- Stand tall: Place your feet about shoulder-width apart with a soft bend in the knees.
- Brace lightly: Keep the ribs stacked over the hips and the core gently engaged.
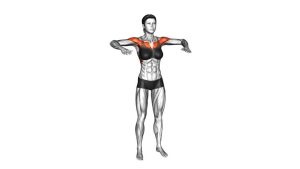
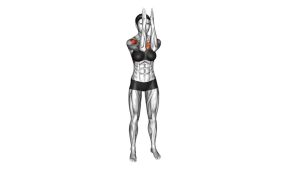
- Bring hands together: Press your palms together in front of the mid-chest like a prayer position.
- Lift the elbows: Let the elbows flare outward slightly so the upper arms stay active.
- Create tension first: Before moving, actively squeeze the palms together to wake up the chest.
Tip: Think “proud chest, long neck, relaxed traps.” The pecs should create the squeeze, not shrugged shoulders.
Execution (Step-by-Step)
- Start with pressure: Press the palms together firmly enough to feel the chest switch on.
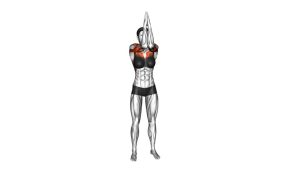
- Lift slightly upward: Raise the hands and elbows a little while keeping the torso still.
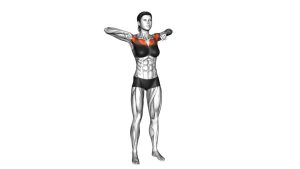
- Draw the circle: Move the elbows outward and around in a controlled circular path.
- Keep the palms connected: Maintain continuous hand pressure through the entire circle.
- Return to center: Finish back at the starting prayer position without losing tension.
- Repeat smoothly: Complete all reps in one direction, then reverse the circle if desired.
Pro Tips & Common Mistakes
- Keep constant palm pressure: The squeeze is what makes this more than just an arm circle.
- Use slow circles: Controlled motion keeps the pecs loaded longer and improves chest awareness.
- Don’t shrug: Keep the traps relaxed so the chest and front delts do the work.
- Stay upright: Avoid leaning backward or thrusting the ribs forward to fake range.
- Don’t over-circle: Huge circles often shift tension into the shoulders and reduce chest squeeze.
- Reverse directions: Doing both directions can help create balanced shoulder control and a more complete warm-up.
- Pair it intelligently: Use it before push-ups, chest presses, cable flyes, or band presses.
FAQ
What muscles does the Elbow Prayer Push Circle Draw work?
It mainly targets the chest, especially the pectoralis major. The front delts, serratus anterior, and upper-body stabilizers also assist.
Is this a chest-building exercise or just a warm-up?
It is best used as a chest activation, warm-up, or mind-muscle connection drill. It can create a good burn, but it is not a replacement for progressive resistance training.
How hard should I press my palms together?
Press firmly enough to feel the pecs engage, but not so hard that your neck, wrists, or shoulders tense up. Think strong but controlled pressure.
Should I do circles in both directions?
Yes. Performing the movement in both directions is a smart way to improve coordination, shoulder control, and total time under tension.
Can beginners use this exercise?
Absolutely. It is beginner-friendly because it requires no equipment and lets you control the intensity by adjusting palm pressure, range, and tempo.
Recommended Equipment (Optional)
- Resistance Bands Set — useful for adding chest activation drills, fly-style patterns, presses, and warm-up work
- Door Anchor for Resistance Bands — helps turn bands into home chest presses and standing fly variations
- Push-Up Bars — great for pairing this drill with push-up work to train the chest through a fuller pressing session
- Foam Roller — useful for upper-back mobility and chest-opening prep before activation and pressing workouts
- Light Therapy / Stretch Bands — ideal for gentle shoulder warm-ups, rehab-style chest activation, and controlled pressing prep
Tip: This exercise needs no equipment, so these tools work best as complements for chest activation, shoulder prep, and follow-up training.