Kneeling Cable High Row (Rope Attachment): Form, Muscles Worked, Sets, Tips & FAQ
Learn how to do the Kneeling Cable High Row with a rope attachment for upper-back thickness, rear-delt engagement, and scapular control. Includes form tips, sets and reps, common mistakes, FAQs, and recommended equipment.
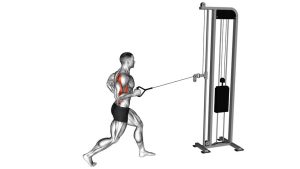
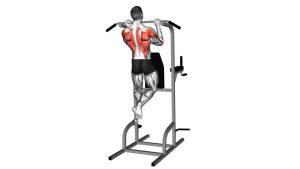
Kneeling Cable High Row (Rope Attachment)
This exercise works best when you keep the movement controlled and let the upper back do the work. The kneeling position helps lock in posture, while the rope attachment allows a more natural hand path and a fuller finish at the contraction. You should feel the movement mostly across the mid-upper back and rear shoulders, not just in the arms.
Quick Overview
| Body Part | Upper Back |
|---|---|
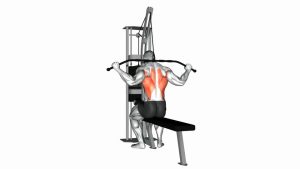
| Primary Muscle | Rhomboids, middle trapezius, rear deltoids |
| Secondary Muscle | Latissimus dorsi, teres major, biceps, brachialis, lower traps |
| Equipment | Cable machine, high pulley, rope attachment, optional kneeling pad |
| Difficulty | Beginner to Intermediate |
Sets & Reps (By Goal)
- Muscle growth: 3–4 sets × 8–12 reps with controlled tempo and a full squeeze
- Strength-focused back work: 4–5 sets × 6–8 reps with heavier load and strict form
- Technique / upper-back activation: 2–3 sets × 12–15 reps with moderate load
- Posture / scapular control: 2–4 sets × 10–15 reps with a 1–2 second pause at peak contraction
Progression rule: Add reps before load whenever possible. If you can keep the chest tall, avoid shrugging, and pause cleanly at the top, then increase resistance gradually.
Setup / Starting Position
- Set the pulley high: Attach a rope handle to a high cable pulley.
- Kneel facing the machine: Kneel on both knees far enough back to create cable tension at the start.
- Grip the rope neutrally: Hold each end with palms facing each other.
- Start with arms extended: Reach forward and slightly upward without rounding excessively.
- Brace your torso: Keep the chest lifted, core engaged, and spine neutral.
- Set the shoulders: Let the shoulder blades move naturally, but avoid shrugging up into the ears.
Tip: A soft kneeling pad can make it easier to stay stable and focus on the pull instead of knee discomfort.
Execution (Step-by-Step)
- Initiate with the upper back: Start by drawing the shoulders down and back, not by curling with the arms first.
- Pull the rope down and back: Drive the elbows behind you as the rope travels toward the upper chest or lower face area.
- Separate the rope ends: As you finish the rep, let the hands move slightly apart to improve rear-delt and upper-back contraction.
- Squeeze at the top: Pause briefly when the shoulder blades are fully retracted and the elbows are pulled back.
- Return under control: Extend the arms slowly and allow the shoulder blades to protract naturally without losing posture.
- Repeat smoothly: Keep the same torso angle and avoid bouncing between reps.
Pro Tips & Common Mistakes
- Lead with the elbows: Think about driving the elbows back rather than pulling only with the hands.
- Keep the chest proud: A lifted chest helps the upper back contract more effectively.
- Separate the rope slightly: This helps finish the rep and increases rear-delt involvement.
- Don’t overlean: Leaning too far back turns the exercise into a momentum-based row.
- Don’t shrug excessively: Keep the neck long and avoid letting the upper traps dominate.
- Control the eccentric: The lowering phase helps build better scapular control and muscle tension.
- Use a moderate load first: This exercise usually works best with precision, not ego lifting.
FAQ
What muscles does the Kneeling Cable High Row work most?
It mainly targets the rhomboids, middle traps, and rear delts, while the lats and arm flexors assist the movement.
Why do this row kneeling instead of standing?
Kneeling reduces body English, improves stability, and makes it easier to keep the pull strict and focused on the upper back.
Should I pull to my chest or face?
For most lifters, pulling toward the upper chest to lower face zone works well. The exact finish depends on cable height, arm length, and what feels strongest in the upper back without shoulder irritation.
Is this more for lats or upper back?
This variation is generally more upper-back dominant than a standard low row because of the high pulling angle and the strong scapular retraction at the finish.
Can beginners use this exercise?
Yes. Beginners can learn it well by starting light, controlling the cable path, and focusing on posture and shoulder-blade movement.
Recommended Equipment
- Rope Cable Attachment — the main attachment for this variation, allowing a neutral grip and rope separation at the finish
- Foam Kneeling Pad — adds comfort and stability when kneeling during cable work
- D-Handle Cable Attachment — useful for single-arm cable rows and accessory back work
- Straight Bar Cable Attachment — helpful for adding pulldowns, rows, and pressdowns to the same cable setup
- Resistance Band Set — great for warm-ups, rear-delt activation, and extra posture-focused upper-back work
Tip: If you train at home or in a small gym space, a few smart cable accessories can make your back workouts much more versatile.