Kettlebell One-Arm Clean and Jerk: Form, Benefits, Sets, Tips & FAQ
Learn how to do the kettlebell one-arm clean and jerk with proper form. Discover benefits, muscles worked, sets and reps by goal, technique tips, common mistakes, FAQs, and recommended equipment.
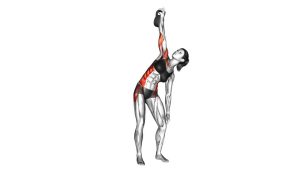
Kettlebell One-Arm Clean and Jerk
This exercise rewards crisp timing and strong body mechanics. The clean should feel smooth and close to the body, while the jerk should be powered by the legs and hips before the arm finishes the lockout. You want the kettlebell to land softly in the rack, stay stable overhead, and return under control for the next repetition. When performed well, this movement builds strength, work capacity, and athletic power at the same time.
Quick Overview
| Body Part | Shoulders |
|---|---|
| Primary Muscle | Deltoids |
| Secondary Muscle | Glutes, quadriceps, hamstrings, triceps, traps, core, upper back |
| Equipment | Kettlebell |
| Difficulty | Intermediate to advanced |
Sets & Reps (By Goal)
- Power development: 4-6 sets × 3-5 reps per arm with full recovery between sets
- Strength and technique: 3-5 sets × 4-6 reps per arm using controlled, high-quality reps
- Conditioning: 3-4 sets × 6-10 reps per arm with moderate rest
- Skill practice: 2-4 sets × 2-4 reps per arm with light-to-moderate weight and strict form focus
Progression tip: First improve smoothness, rack position, and overhead stability. Then increase reps or load gradually without sacrificing timing or control.
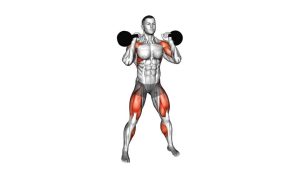
Setup / Starting Position
- Place the kettlebell in front of you: Stand with feet about shoulder-width apart and the kettlebell positioned between or slightly in front of your feet.
- Hinge at the hips: Push your hips back, keep your chest proud, and maintain a neutral spine as you reach down with one hand.
- Grip firmly: Hold the kettlebell handle with a secure grip while keeping the shoulder packed and the core braced.
- Set your posture: Keep your head neutral, ribs down, and weight balanced through the full foot.
- Prepare for an explosive pull: The movement starts from the hips and legs, not from yanking the kettlebell with the arm.
Execution (Step-by-Step)
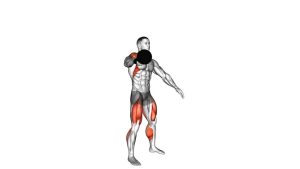
- Drive from the floor or backswing: Hike or lift the kettlebell into motion and generate force by extending the hips powerfully.
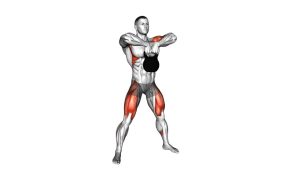
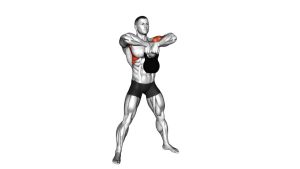
- Guide the clean: Keep the bell close to your body as the elbow travels in, then allow the kettlebell to rotate smoothly around the wrist into the rack position.
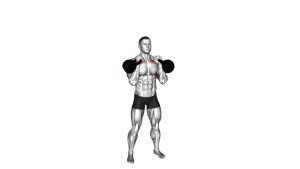
- Establish the rack: Let the kettlebell rest against the forearm and upper arm with the elbow close to the torso and the wrist straight.
- Dip slightly: Bend the knees a little while keeping the torso upright to load the legs for the jerk.
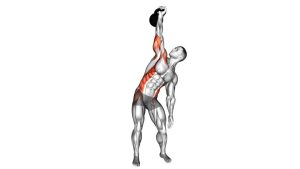
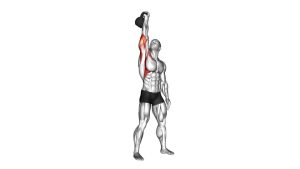
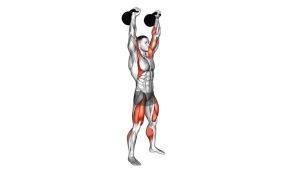
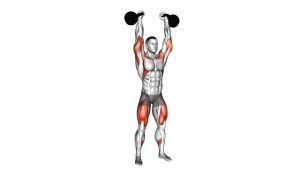
- Drive upward: Explosively extend the knees and hips to send the kettlebell overhead.
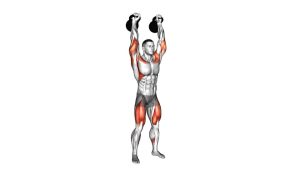
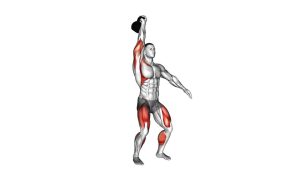
- Finish the lockout: Punch under the kettlebell and straighten the arm fully overhead with the shoulder stacked and core tight.
- Lower with control: Bring the kettlebell back to the rack position, then guide it back down into the next rep safely and smoothly.
Pro Tips & Common Mistakes
- Use the hips for the clean: Do not curl the kettlebell with the arm.
- Keep the bell close: A wide arc wastes energy and makes the catch rough on the forearm.
- Let it rotate, not flip: The kettlebell should wrap around the hand smoothly into the rack.
- Jerk with the legs: The dip and drive should create the power for the overhead phase.
- Avoid leaning back: Do not turn the lockout into a lower-back compensation pattern.
- Brace the core hard: Stability through the trunk improves both power transfer and shoulder safety.
- Own the rack position: A loose or unstable rack makes the jerk weaker and less efficient.
FAQ
What muscles does the kettlebell one-arm clean and jerk work?
It primarily targets the shoulders, especially the deltoids, while heavily involving the glutes, legs, triceps, upper back, and core. It is a true full-body power exercise.
Is this exercise more about strength or conditioning?
It can serve both goals. Lower reps with more rest emphasize power and strength, while moderate reps with shorter rest challenge conditioning and work capacity.
Why does the kettlebell hit my forearm during the clean?
That usually happens when you swing the bell too far away from the body or let it flip over the hand. Keep it close and think about guiding it smoothly into the rack.
Should I press or jerk the kettlebell overhead?
In this movement, the overhead phase should be a jerk, meaning you use a small dip and a strong leg drive to help propel the kettlebell upward before locking it out.
Is this exercise good for beginners?
It is usually better suited for intermediate trainees who already know the basics of the kettlebell swing, clean, rack position, and overhead lockout. Beginners should master those first.
Recommended Equipment
- Cast Iron Kettlebell — the essential tool for practicing clean and jerk mechanics with reliable balance and grip
- Competition Kettlebell — useful for athletes who want consistent handle dimensions across different weights
- Weightlifting Chalk — improves grip security during explosive single-arm kettlebell work
- Wrist Sweatbands — can help reduce irritation and improve comfort during repeated cleans
- Exercise Floor Mat — creates a more stable and protective training area for kettlebell practice
Choose a kettlebell weight that allows a smooth clean, a stable rack, and a confident overhead lockout. Technique quality should always come before heavier loading.