Kettlebell One-Arm Jerk: Proper Form, Sets, Benefits, Mistakes & FAQ
Learn how to perform the kettlebell one-arm jerk with proper form for explosive shoulder strength, overhead stability, and full-body power. Includes setup, step-by-step execution, sets by goal, common mistakes, FAQs, and recommended equipment.
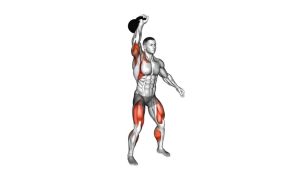
Kettlebell One-Arm Jerk
This exercise works best when power is generated from the legs and hips, then transferred through a braced torso into a strong overhead lockout. The working shoulder must stabilize the bell while the wrist stays stacked and the ribs stay controlled. A good rep feels crisp and efficient, not like a slow grind. The bell should float from leg drive, and your job is to meet it overhead with precise timing.
Quick Overview
| Body Part | Shoulders |
|---|---|
| Primary Muscle | Deltoids (especially anterior and medial heads) |
| Secondary Muscle | Triceps, upper traps, core, quads, glutes, calves |
| Equipment | Kettlebell |
| Difficulty | Intermediate (requires timing, overhead control, and full-body coordination) |
Sets & Reps (By Goal)
- Power development: 4–6 sets × 3–5 reps per arm with full recovery between sets
- Strength and overhead skill: 3–5 sets × 4–6 reps per arm with controlled technique
- Conditioning: 3–4 sets × 6–10 reps per arm using moderate weight and steady pacing
- Technique practice: 3–5 sets × 2–4 reps per arm with a lighter bell and perfect timing
Progression rule: Increase load only when you can keep the dip vertical, the rack stable, and the overhead catch clean on every rep. Technical quality should improve before weight increases.
Setup / Starting Position
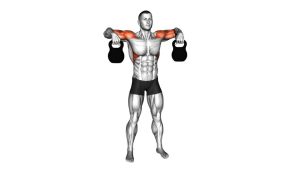
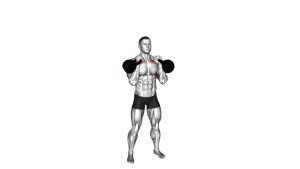
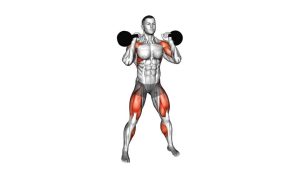
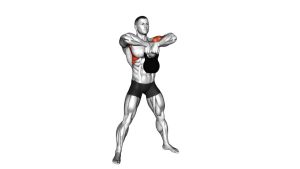
- Clean the kettlebell into the rack: Rest the bell on the forearm and upper arm with the elbow close to the body.
- Set your stance: Place the feet about shoulder-width apart with pressure balanced through the mid-foot.
- Brace the torso: Keep the chest tall, ribs down, and core tight without leaning back.
- Align the wrist: Keep the wrist neutral and stacked under the handle, not bent backward.
- Relax the non-working arm: Let it move naturally for balance without twisting the torso.
Tip: Before jerking the bell, make sure your rack position feels quiet and secure. If the bell is already unstable, the overhead phase will usually get worse.
Execution (Step-by-Step)
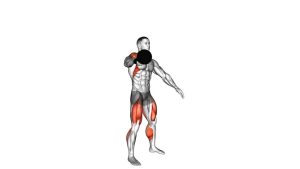
- Dip straight down: Bend the knees slightly while keeping the torso upright. This is a short, controlled dip, not a squat.
- Drive explosively: Push through the floor and extend the knees and hips sharply to send the kettlebell upward.
- Let the bell float: Do not try to strict press the weight early. Use the momentum created by the lower body.
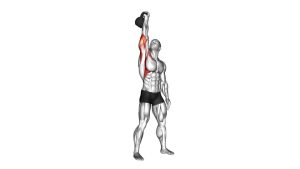
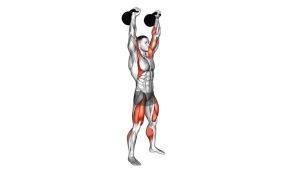
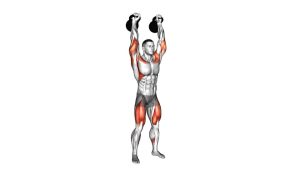
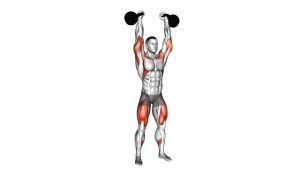
- Drop under and punch up: As the bell rises, quickly re-bend the knees and lock the arm overhead into a stable catch.
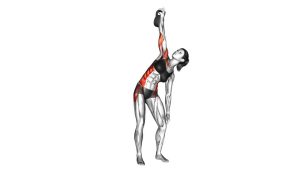
- Stand tall to finish: Straighten the legs fully, stack the wrist over the shoulder, and keep the biceps close to the ear.
- Return to the rack: Lower the kettlebell back under control, reset your posture, and begin the next rep.
Pro Tips & Common Mistakes
- Use the legs first: The jerk is a power movement, not a pure shoulder press.
- Keep the dip vertical: Avoid folding forward or letting the knees drift into a squat pattern.
- Catch with a stacked arm: Wrist, elbow, shoulder, and kettlebell should line up overhead.
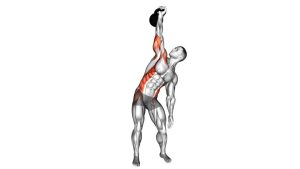
- Do not over-lean back: Excessive spinal extension shifts stress into the lower back.
- Keep the rack quiet: A stable starting position makes the drive smoother and safer.
- Avoid crashing on the way down: Guide the kettlebell back to the rack instead of letting it slam the forearm.
- Train both sides: Unilateral jerks expose right-left strength and stability differences quickly.
FAQ
What is the main benefit of the kettlebell one-arm jerk?
It improves explosive overhead power, unilateral shoulder stability, and total-body coordination. It also teaches efficient force transfer from the legs through the trunk into the arm.
Is the kettlebell one-arm jerk a shoulder exercise or a full-body exercise?
It is both. The shoulder stabilizes and finishes the lockout, but the movement also relies heavily on the quads, glutes, calves, core, and upper back to create and transfer force.
What is the difference between a one-arm jerk and a strict press?
A strict press relies mostly on upper-body pressing strength with little or no leg assistance. A jerk uses a dip-and-drive from the legs, then a fast catch under the kettlebell to move heavier loads efficiently.
How heavy should I go on this exercise?
Start with a weight you can rack comfortably and lock out cleanly overhead without wobbling. If you cannot control the catch or return safely to the rack, the load is too heavy.
Should beginners do kettlebell one-arm jerks?
Most beginners should first learn the kettlebell rack position, overhead hold, push press, and clean. Once those skills are stable, the jerk becomes much easier to learn safely.
Recommended Equipment
- Powder-Coated Kettlebell — ideal for consistent grip, durability, and stable one-arm rack-to-overhead work
- Adjustable Kettlebell — useful if you want multiple training loads without buying several bells
- Wrist Wraps for Weightlifting — helpful for lifters who want extra wrist support during rack and overhead phases
- Gym Chalk — improves handle security if sweat makes your grip slippery
- Non-Slip Exercise Mat — adds traction and protects the floor in home training spaces
Tip: For most lifters, the best starting investment is a quality kettlebell plus chalk or wrist support if needed. Extra gear should support technique, not replace it.