Lever Military Press (Plate-Loaded): Proper Form, Sets, Tips & FAQ
Learn how to perform the Lever Military Press (Plate-Loaded) with proper form for stronger shoulders and safer overhead pressing. Includes setup, execution, sets and reps by goal, mistakes, FAQ, and recommended equipment.
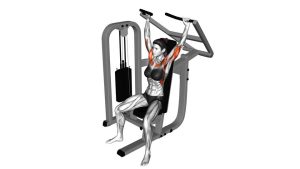
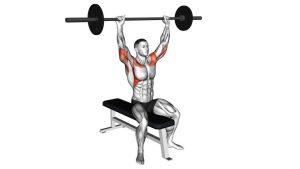
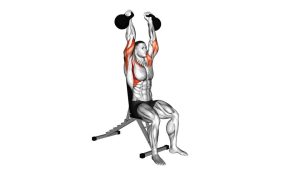
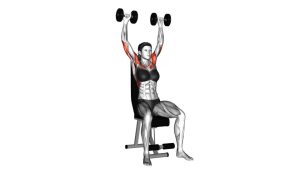
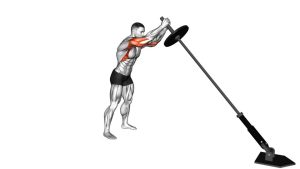
Lever Military Press (Plate-Loaded)
This exercise works well for lifters who want a more stable overhead press variation for muscle growth and shoulder strength. The machine path helps keep the motion consistent, making it easier to focus on pressing mechanics, joint control, and full muscular tension. You should feel the deltoids doing most of the work, with the triceps assisting as the elbows extend through the top half of the rep.
Quick Overview
| Body Part | Shoulders |
|---|---|
| Primary Muscle | Anterior deltoid |
| Secondary Muscle | Lateral deltoid, triceps, upper chest |
| Equipment | Plate-loaded lever shoulder press machine |
| Difficulty | Beginner to Intermediate |
Sets & Reps (By Goal)
- Muscle growth: 3–5 sets × 8–12 reps, resting 60–90 seconds
- Strength focus: 4–5 sets × 5–8 reps, resting 90–150 seconds
- Beginner technique work: 2–3 sets × 10–15 reps with moderate load and clean tempo
- Shoulder accessory volume: 2–4 sets × 12–15 reps after compound pressing
Progression rule: Increase load only when you can complete all target reps with steady control, no bouncing, and no loss of shoulder position against the pad.
Setup / Starting Position
- Adjust the seat: Set the seat so the handles start around shoulder level or slightly below.
- Sit tall: Place your back firmly against the pad and keep your chest lifted naturally.
- Plant your feet: Keep both feet flat on the floor to create full-body stability.
- Grip the handles evenly: Use a secure grip with wrists stacked and aligned over the forearms.
- Set your shoulders: Keep the shoulders down and stable without shrugging up toward the ears.
- Brace the core: Maintain a neutral spine and avoid excessive lower-back arching before the press begins.
Tip: If the machine allows multiple grip options, choose the one that lets your shoulders feel strongest and most comfortable through the full pressing path.
Execution (Step-by-Step)
- Start from the bottom position: Hold the handles with elbows bent and aligned under or slightly in front of the wrists.
- Press upward smoothly: Drive the handles up in the machine’s fixed path without jerking or using momentum.
- Keep posture locked in: Stay braced against the back pad and avoid lifting the chest excessively to cheat the rep.
- Approach full extension: Finish near the top without slamming into a hard lockout.
- Lower under control: Bring the handles back down slowly until you reach a strong stretch at the bottom.
- Repeat with the same tempo: Keep every rep smooth, balanced, and controlled from start to finish.
Pro Tips & Common Mistakes
- Do not rush the lowering phase: The eccentric portion is where a lot of muscle-building tension happens.
- Keep wrists neutral: Bent-back wrists can make the press feel less stable and less comfortable.
- Avoid excessive shrugging: Let the delts press the load instead of turning the rep into an upper-trap movement.
- Do not bounce from the bottom: Pause briefly if needed to remove momentum and protect the shoulders.
- Use a shoulder-friendly range: Lower the handles only as far as you can while maintaining control and comfort.
- Stay centered: Press evenly through both arms to avoid one side taking over the movement.
- Control ego loading: A slightly lighter load with better tempo usually builds more quality shoulder tension.
FAQ
Is the lever military press good for shoulder growth?
Yes. It is an excellent option for shoulder hypertrophy because the machine provides stability and lets you focus on pressing the target muscles hard through a controlled path.
What muscles does the plate-loaded lever military press work?
The main target is the anterior deltoid. The lateral deltoid and triceps assist, while the upper chest may contribute slightly depending on the machine angle.
Is this better than a dumbbell shoulder press?
It is not always better, but it is often easier to control. The machine reduces balance demands, which can make it a great choice for hypertrophy work, beginners, and lifters managing fatigue.
How low should I lower the handles?
Lower the handles until you reach a comfortable bottom position where the shoulders still feel stable. Do not force an exaggerated range if it causes pain or makes you lose position.
Should I lock out at the top?
You can reach near full extension, but avoid slamming into lockout. Keep tension on the shoulders and stay in control of the machine throughout the full rep.
Recommended Equipment
- Weightlifting Wrist Wraps — helpful for extra wrist support and stability during heavy pressing sessions
- Resistance Bands Set — useful for shoulder warm-ups, activation drills, and upper-back prep before pressing
- Fractional Weight Plates — ideal for making smaller load jumps when progressing machine pressing strength
- Lifting Gloves — optional grip support for longer workouts or high-volume shoulder sessions
- Foam Roller — useful for upper-back mobility work that can improve overhead pressing setup
Tip: Accessories should improve comfort, setup quality, or progression. They should never replace good form, smart loading, and controlled reps.