Band Standing Rear Delt Row: Proper Form, Rear Delt Tips, Sets & FAQ
Learn how to perform the Band Standing Rear Delt Row with proper form to target the rear delts, upper back, and posture muscles. Includes setup, step-by-step execution, sets by goal, common mistakes, FAQs, and recommended equipment.
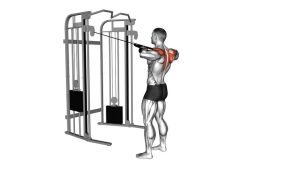
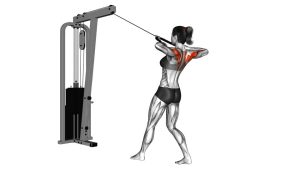
Band Standing Rear Delt Row
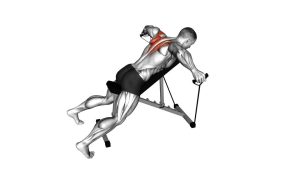
This exercise works best when you treat it as a rear-delt dominant row, not a heavy full-back pull. The band should stay under control from start to finish, and the movement should come from the shoulders and upper back rather than from swinging the torso. When done well, you should feel the back of the shoulders working hard with a clean squeeze across the upper back.
Quick Overview
| Body Part | Rear Shoulders |
|---|---|
| Primary Muscle | Rear deltoids (posterior delts) |
| Secondary Muscle | Rhomboids, middle trapezius, rotator cuff stabilizers, biceps |
| Equipment | Resistance band with a secure anchor point |
| Difficulty | Beginner to Intermediate |
Sets & Reps (By Goal)
- Muscle growth: 3–4 sets × 10–20 reps with controlled tempo and 45–75 sec rest
- Shoulder activation / warm-up: 2–3 sets × 12–20 reps with light tension and perfect form
- Posture / upper-back endurance: 2–4 sets × 15–25 reps with smooth reps and short rest
- Technique practice: 2–3 sets × 8–12 reps using a lighter band and a slower squeeze
Progression rule: First improve control, pause quality, and total reps. Move to a stronger band only when you can keep your chest up, elbows wide, and shoulders relaxed without momentum.
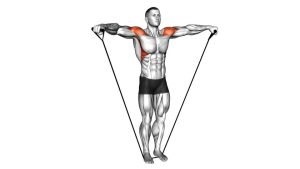
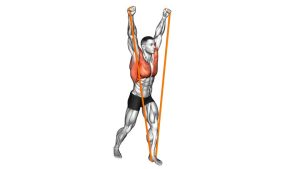
Setup / Starting Position
- Anchor the band: Attach the band at about upper-chest to shoulder height to allow a horizontal pull.
- Take your stance: Stand facing the anchor point with feet hip-width apart or in a light staggered stance for balance.
- Grip the band: Hold the ends or handles with both arms extended in front of you and the band already under light tension.
- Set your posture: Keep the chest tall, ribs stacked, core braced, and neck neutral.
- Prepare the shoulder path: Let the shoulders reach slightly forward at the start, but do not round the whole upper body.
Tip: Step farther back from the anchor to increase tension, but only enough that you can still complete each rep without swinging or shrugging.
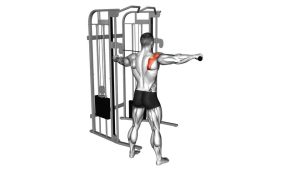
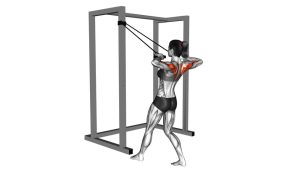
Execution (Step-by-Step)
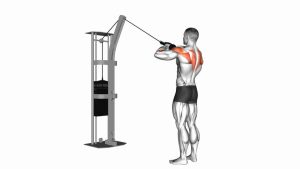
- Start long: Begin with your arms extended and the band taut. Keep your chest lifted and shoulders down.
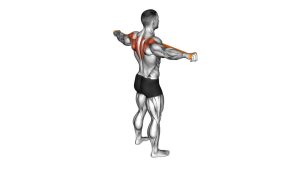
- Lead with the elbows: Pull the elbows out and back in a wide arc instead of keeping them tight to your sides.
- Row toward the upper chest: Bring your hands toward the upper chest or lower face line, depending on band angle and arm position.
- Squeeze the rear delts: At the top, pause briefly while squeezing the rear shoulders and upper back together.
- Return under control: Extend the arms forward slowly, allowing the shoulder blades to move naturally without losing posture.
- Repeat smoothly: Keep tension on the band and maintain the same elbow path on every rep.
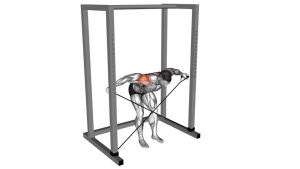
Pro Tips & Common Mistakes
- Pull with the elbows: This helps keep tension on the rear delts instead of overusing the hands and biceps.
- Keep the elbows wide: A flared path is what makes this more rear-delt dominant than a normal band row.
- Don’t shrug: Keep the shoulders away from the ears so the upper traps do not take over.
- Avoid torso swinging: Leaning back and using momentum turns the movement into a cheat row.
- Control the eccentric: The return phase matters for shoulder stability and muscle tension.
- Don’t pull too low: Pulling toward the lower ribs usually shifts more of the load to the lats.
- Use the right band: Too much resistance often causes shortened reps, elbow drop, and excessive trap involvement.
FAQ
What muscles does the Band Standing Rear Delt Row work?
It mainly targets the rear deltoids. It also trains the rhomboids, middle traps, and smaller shoulder stabilizers that help control scapular movement.
Is this exercise more for shoulders or back?
It is mainly a rear-shoulder exercise, but it also involves the upper back. The wide-elbow path is what shifts the emphasis more toward the rear delts.
Should I keep my elbows tucked or flared?
For this variation, keep them flared out rather than tucked. Tucked elbows usually turn it into a more traditional row that emphasizes the lats and mid-back more heavily.
How heavy should the band be?
Use a band that lets you feel a full squeeze in the rear delts without leaning back, shrugging, or cutting the range short. Clean form matters more than heavy resistance here.
Can beginners use this exercise?
Yes. It is beginner-friendly because the resistance is easy to scale. Start with a light band and master the elbow path, posture, and tempo before increasing tension.
Recommended Equipment (Optional)
- Resistance Bands with Handles — ideal for comfortable gripping and adjustable tension during standing rows
- Door Anchor for Resistance Bands — gives you a quick chest-height anchor point for home workouts
- Fabric or Heavy-Duty Band Set — useful if you want multiple resistance levels for progression
- Adjustable Exercise Handles for Bands — improves comfort and control if your bands do not come with handles
- Wall-Mounted Resistance Band Anchor — a more permanent setup option for consistent pulling height and better training convenience
Tip: For rear delt work, choose equipment that lets you set the anchor around upper-chest or shoulder height so the band path stays horizontal and smooth.